

Build 6 Simple Machines for Kids in Under 20 Minutes, With Comics
The six simple machines are the lever, wheel and axle, pulley, inclined plane, wedge, and screw. Every one of them shows up in your kitchen, backyard, or classroom, and each has a plain definition, everyday examples, and a five-minute activity you can run with things already lying around the house.
TL;DR:
- Simple machines trade force for distance, with pulleys providing an ideal mechanical advantage roughly equal to the number of rope segments, but real-world friction reduces efficiency.
- Building quick, household-based experiments like a ruler catapult or a pulley flag raiser offers practical insight into how simple machines operate and their mechanical advantages.
- Most everyday tools are combinations of simple machines, such as scissors combining levers and wedges or wheelbarrows mixing levers with wheels and axles, making them useful for scavenger hunts.
- Correcting misconceptions about machines involves emphasizing that they do not create energy but only change force direction or amount, with friction and material factors affecting performance.
- Hands-on activities take approximately 10 to 45 minutes, depending on age, and help solidify understanding by linking physical building with real-world examples, especially when paired with story-based learning.
Table of Contents
- What Are the Six Simple Machines for Kids?
- How Do Simple Machines Actually Make Work Easier?
- Simple Machines Activities Kids Can Build Today
- Where Do Simple Machines Hide in Everyday Objects?
- Teaching Tips: Pacing, Misconceptions, and Quick Checks
- Why Hands-On Building Beats a Worksheet Every Time
- Extend the Lesson With Brainie Comics
- Sources
- FAQ
What Are the Six Simple Machines for Kids?
Every complicated device on the planet, from a bicycle to a crane, breaks down into some combination of these six classical simple machines. Here’s the plain-language version you can read straight to a seven-year-old.
- Lever: a stiff bar that pivots on a fixed point (called a fulcrum) to lift or move something. Seesaws, scissors, and bottle openers are all levers.
- Wheel and axle: a wheel attached to a rod that spins with it, letting a small push move something heavy. Doorknobs, rolling office chairs, and skateboards all use this pair.
- Pulley: a wheel with a rope or belt running over it, used to change the direction of a pulling force. Flagpoles, window blinds, and construction cranes rely on pulleys.
- Inclined plane: a flat, slanted surface that lets you move something up or down without lifting it straight into the air. Wheelchair ramps, playground slides, and moving-truck ramps are inclined planes.
- Wedge: two inclined planes stuck back to back, used to split or separate things. Doorstops, axe heads, and the tip of a nail are wedges.
- Screw: an inclined plane wrapped around a cylinder, used to fasten things or lift material as it turns. Jar lids, drill bits, and even spiral staircases work on this principle.
One aside worth mentioning to older kids or curious students: levers actually come in three classes, sorted by where the fulcrum, effort, and load sit relative to each other. A seesaw (fulcrum in the middle) is a first-class lever; a wheelbarrow (load in the middle) is second-class; a pair of tweezers (effort in the middle) is third-class. You don’t need to teach the classes to a five-year-old, but it’s a handy fact to have ready when a ten-year-old asks why a wheelbarrow “doesn’t count as a lever.”
How Do Simple Machines Actually Make Work Easier?
Simple machines don’t create energy. They trade force for distance, and that trade has a name: mechanical advantage, or the ratio of output force to input force. A OpenStax physics resource puts it plainly: these devices change the size or direction of a force, letting a person apply less effort over a longer distance instead of more effort over a shorter one.
On a simple lever, if the effort arm is longer than the resistance arm, the ideal mechanical advantage is greater than one, meaning you need less force to lift the same load, but you have to push your end of the lever farther. For pulleys, the ideal mechanical advantage roughly equals the number of rope segments holding up the load, a shortcut confirmed by CK-12’s classroom physics materials.
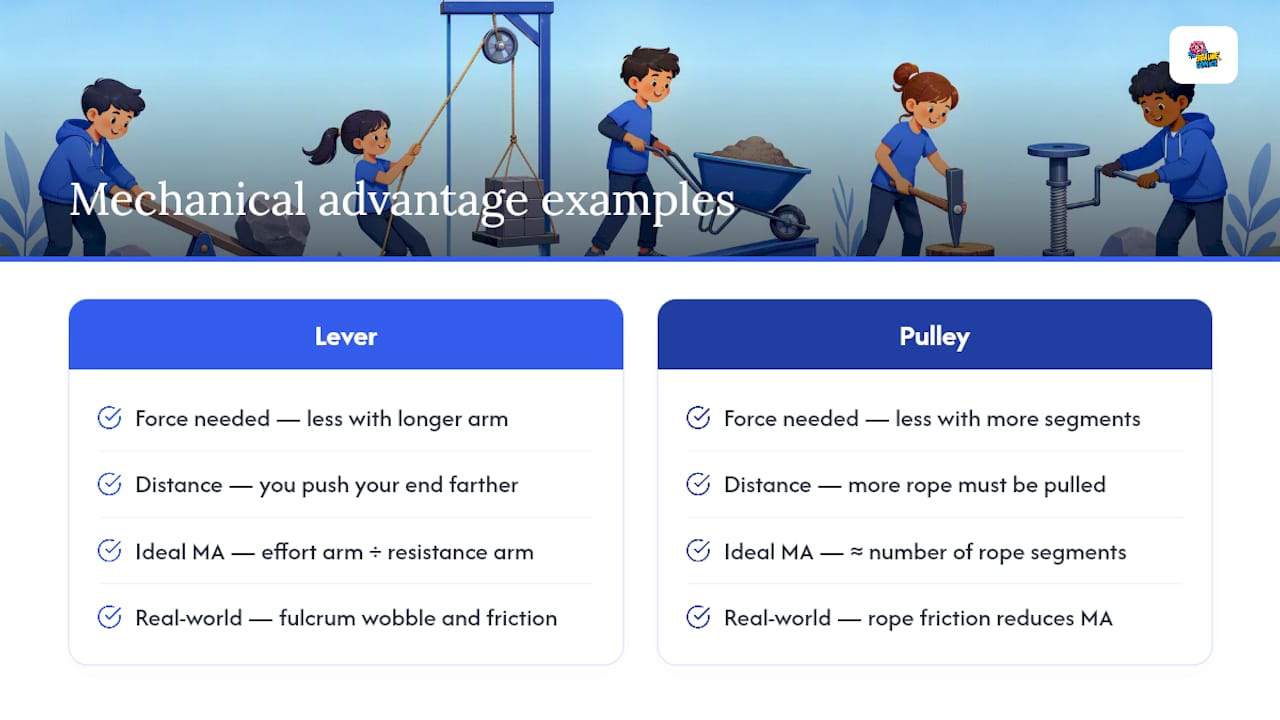
Real builds rarely hit those clean numbers. Friction in a rope, a bent cardboard ramp, or a wobbly fulcrum eats into the ideal mechanical advantage every time, which is exactly why a homemade pulley never feels quite as effortless as the math promises.
Simple Machines Activities Kids Can Build Today
Each of these projects takes under 20 minutes and uses items you probably already own. Read the safety note before handing over scissors or a craft knife to younger kids.
- Lever: the ruler catapult. Tape a small paper cup to one end of a wooden ruler, then rest the ruler over a thick marker so it can tip like a seesaw. Load a cotton ball into the cup and press down on the far end to launch it. Watch what happens when you move the marker (the fulcrum) closer to the cup versus farther away. Troubleshooting: if nothing launches, the fulcrum is probably too close to the load; slide it toward the middle.
- Wheel and axle: the pencil-and-spool roller. Push a pencil through the center of an empty tape spool or thread spool, then try rolling a small book across the table using just the pencil as an axle versus dragging the book flat. Kids feel the difference in effort immediately. Troubleshooting: if the spool wobbles, the pencil hole is too loose; wrap a little tape around the pencil to snug the fit.
- Pulley: the clothes-pin flag raiser. Tie a string over a curtain rod or broom handle propped between two chairs, attach a small cup or clothespin to one end, and pull the other end to raise it. Compare the pulling direction to lifting the cup by hand. Troubleshooting: a rope that keeps slipping off the rod needs a shallow notch or a loop of tape to hold it in place.
- Inclined plane: the ramp race. Prop a piece of cardboard against a stack of books to make a ramp, then time how a toy car rolls down versus how hard you’d have to push it straight up the same height. Raise and lower the ramp angle and note how speed changes. Troubleshooting: a car that stalls halfway usually means the ramp surface has too much friction; smooth cardboard or add a strip of wax paper.
- Wedge: the soap-splitting demo. Press the thin edge of a plastic knife into a bar of soft soap or a lump of clay and show how it splits apart rather than crushes. Keep this one adult-supervised if you swap in a real knife, and always cut away from fingers. Troubleshooting: if the wedge just squishes the material instead of splitting it, the edge is too blunt; a sharper wedge angle works better.
- Screw: the pencil-and-paper model. Cut a triangle of paper and wrap it around a pencil at an angle. Kids can see the paper’s slanted edge forming the spiral ridge of a screw thread. Troubleshooting: if the spiral looks messy, use a longer triangle for a gentler, more visible slope.
Pro Tip: Keep a small notebook nearby during builds and have kids write down what they predicted before testing it. The gap between prediction and result is where most of the real learning happens.
Where Do Simple Machines Hide in Everyday Objects?
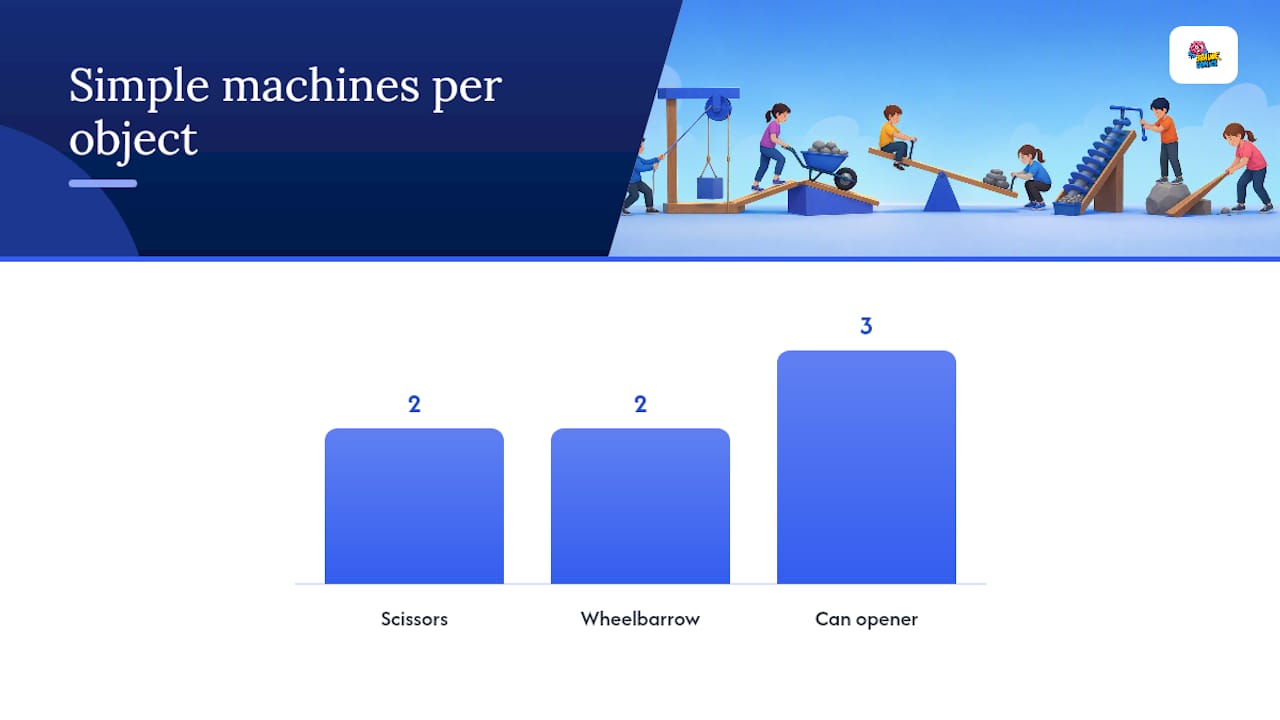
Most tools kids use every day are compound machines, meaning two or more simple machines working together. Scissors combine a lever (the handles) with two wedges (the blades). A wheelbarrow pairs a lever with a wheel and axle. A can opener stacks a lever, a wedge, and a wheel and axle in one small gadget.
Turning this into a scavenger hunt gets kids spotting these combinations on their own, which engineering educators note shifts kids from passive users of gadgets into active analysts of how things work.
- Find something in the kitchen that uses a wedge (a knife, a cheese grater).
- Find something on a door or cabinet that uses a screw or a lever.
- Find one toy that combines at least two simple machines.
- Have kids explain out loud which parts do the pushing, splitting, or lifting.
Teaching Tips: Pacing, Misconceptions, and Quick Checks
A quick demo runs 10 to 15 minutes and suits kids under seven; a full build with troubleshooting fits older kids and takes 30 to 45 minutes. The most common misconception to correct early is the idea that machines “create” extra energy. OpenStax’s physics materials confirm total work stays the same. A machine only changes how much force you apply and over what distance.
- Ask kids to predict which end of a lever needs less push before testing it.
- Have them explain, in their own words, why a ramp feels easier than lifting straight up.
- Watch for the phrase “it makes things lighter” and gently correct it to “it changes how much force you need.”
Pro Tip: If a build doesn’t match the textbook numbers, don’t fix it before kids notice. Ask “why do you think that happened?” first. Friction and material stretch are the usual culprits, and naming them turns a “failed” experiment into a real lesson.
Why Hands-On Building Beats a Worksheet Every Time
A demonstration paired immediately with a hands-on build tends to stick with kids far longer than a lecture alone, and that pairing is exactly why Brainie Comics builds its stories around kitchen experiments instead of static diagrams. When a character in a comic has to rig a pulley to escape a trap, the physics lesson rides in on curiosity, not homework.
That’s the gap most STEM materials miss: kids don’t resist science, they resist boredom. Story and hands-on testing together fix that.
Extend the Lesson With Brainie Comics
Once your scavenger hunt and ramp races wrap up, a story can carry the momentum further. Gravity Gang follows characters through physics-driven plots that double as kitchen-safe experiment guides, making it a natural next chapter after a lesson on levers and inclined planes. Fizz Force shifts into chemistry once kids are ready to branch out from mechanics.
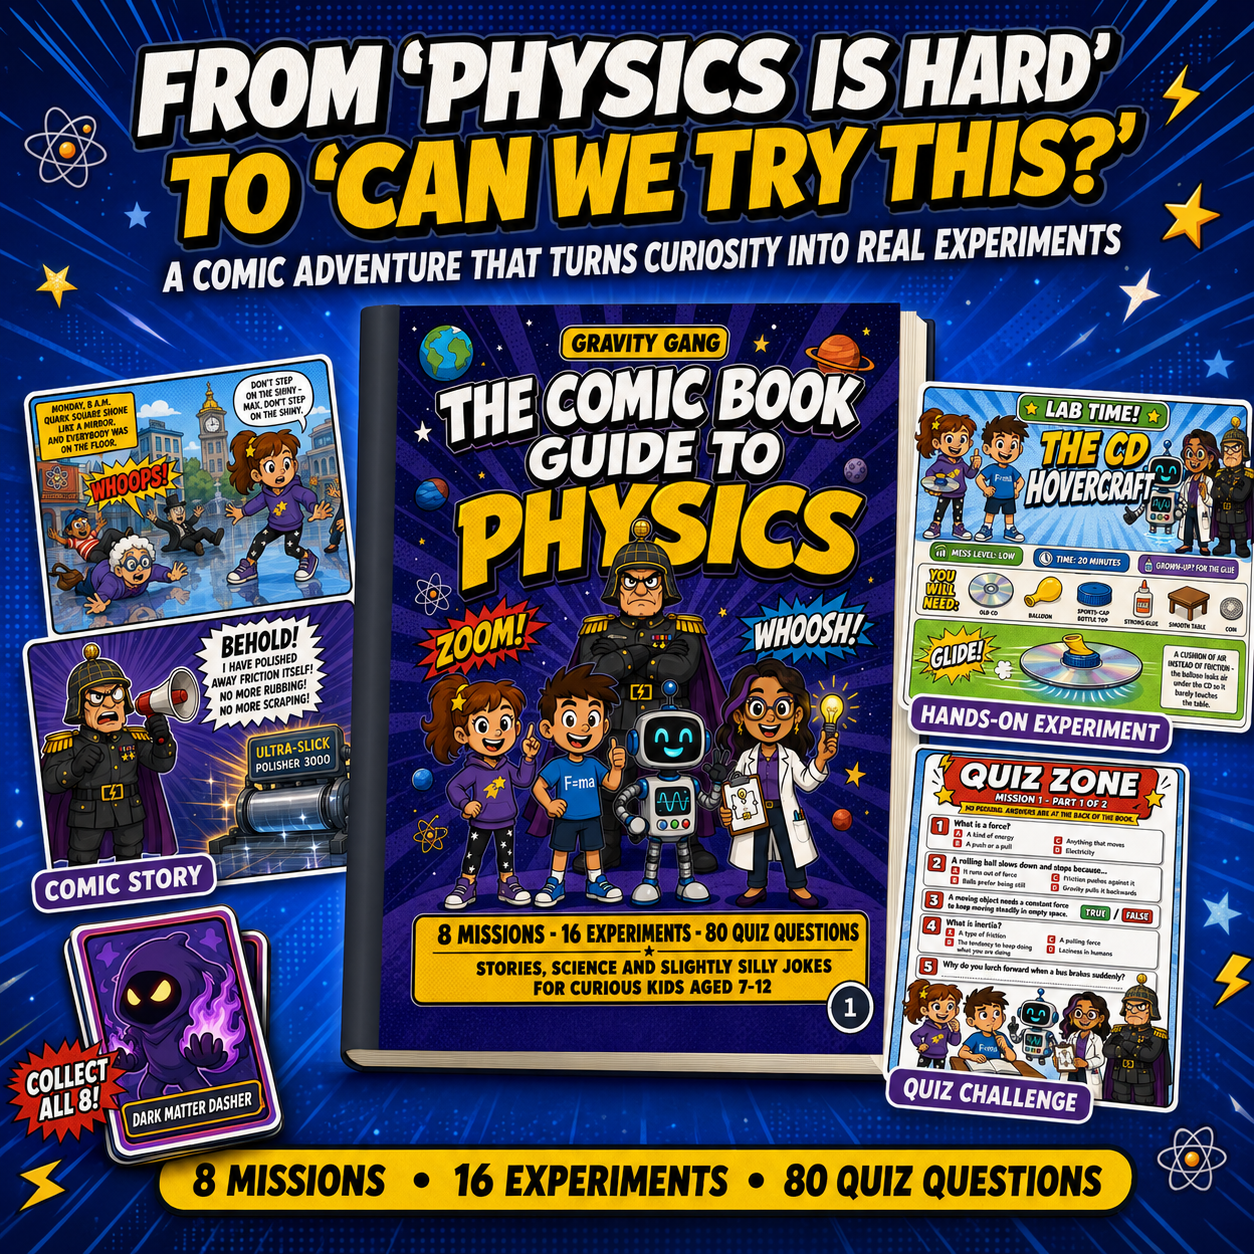
Use either book as pre-reading before your next simple machines activity or as a screen-free reward after finishing a build. Both work well alongside other hands-on lessons, including the ramp and force experiments covered in Newton’s Laws for Kids. Browse the full catalog and order a copy at Brainie Comics to keep the curiosity going past today’s project.
Sources
For deeper definitions and classroom standards, see Britannica’s entry on simple machines, OpenStax’s physics chapter, NASA’s educator lesson PDF, and CK-12’s mechanical advantage lesson.
- Simple machine | Definition, Types, Examples, List, & Facts | Britannica
- 9.3 Simple machines - Physics | OpenStax
- Compound machines and mechanical advantage | CK-12
FAQ
What Are the 6 Simple Machines?
The six simple machines are the lever, wheel and axle, pulley, inclined plane, wedge, and screw, each of which changes the direction or amount of force needed to do work.
What Is a Simple Machine, Explained for Kids?
A simple machine is any basic tool with few or no moving parts that makes a task easier by changing how much force you need or which direction you push, like a ramp or a lever.
What Are Some Simple Machines Kids Can Make at Home?
Kids can build a ruler catapult (lever), a cardboard ramp (inclined plane), a spool roller (wheel and axle), or a clothes-pin flag raiser (pulley) using household items and about 15 minutes.
Can You List 20 Examples of Simple Machines?
Common examples include scissors, seesaws, bottle openers, door knobs, skateboards, flagpoles, window blinds, wheelchair ramps, playground slides, moving ramps, doorstops, axes, nails, jar lids, drill bits, screws, spiral staircases, wheelbarrows, can openers, and pizza cutters, all built from one or more of the six basic types.
How Do I Adjust These Activities for Different Ages?
Keep it to a single 10-minute demo with lots of hands-on touching for kids under seven, and stretch to a 30 to 45 minute build with predictions and troubleshooting for kids eight and older.