

Lesson Ready Salt Science Experiments: 12 Quick Demos for Teachers
This page has 12 kid-tested salt science experiments covering freezing point depression, saltwater density, and crystal growth, plus the household materials, timing, and age fit for each one. Every activity uses table salt, kosher salt, or rock salt you likely already have, runs in 5 to 40 minutes, and works for ages 4 through 12 with simple adjustments for younger versus older kids. Parents, teachers, and after-school leaders can pull straight from the list below.
TL;DR:
- Salt increases water density, allowing objects like eggs to float, and the effect depends on the amount of salt dissolved in the water.
- Dissolving salt lowers water’s freezing point, enabling ice to melt faster and ice cream to freeze without specialized equipment.
- Observing salt crystals forming over days demonstrates crystallization, which occurs as water evaporates from a saturated solution.
- Layered salt water densities can be visualized by carefully pouring solutions of different salt concentrations, highlighting how more dissolved salt increases water’s mass.
- Salt’s ionic structure and its interaction with water molecules drive most experiments, from buoyancy and melting points to osmosis and crystal growth.
Table of Contents
- Salt Science Experiments You Can Run This Week
- Prepping Once for Multiple Salt Experiments
- The Science Behind Every Salt Experiment
- Why Story-Led Experiments Stick With Kids
- The Chemistry Nobody Explains Before the Salt Shaker Comes Out
- What Osmosis Looks Like With Salt and a Cucumber
- Common Threads: Osmosis, Solubility, and Freezing Explained Together
- Turning Observations Into Real Data
- Quick Adaptations for Different Ages and Group Sizes
- Turn These Experiments Into a Full Lesson Kit
- Where to Learn More
- Where the Real Learning Happens After the Salt Dries
- Sources
Salt Science Experiments You Can Run This Week
Each entry lists what you need, how long it takes, and the one science idea it’s built to teach. Skim the age range first, then jump to whichever fits your group.
1. Salt Painting Materials: salt, glue, watercolor paint, black paper. Time: 20 minutes plus drying overnight. Steps: Draw a design with glue on black paper. Sprinkle salt heavily over the wet glue. Shake off excess. Drip watery paint onto the salt and watch color spread through the grains. Age: 4 to 8. Objective: Observe capillary action as salt wicks color along its ridges. Science in one line: Salt crystals create tiny channels that pull liquid paint sideways through absorption.
2. Floating Egg Materials: raw egg, water, salt, tall glass, spoon. Time: 10 minutes. Steps: Fill a glass halfway with water. Stir in salt, about seven teaspoons per liter, until dissolved. Gently lower in the egg. Compare to a second glass of plain water. Age: 5 to 10. Objective: See how dissolved salt changes water’s density. Science in one line: Salt water is denser than fresh water, so it pushes the egg upward with more force.
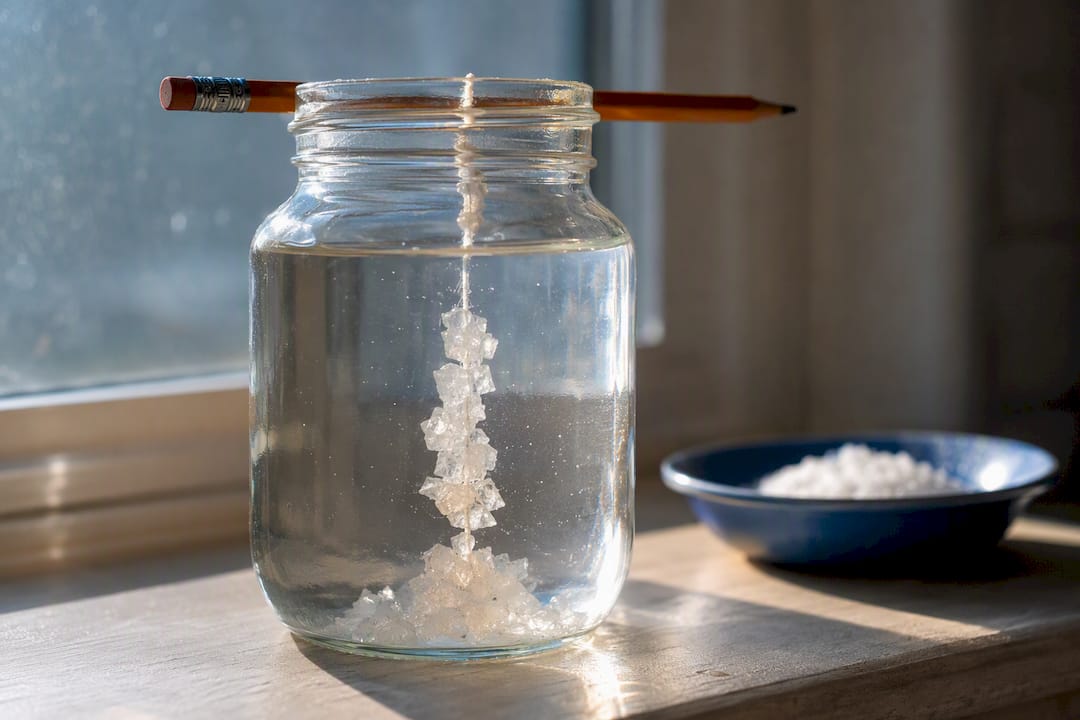
3. Grow Salt Crystals Materials: table salt, warm water, jar, string, pencil. Time: 15 minutes active, 3 to 7 days to grow. Steps: Stir salt into warm water until no more dissolves. Filter out any grains left at the bottom. Tie string to a pencil and rest it across the jar so the string dangles in the solution. Leave undisturbed and check daily. Age: 6 to 12. Objective: Watch a solid form directly from a dissolved solution. Science in one line: As water evaporates, salt molecules run out of room to stay dissolved and lock into crystal shapes.
4. Salt Lava Lamp Materials: water, vegetable oil, food coloring, salt, clear bottle or jar. Time: 10 minutes. Steps: Fill a jar three-quarters with water, add a few drops of food coloring. Pour oil on top. Sprinkle salt over the oil and watch colored blobs drop and rise. Age: 4 to 9. Objective: Connect density differences to visible motion. Science in one line: Salt drags oil down through water, then dissolves and releases the oil to float back up.
5. Ice and Salt Chalk Art Materials: ice cubes, rock salt, liquid watercolor or food coloring, tray. Time: 15 minutes. Steps: Set ice cubes on a tray. Sprinkle rock salt over them. Drop colored water onto the melting spots and watch tunnels and patterns form. Age: 5 to 10. Objective: See melting speed up unevenly across a surface. Science in one line: Salt lowers the ice’s freezing point where it touches, so those spots melt faster than the rest.
6. Ice Cream in a Bag Materials: whole milk, sugar, vanilla, ice, rock salt, small and large zip bags. Time: 15 minutes. Steps: Mix milk, sugar, and vanilla in the small bag and seal tightly. Fill the large bag with ice and a generous handful of rock salt. Nest the small bag inside, seal, and shake for 8 to 10 minutes. Age: 6 to 12. Objective: Use freezing point depression to create colder-than-ice conditions. Science in one line: Salted ice drops well below 32°F, cold enough to freeze cream without a machine.
7. Melt Ice Race Materials: two ice cubes, table salt, timer, small plates. Time: 10 minutes. Steps: Place one ice cube on each plate. Sprinkle salt on only one cube. Time how long each takes to fully melt. Age: 5 to 11. Objective: Test freezing point depression as a measurable, timed variable. Science in one line: Salt lowers the melting threshold, so the salted cube liquefies noticeably faster.
8. Density Column with Salt Layers Materials: water, salt, food coloring, tall clear glass. Time: 20 minutes. Steps: Make three cups of water with light, medium, and heavy salt concentrations, coloring each differently. Let each cool to room temperature. Pour the heaviest layer first, then slowly add lighter ones on top using a spoon to slow the pour. Age: 8 to 12. Objective: Build a visible model of layered densities. Science in one line: More dissolved salt means more mass packed into the same space, so denser layers sink below lighter ones.
9. Sticky Ice with String Materials: ice cube, string, salt, plate. Time: 5 minutes. Steps: Lay a string across an ice cube. Sprinkle salt directly on top of the string. Wait 30 seconds, then lift the string. Age: 4 to 8. Objective: Observe refreezing as a hands-on cause and effect. Science in one line: Salt melts a thin layer of ice around the string, and that water refreezes around it once the salt dilutes, gluing the string in place.
10. Salt and Sound Vibrations Materials: plastic wrap, rubber band, bowl or cup, salt, speaker or phone. Time: 10 minutes. Steps: Stretch plastic wrap tightly over a bowl and secure with a rubber band. Sprinkle a thin layer of salt on top. Play bass-heavy music nearby or tap the bowl’s side rhythmically. Age: 6 to 12. Objective: Make sound waves visible through movement. Science in one line: Vibrations from sound travel through the wrap and bounce the salt grains into moving patterns.
11. Static Salt and Pepper Separator Materials: table salt, ground pepper, plastic spoon, wool cloth or hair. Time: 5 minutes. Steps: Mix a small pile of salt and pepper on a plate. Rub the spoon against wool or hair for 15 seconds. Hold it just above the mixture. Age: 5 to 9. Objective: Compare how static charge affects light versus dense particles differently. Science in one line: Pepper is light enough to jump toward the charged spoon while heavier salt stays put.
12. Osmosis Egg Shrink and Swell Materials: raw egg (shell removed with vinegar soak beforehand), plain water, heavily salted water, two cups. Time: 10 minutes setup, 24 hours to observe. Steps: Place the shell-free egg in plain water for a day and note its size. Move it to a heavily salted water cup and check again 24 hours later. Age: 9 to 12. Objective: Watch water move across a membrane toward higher salt concentration. Science in one line: Water shifts out of the egg into the saltier solution, shrinking it, in the same process that governs osmosis in living cells.
Prepping Once for Multiple Salt Experiments
Stock table salt, rock salt (ice cream salt), a few jars, a kitchen scale or measuring spoons, food coloring, and a tray for spills. Dissolve salt in warm water for faster results in crystal and density experiments; cold water leaves grains undissolved and skews your results. Pre-freeze ice trays the night before for melt races and ice art so you’re not waiting mid-lesson.
- Supervise salt handling with kids under 6; a stray grain in the eye stings.
- Rock salt used for de-icing isn’t food-safe. Keep it away from mouths and separate from kitchen salt.
- Protect tables with a tray or towel before pouring colored solutions.
- Rinse dissolved salt water down the drain with running water; it won’t harm pipes in normal classroom quantities.
Pro Tip: Let every salt solution cool to room temperature before layering it in a density column. A warm layer poured on top of a cool one will mix instead of floating cleanly, and you’ll lose the visible bands that make the whole demo work.
The Science Behind Every Salt Experiment
Freezing point depression explains why salted ice melts faster and why rock salt makes ice cream possible: dissolved salt lowers water’s freezing point below 32°F (0°C), so ice has to get colder before it can stay frozen. Density and buoyancy explain the floating egg and layered columns, since salt increases water’s mass without adding much volume. Crystallization happens as evaporating water leaves salt molecules with nowhere to go but into a solid lattice.
- Freezing point depression: more dissolved salt equals a lower freezing threshold.
- Density and buoyancy: saltier water supports more weight per unit of volume.
- Crystallization: patience and an undisturbed jar beat speed every time.
- Solubility: warm water dissolves more salt than cold water, up to a limit.
For a classroom extension with older students, ask what happens if you swap table salt for sugar in the crystal jar or the density column. Same physical principle, different molecule, different results worth predicting first.
Why Story-Led Experiments Stick With Kids
Kids who read a short comic panel before running an experiment tend to follow steps more accurately than kids handed a plain instruction sheet, since pictures carry the sequence for readers who struggle with dense text. Some educational comic books build their content around a structure of story panels followed by hands-on steps.
The Chemistry Nobody Explains Before the Salt Shaker Comes Out
Table salt is sodium chloride, written as NaCl, and it’s built from a positively charged sodium ion bonded to a negatively charged chloride ion. That bond is ionic, meaning the two atoms don’t share electrons the way carbon and hydrogen do in most organic molecules. Instead, sodium essentially hands off an electron to chlorine, and the resulting opposite charges snap together like tiny magnets.
That ionic structure is exactly why salt dissolves so readily in water. Water molecules are polar, with a slightly negative oxygen end and slightly positive hydrogen ends. When salt hits water, those polar water molecules surround the sodium and chloride ions individually, pulling the crystal lattice apart ion by ion. This is why salt “disappears” into water rather than just sitting at the bottom like sand.
This single property drives most of the demonstrations on this page. Dissolved ions increase the total mass of the solution without changing its volume much, which raises density and explains the floating egg. Those same dissolved ions interfere with water molecules trying to lock into the orderly hexagonal structure ice requires, which is the direct mechanism behind freezing point depression.
Different salts carry the same basic ionic setup with different results. Rock salt (still sodium chloride, just less refined) works fine for melting ice because the ion is the mechanism, not the grain size. Epsom salt is a different compound entirely, magnesium sulfate, and it dissolves and behaves differently in water, which makes it a good comparison experiment for kids who ask “does it have to be this kind of salt?”
What Osmosis Looks Like With Salt and a Cucumber
Salt has preserved food for thousands of years by pulling water out of it, and that mechanism is osmosis: water moves across a membrane from an area of low salt concentration to an area of high salt concentration until things balance out. This is precisely what happens in a shrinking pickle or a piece of cured meat, and it’s a satisfying experiment to run with kids using nothing more exotic than cucumber slices.
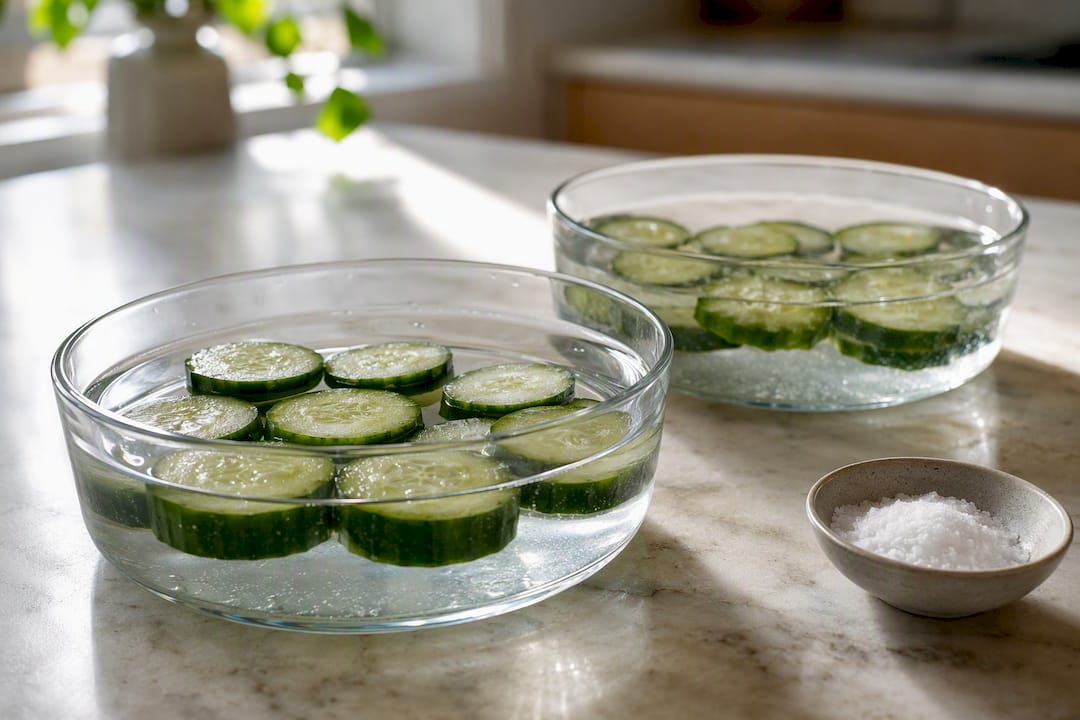
Slice a cucumber and lay half the pieces in a bowl of heavily salted water, the other half in plain water, for comparison. Check both after an hour. The salted slices will look visibly limper and smaller, having lost water to the surrounding brine, while the plain-water slices stay closer to their original size. It’s the same principle behind the shell-free egg experiment mentioned above, just faster and with a vegetable most kitchens already have.
Fermentation experiments extend this same idea. A basic salt brine used in home fermentation (think sauerkraut) does double duty: it draws water out of the vegetable through osmosis, which creates the liquid environment fermentation bacteria need, and the salt concentration also suppresses the growth of spoilage organisms that can’t tolerate a high-salt environment as well as the beneficial bacteria can. Kids old enough to track a multi-day process (grade 5 and up) can weigh salted vegetables over three or four days and graph the water loss, turning a kitchen activity into a real data-collection exercise.
Common Threads: Osmosis, Solubility, and Freezing Explained Together
Three principles keep showing up across this list, and they’re more connected than they first appear. Solubility governs how much salt water can hold before it stops dissolving anything new, and that limit depends heavily on temperature, warm water dissolves noticeably more salt than cold water. Freezing point depression is a direct consequence of solubility: once salt ions are dissolved and distributed through the water, they physically block the orderly molecular arrangement ice needs to form, forcing the temperature to drop further before freezing can happen.
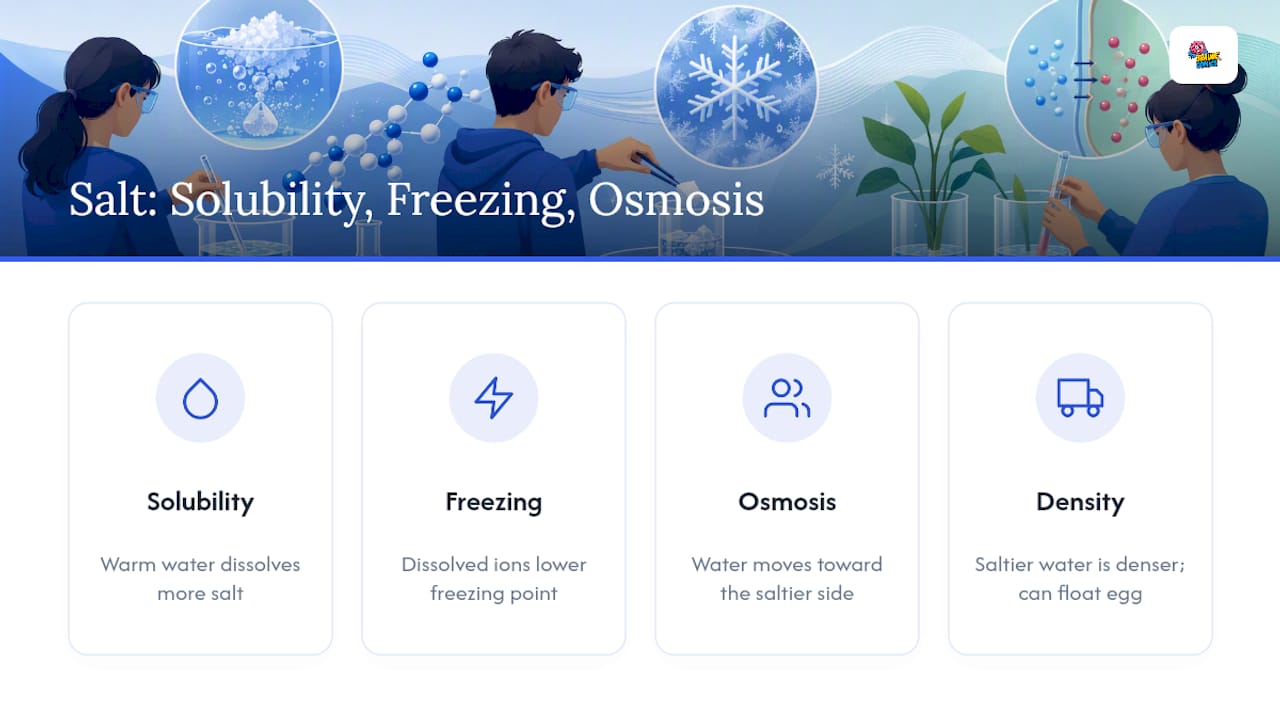
Osmosis operates on a related but distinct idea: concentration difference across a barrier rather than a change in a single liquid’s properties. Where freezing point depression and density changes happen within one body of salt water, osmosis happens between two different concentrations separated by something semi-permeable, a membrane, a cucumber skin, an eggshell membrane. Water always moves toward the saltier side until both sides reach equal concentration or the membrane gets in the way.
What ties all three together is that salt never destroys or creates anything. Nothing gets “burned off” or eliminated. Every effect kids observe, from a floating egg to a shriveled cucumber slice, comes from redistribution: ions spreading through water, water molecules migrating toward higher concentration, or molecules losing the space they need to freeze into orderly ice crystals. Framing it that way for older students (grade 6 and up) turns three separate demos into one coherent unit about how matter moves and settles rather than three disconnected party tricks.
Turning Observations Into Real Data
A salt experiment stops being a demo and starts being science the moment kids write numbers down instead of just watching. For the melt ice race, a stopwatch and a simple two-column chart (salted cube time, plain cube time) turns a 10-minute activity into a comparison kids can defend with evidence. For density work, a kitchen scale showing grams of salt per measured cup of water gives a number that replaces “I added some salt” with something repeatable.
Consistency matters more than precision here. Use the same measuring spoon every time rather than switching between a teaspoon and a random spoon from the drawer, and always record water temperature since it changes how much salt actually dissolves. A simple table works well for most of these experiments, with columns for the variable changed, the amount used, and the observed result, whether that’s melt time in minutes, crystal size in millimeters after three days, or a simple yes/no for whether the egg floated.
For crystal growth and osmosis experiments, a daily photo taken from the same angle does more than a written description ever will, since kids can visually rank the sequence later. Older students running the melt race or density column can repeat the trial three times and average the results, which introduces the idea that a single measurement can be misleading but a pattern across repeated trials is trustworthy. That’s a habit worth building early, since it’s the same instinct behind every controlled experiment a science class will ask for later on.
Quick Adaptations for Different Ages and Group Sizes
Run solo kids through two or three experiments with a results notebook; groups do best at timed stations with one helper per table. Older kids can test variables like salt type or amount and graph outcomes. Assign one clipboard monitor per group to keep cleanup fast.
Turn These Experiments Into a Full Lesson Kit
Beyond a single afternoon of salt experiments, Fizz Force gives kids a full chemistry story built around kitchen-safe experiments they run themselves, panel by panel, while Gravity Gang does the same for physics concepts like density and buoyancy.
These types of resources can work as lesson starters, rainy-day homeschool units, or gifts for kids who prefer comic panels to regular textbooks. They often pair stories with printable worksheets and completion certificates, extending the learning beyond the comic itself. If today’s list left your group wanting more hands-on chemistry and physics, browse Brainie Comics’ full catalog and pick the title that matches what you just ran.
Where to Learn More
- Please Pass the Salt (NOAA Ocean Service): step-by-step density and buoyancy lessons.
- Using Salt to Melt Ice (PBS LearningMedia): grades 3–8 lesson plans.
- Flinn Scientific: teacher notes on de-icers and safety.
Where the Real Learning Happens After the Salt Dries
The best salt experiment on this list isn’t the flashiest one. It’s whichever one a kid asks to repeat with a different variable, because that’s the moment a demo turns into actual scientific thinking. Too many salt activities online treat the science explanation as an afterthought, a single sentence bolted onto the bottom of a craft project. That’s backward.
Kids retain the “why” far better when it’s delivered as part of the story rather than as a lecture tacked onto the end of a mess they’re eager to clean up. This is the gap most home and classroom salt activities never close: they nail the fun, they skip the framework for actually thinking like a scientist, and hypothesis, variable, observation, conclusion never gets modeled. A floating egg is memorable for a day. A kid who was asked to predict what would happen before pouring the salt, and who got to check whether they were right, carries that habit into the next experiment, and the one after that.
— Brainie Comics
Sources
- Seawater — Wikipedia
- Density effects — Exploring Our Fluid Earth (University of Hawai‘i)
- Please Pass the Salt — NOAA Ocean Service
- Flinn Scientific — Teaching chemistry resources
- Using Salt to Melt Ice — PBS LearningMedia