

Lava Lamp Experiment for Parents and Educators
A safe, 10-minute lava lamp experiment needs just three things: vegetable oil, colored water, and one Alka-Seltzer tablet. Drop a tablet piece into a jar mostly full of oil sitting on top of a layer of colored water, and you’ll watch blobs of color rise and fall like something out of a 1970s dorm room. The science behind it, density and polarity plus CO2 gas, is exactly what kids in grades 2 through 6 need to see in action.
Quick-start checklist:
- Fill a clear jar or plastic bottle with about 1 inch of water
- Add several drops of food coloring and stir
- Pour vegetable oil until the container is mostly full
- Wait for the layers to separate
- Break an Alka-Seltzer tablet into small pieces and drop one piece in
Safety first, before anything else:
- Adult supervision required for all ages
- Alka-Seltzer tablets are a choking hazard for children under 5; keep them out of reach
- No tasting the liquids, even the colored water
- Use a plastic bottle (not glass) with children under 7
Pro Tip: Break the tablet into four pieces before class. Smaller fragments give you more controlled, slower-moving blobs, which are easier for kids to observe and describe.
Key Takeaways
The lava lamp experiment works because oil and water have different densities and polarities, and CO2 from an effervescent tablet carries colored water droplets up through the oil layer and back down again.
| Point | Details |
|---|---|
| Core science | Density, polarity, and CO2 gas drive the effect; oil floats, colored water sinks, bubbles lift droplets. |
| Best effervescent source | Alka-Seltzer broken into quarters gives the most controlled, repeatable reaction for classrooms. |
| Reusability | Once the reaction stops, add a fresh tablet piece; no need to re-prep the liquids. |
| Safety essentials | Adult supervision required; no tasting; dispose of oil in the trash, never down the drain. |
| Brainiecomics extension | Fizz Force and Gravity Gang pair directly with this demo to reinforce chemistry and physics concepts through story. |
Table of Contents
- What materials do you need for the lava lamp experiment?
- How to make a lava lamp, step by step
- Why does the lava lamp effect actually happen?
- How can you vary and extend the experiment?
- Safety rules and cleanup
- A ready-to-use classroom lesson plan
- What running this demo actually taught me
- Take the experiment further with Brainie Comics
- Sources
What materials do you need for the lava lamp experiment?
The setup is inexpensive and most materials are common household items.
Core materials:
- Clear plastic bottle or glass jar (a typical size works well; plastic for younger kids)
- Water (room temperature or slightly warm)
- Vegetable oil (about 1 cup per container) or baby oil/mineral oil as an alternative
- Food coloring (any color, gel or liquid)
- Alka-Seltzer effervescent tablets (1 tablet per student, broken into pieces)
- Optional: fine glitter, a small flashlight
For classroom prep, a 32 oz bottle of vegetable oil fills roughly four student containers. Baby oil produces slightly clearer blobs because it’s more transparent, though it costs a bit more. Mineral oil works the same way.
Substitution options at a glance
| Effervescent source | Reaction control | Visual effect | Mess level |
|---|---|---|---|
| Alka-Seltzer tablet | High (easy to portion) | Strong, steady bubbles | Low |
| Vitamin C effervescent tablet | Medium | Similar to Alka-Seltzer | Low |
| Baking soda + vinegar | Low (hard to control) | Fast, dramatic, brief | Medium-high |
The PBS KIDS DIY lava lamp guide recommends breaking Alka-Seltzer into quarters as the standard classroom approach. Baking soda and vinegar produce a faster, more dramatic reaction, but the fizzing is over in seconds and the mess is harder to manage at group stations.
Container guidance by age: Use plastic bottles for children under 8. Glass jars are fine for older students and give a cleaner view of the layers, but they break. A wide-mouth mason jar or a clear plastic deli container both work well.
How to make a lava lamp, step by step
Total active time: about 10 minutes. The setup takes 3 minutes; the reaction runs as long as you keep adding tablet pieces.
Standard home or classroom setup
- Pour water into your container until it’s about 1 inch deep.
- Add food coloring (5 drops) and stir until the color is even.
- Pour in vegetable oil slowly until the container is three-quarters full. Wait 30 seconds for the layers to separate cleanly.
- Break one Alka-Seltzer tablet into four pieces.
- Drop one piece into the container and watch the blobs rise and fall.
- Add another piece when the bubbling slows. The setup is reusable: once the reaction finishes, just add a fresh tablet piece without re-prepping the liquids.
According to the Warwick Chemistry Outreach guide, the setup can be reused indefinitely this way, which makes it ideal for stations where groups rotate through.
Classroom station setup
- Pre-fill containers with water and food coloring the night before
- Set out oil in a shared pouring pitcher at each station (reduces spills)
- Give each group a small cup with pre-broken tablet pieces
- Groups of 3 to 4 students per container work best for observation
Timing cues: With room-temperature water, one tablet quarter bubbles actively for roughly 1 to 2 minutes. Warmer water speeds the reaction; colder water slows it noticeably, which is worth demonstrating deliberately as a variable.
Troubleshooting:
- No bubbling: The tablet may be old or damp. Try a fresh piece.
- Tiny blobs that barely move: The oil layer is too thick. Pour some out.
- Tablet sinks without reacting: The water layer is too shallow. Add more water.
- Layers won’t separate: You may have shaken the container. Wait 2 to 3 minutes.
Pro Tip: The Warwick outreach instructions suggest anchoring half a tablet to a coin with a rubber band. The coin slows dissolution and produces larger, slower-moving blobs, which are much easier for younger kids to track and sketch.
Why does the lava lamp effect actually happen?
Three forces drive everything you see: density, polarity, and CO2 gas.
Density is the key starting point. Oil is less dense than water, so it floats on top no matter how much you shake the container. Food coloring is water-based and polar, so it sinks straight through the oil and mixes only with the water below. As Science Buddies explains, the effect comes directly from these density differences combined with the CO2 produced when an effervescent tablet dissolves in water.
Polarity explains why oil and water refuse to mix. Water molecules are polar (they have a slight positive and negative charge), while oil molecules are non-polar. As the Royal Society of Chemistry notes, polar and non-polar substances don’t attract each other, so they stay in separate layers. This is also why dish soap (an emulsifier) can force them to mix temporarily, which makes a great extension experiment.
CO2 as the elevator. When an Alka-Seltzer tablet hits the water layer, it releases carbon dioxide bubbles. Those bubbles attach to droplets of colored water and carry them up through the oil. At the surface, the CO2 escapes into the air, the droplet loses its lift, and it sinks back down. Then the cycle repeats.
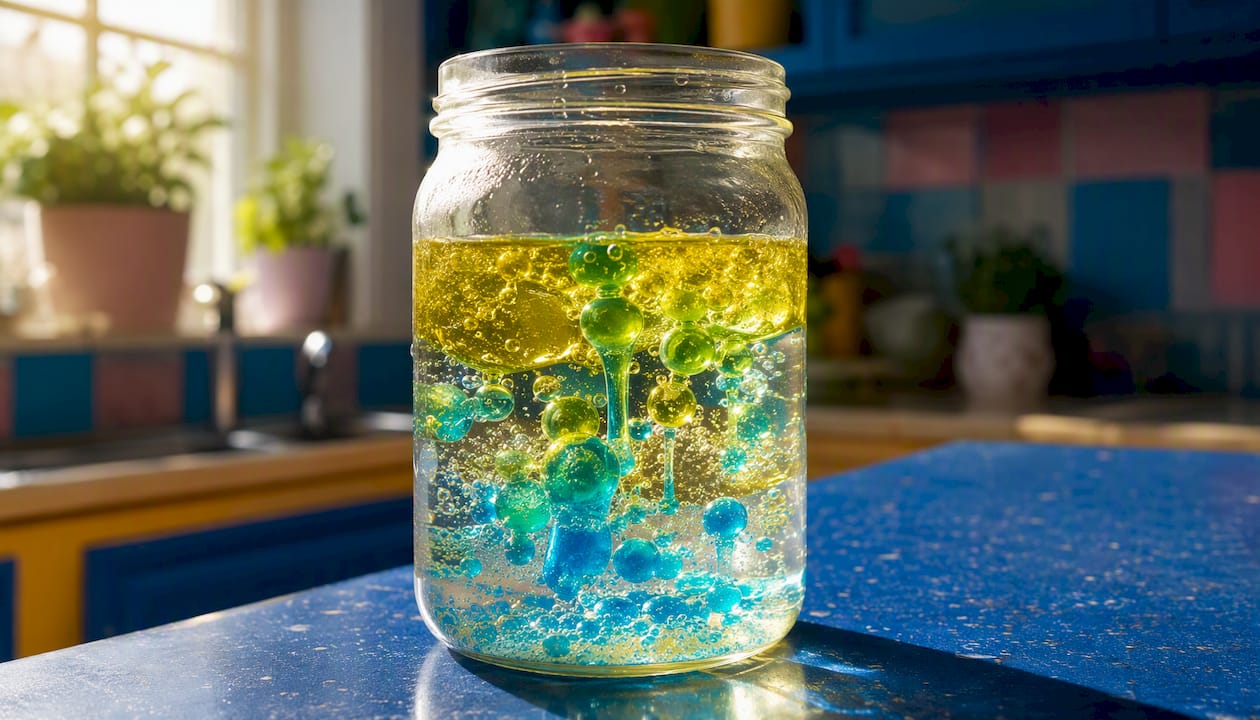
One misconception worth clearing up: this demo is not how a real electric lava lamp works. Electric lamps use heat to change the density of wax, making it rise and fall. Your DIY version uses CO2 gas instead. The RSC’s oil and water resource makes this distinction clearly, and it’s worth raising with older students who may already know what’s inside a commercial lava lamp.
How can you vary and extend the experiment?
Small tweaks turn a 10-minute demo into a multi-day inquiry unit.
Visual enhancements:
- Add a pinch of fine glitter to the water layer before pouring in the oil. The glitter travels with the colored blobs and makes the motion more dramatic.
- Place the container on an upward-facing flashlight in a darkened room. Scientific American recommends this approach for making the colored blobs stand out dramatically against the light.
- Glow-in-the-dark pigment powder (available at craft stores) works the same way as food coloring and looks striking under UV light.
Substitute reactions:
- Vitamin C effervescent tablets: Nearly identical to Alka-Seltzer in behavior, slightly milder fizz. Good for schools where Alka-Seltzer isn’t available.
- Baking soda + vinegar: Pour a small amount of vinegar into the water layer instead of using a tablet. The reaction is fast and dramatic but hard to control and produces more mess. Best as a comparison demo rather than a student activity.
Extension experiments worth trying:
- Test warm water vs. cold water. Science Buddies documents that warmer water dissolves tablets faster (roughly 20 to 30 seconds) and produces a more energetic display, while cold water slows the reaction to several minutes.
- Swap vegetable oil for baby oil or mineral oil and compare blob size and speed.
- Vary tablet fragment size (quarter vs. half vs. whole) and time how long each reaction lasts.
- For a cross-curricular connection, NOAA’s oil and water education resource links the oil-floats-on-water principle to real environmental science, including oil spill cleanup.
Pro Tip: For older students (grades 5 and up), add a drop of dish soap after the reaction finishes and watch what happens to the layers. It’s a vivid way to introduce emulsifiers and explain why soap cleans grease. The RSC’s polarity explainer gives solid teacher background on the chemistry involved.
Safety rules and cleanup
Before you start
- Adult supervision is required for all ages, especially when handling tablets
- No tasting any liquid in the container, including the colored water
- Alka-Seltzer tablets are a choking hazard; keep them away from children under 5
- Gloves and safety glasses are optional for older students but recommended if you’re using glass containers
- Use plastic containers for children under 8
Cleanup steps
- Let the liquids sit undisturbed until they fully separate (5 to 10 minutes).
- Pour the oil into a sealed container (an old jar or zip-lock bag) and dispose of it in the trash. Do not pour oil down the drain; it clogs pipes.
- Pour the colored water down the sink. Food coloring in these quantities is safe for drains.
- Wipe surfaces with paper towels before using any water, since water spreads oil further.
- Wash hands with soap and water after handling.
If ingestion occurs: Call Poison Control at 1-800-222-1222 immediately. Alka-Seltzer in small amounts is generally low-risk, but always call to confirm.
A ready-to-use classroom lesson plan
Grade range: 2 through 6. Total time: 30 to 45 minutes.
Learning objectives
- Observe that liquids of different densities form separate layers
- Describe what happens when CO2 gas is introduced into the oil-water system
- Record observations and form a simple hypothesis about one variable (temperature, tablet size, or oil type)
NGSS alignment: this activity supports practices of planning and carrying out investigations and analyzing and interpreting data.
Timing grid
| Phase | Activity | Time |
|---|---|---|
| Prep | Teacher sets up stations, distributes materials | 5 min |
| Demo | Teacher runs one full demo, explains layers | 10 min |
| Exploration | Student groups run their own version, record observations | 10 min |
| Discussion | Worksheet prompts, group sharing, cleanup | 10 min |
Worksheet prompts
- Predict: “What do you think will happen when the tablet hits the water?”
- Observe: “Draw what you see. Label the oil layer, water layer, and bubbles.”
- Explain: “Why do you think the colored blobs go up and then come back down?”
WeAreTeachers offers a free printable worksheet with assessment prompts already formatted for elementary classrooms, which you can pair directly with this lesson.
Station setup: 3 to 4 students per container. Pre-fill containers with water and food coloring before class. Keep oil in a shared pitcher at each station. Distribute tablet pieces in small cups so students control the timing themselves.
Assessment: A simple checklist works well. Did the student predict an outcome? Record at least two observations? Offer one explanation for the motion? That’s enough for a formative check at grades 2 through 4. For grades 5 and 6, ask students to identify one variable they could change and predict the result.
What running this demo actually taught me
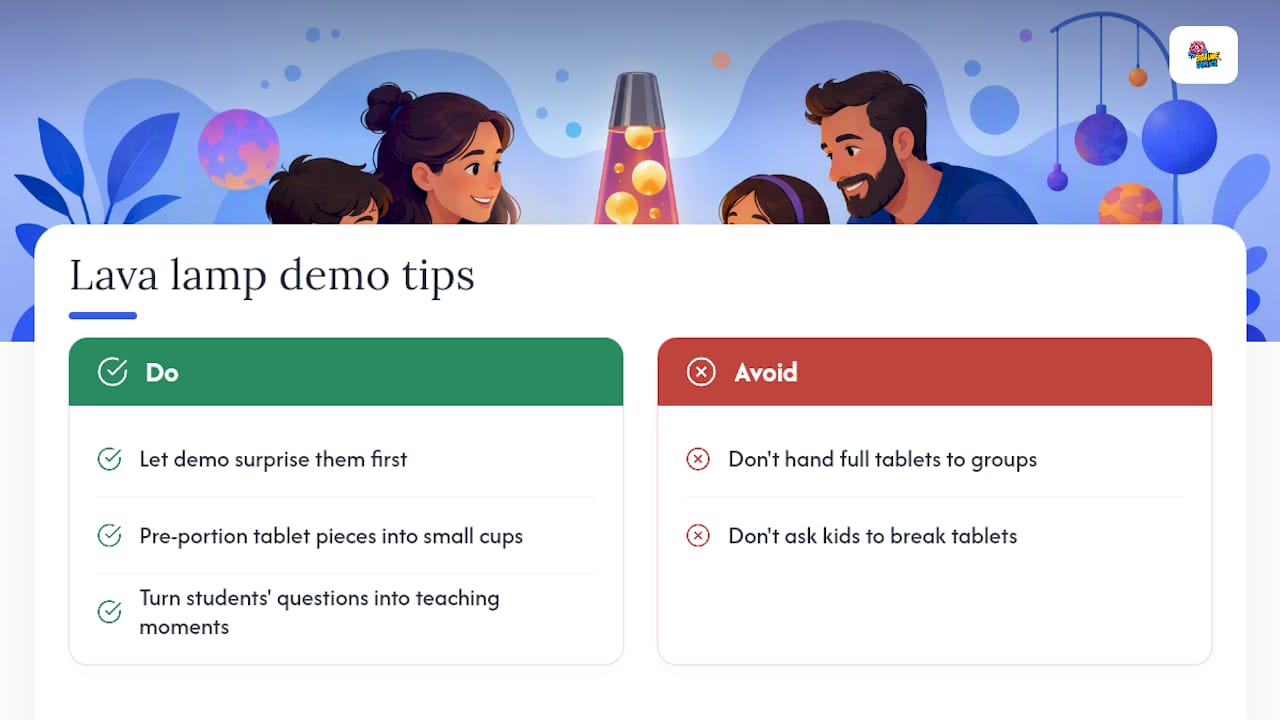
The first time you run this with a group of second-graders, the moment the first blob rises through the oil is genuinely loud. Kids react before you’ve finished your sentence. That reaction is the whole point: the surprise comes first, and the explanation lands better because they already want to know why.
One practical tip that makes a real difference: pre-portion the tablet pieces into small paper cups before class. Handing a full tablet to a group of eight-year-olds and asking them to break it into quarters is a recipe for crumbled powder and uneven results. Tiny cups with pre-cut pieces let every group start at the same moment, which makes the class discussion much easier to run.
The learning moment that sticks is when a student notices the blobs stop moving after a while and asks why. That question opens the door to talking about what the tablet actually does, and from there, density and CO2 feel like answers to a real question rather than vocabulary words on a slide.
Take the experiment further with Brainie Comics
If the lava lamp demo sparked something in your students, Fizz Force: Comic Book Guide to Chemistry picks up exactly where the jar puts down. It covers kitchen-safe chemistry reactions through story-driven experiments designed for ages 7 to 12, with built-in worksheets kids can complete using household materials. For the density and physics side of today’s demo, Gravity Gang: Comic Book Guide to Physics connects those same concepts to gravity, forces, and motion through a comic narrative that reluctant readers actually finish.

A simple pairing that works well: read a chapter of Fizz Force aloud before the demo as a warm-up, then use the book’s worksheet prompts after. Both titles are available at Brainiecomics, where you can also find bundle options for classroom sets.
Sources
- Make an Alka-Seltzer Powered Lava Lamp | STEM Activity
- DIY Lava Lamp | Kids Coloring Pages | PBS KIDS for Parents
- Make Your Own Lava Lamp | Scientific American
- Oil and water mix
- Lava lamp experiment instructions (Warwick outreach PDF)