

Baking Soda Vinegar Experiments for Kids: 8 Easy Ideas
Mix one teaspoon of baking soda with two tablespoons of white vinegar and you get an instant, fizzy CO2 reaction that teaches acid-base chemistry in about thirty seconds. That’s the core of every baking soda vinegar experiment: sodium bicarbonate (a base) meets acetic acid (in vinegar), and the two react to release carbon dioxide gas, which you see as bubbles and foam. Safe, cheap, and repeatable.
Four demos worth starting with:
- Fizzy Colours (preschool+): drop vinegar onto baking soda mixed with food coloring in a tray
- Classic Volcano (ages 5+): build a mound around a bottle, pour vinegar in, watch it erupt
- Balloon Inflation (ages 6+): seal a balloon over a bottle to collect CO2 and watch it expand
- Fizz Racer (ages 7+): use the reaction to propel a lightweight object across a surface
All four work with items already in most kitchens. Preschoolers need close supervision and can skip eye protection; elementary and middle-school groups should wear safety glasses when pouring. For classrooms, every activity here runs in groups of two to four students with minimal prep.
Pro Tip: Set up a plastic tray or baking sheet under any experiment before you start. Cleanup drops from five minutes to thirty seconds.
Key Takeaways
The baking soda vinegar experiment is a two-step acid-base reaction that produces CO₂ gas, teaches limiting reactants, and runs safely at home or in class with everyday materials.
| Point | Details |
|---|---|
| The reaction produces CO₂ | One tablespoon of baking soda can release over 5 liters of CO₂ when enough acid is present. |
| Ratio changes reveal limiting reactants | Keep vinegar constant and vary baking soda to show students why fizz stops increasing past a point. |
| Dish soap extends observation time | One drop of liquid dish soap traps CO₂ in films, turning a brief burst into measurable foam. |
| Safety is simple but non-negotiable | Use 5% white vinegar, supervise all ages, add safety glasses for groups 7 and up, and ventilate for large demos. |
| Brainiecomics Fizz Force extends the learning | The comic pairs the same kitchen chemistry experiments with story-driven lessons for ages 7–12. |
Table of Contents
- What baking soda and vinegar experiments can you try right now?
- 1. Fizzy Colours: the easiest preschool starter
- 2. Classic baking soda volcano: reliable eruption every time
- 3. Balloon inflation: CO2 you can actually see and measure
- 4. Fizz racer: turn the reaction into an engineering challenge
- 5. Mega ratio experiment: which amounts give the biggest fizz?
- 6. The chemistry behind the fizz, explained simply
- 7. Safety, first aid, and cleanup
- 8. Turning demos into real lessons: teaching tips and learning objectives
- 9. Shopping list and smart substitutes
- Why fizz experiments are worth every messy minute
- Fizz Force brings the chemistry story home
- Sources
What baking soda and vinegar experiments can you try right now?
Here’s a fast-scan overview so you can match the right activity to your group before committing to a full setup.
- Fizzy Colours — Prep: 2 min. Ages 3+. Learning focus: observation, color mixing, vocabulary. Everyday materials only. Low cleanup. Adult supervision recommended for toddlers.
- Classic Volcano — Prep: 5–10 min. Ages 5+. Learning focus: measurement, cause-and-effect, limiting reactants. Everyday materials; optional dish soap. Medium cleanup. Adult pouring for younger kids.
- Balloon Inflation — Prep: 5 min. Ages 6+. Learning focus: gas volume, closed systems, measurement. Needs a narrow-neck bottle and a balloon. Low cleanup. Supervise balloon handling for preschoolers.
- Fizz Racer — Prep: 10 min. Ages 7+. Learning focus: engineering design, iteration, measurement. Needs lightweight materials (ping-pong balls, straws, tape). Low-medium cleanup. Works well in small groups.
- Mega Ratio Investigation — Prep: 10–15 min. Ages 8+. Learning focus: stoichiometry, data collection, fair testing. Needs measuring spoons, cups, and a data sheet. Low cleanup. Best for classroom or structured home learning.
- Fizz Painting — Prep: 3 min. Ages 4+. Learning focus: creative observation, color change. Everyday materials. Very low cleanup.
- Rock Fizz Test — Prep: 5 min. Ages 7+. Learning focus: geology, carbonates, scientific comparison. Needs small rock samples (limestone works best). Low cleanup.
- Temperature Drop — Prep: 5 min. Ages 9+. Learning focus: endothermic reactions, energy change. Needs a thermometer. Very low cleanup.
1. Fizzy Colours: the easiest preschool starter
Materials: 2–3 tablespoons baking soda, 2 tablespoons white vinegar per color, food coloring (3–4 colors), a shallow tray or muffin tin, small cups or a dropper bottle.
Spread the baking soda in a thin, even layer across the tray. Add a few drops of different food coloring directly onto the baking soda in separate spots. Then let kids use a dropper or small spoon to drip vinegar onto each colored patch. The fizz erupts right where the drop lands, and the colors spread and blend as the reaction moves outward.
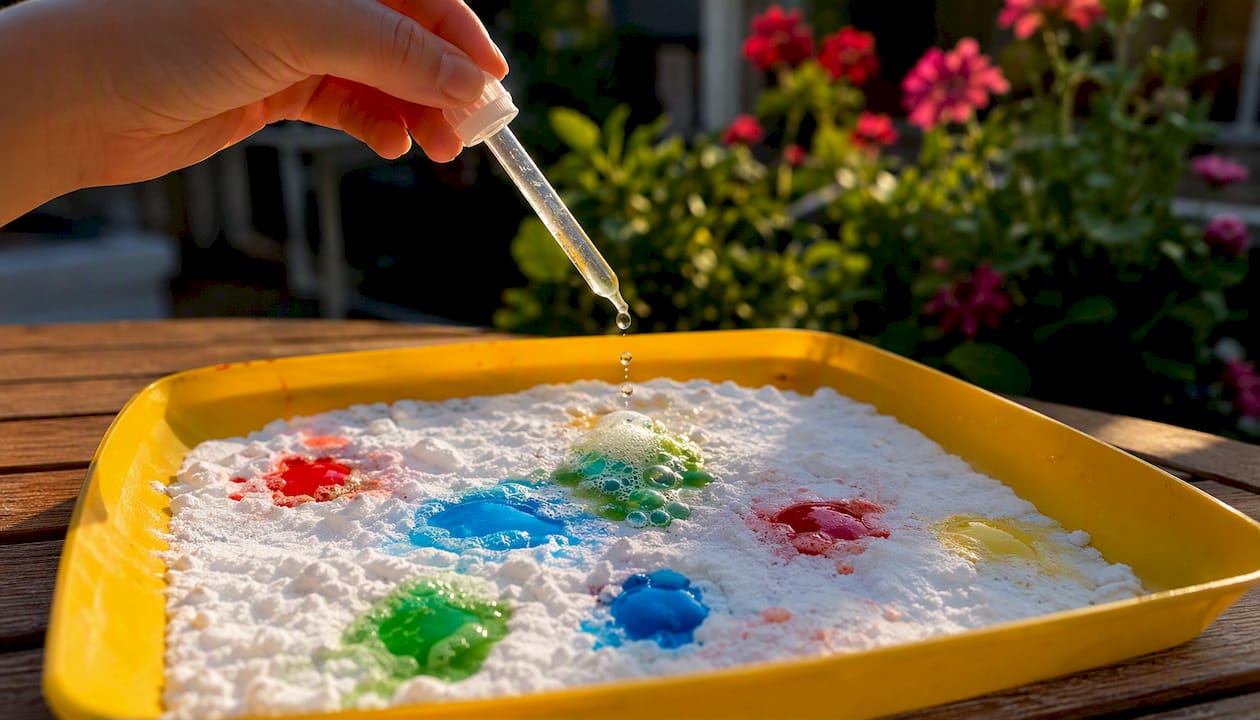
The STEM connection is simple and immediate: kids see a gas being produced (CO2 bubbles), observe a color change, and can describe what they notice using words like fizz, bubble, and effervesce. For early learners, this is a first encounter with the idea that mixing two things can create something new.
Two quick variations: pour the baking soda into separate muffin tin cups for a tidier color-by-color comparison, or layer two colors of baking soda in the tray and watch what happens when the vinegar hits the boundary between them.
Age/difficulty: Preschool to early elementary. No reading required. Adult pours the vinegar for children under four.
Pro Tip: Use a turkey baster instead of a dropper for toddlers. The larger grip is easier to squeeze and gives them more control over where the fizz lands.
2. Classic baking soda volcano: reliable eruption every time
Supplies by demo size:
| Demo size | Baking soda | Vinegar | Container |
|---|---|---|---|
| Small (desk) | 1 tsp | 10 mL (2 tsp) | 8 oz plastic cup |
| Medium (table) | 1 tbsp | 30 mL (2 tbsp) | 16 oz bottle |
| Large (floor) | 2 tbsp | 30 mL (2 tablespoons) | 1-liter bottle |
Following RSC classroom protocols, start with ½ teaspoon baking soda and 10 mL vinegar for your first trial so you can see the reaction before scaling up.
Steps:
- Place your container in the center of a tray or bin to catch overflow.
- Add the baking soda to the container first.
- Optional: add 2–3 drops of dish soap and a few drops of red or orange food coloring for a lava effect.
- Have an adult pour the vinegar in one steady pour (not a slow drip) for the best eruption.
- Observe the foam height, how long the fizz lasts, and whether it overflows.
- Record what you see before adding more reactant.
The teaching moment here is measurement and control. Ask: “What happens if we add more baking soda but keep the vinegar the same?” That question opens the door to limiting reactants without needing the vocabulary yet. Adding a small amount of dish soap traps CO2 in soap films and turns a brief burst into a sustained lava-like overflow, which is much easier for kids to observe and measure.
Pro Tip: Build the volcano mound from salt dough or crumpled foil around the bottle before the demo day. It dries overnight and makes the whole setup reusable.
3. Balloon inflation: CO2 you can actually see and measure
Materials: 1 narrow-neck plastic bottle (16–20 oz), 1 balloon, 1 teaspoon baking soda, 3 tablespoons white vinegar, a funnel (optional), string or a ruler.
Pour the vinegar into the bottle. Use a funnel to load the baking soda into the balloon without letting any fall into the bottle yet. Stretch the balloon neck over the bottle opening, making sure it’s sealed all the way around. When you’re ready, lift the balloon upright so the baking soda drops into the vinegar. The reaction starts immediately, and the CO2 inflates the balloon right in front of you.
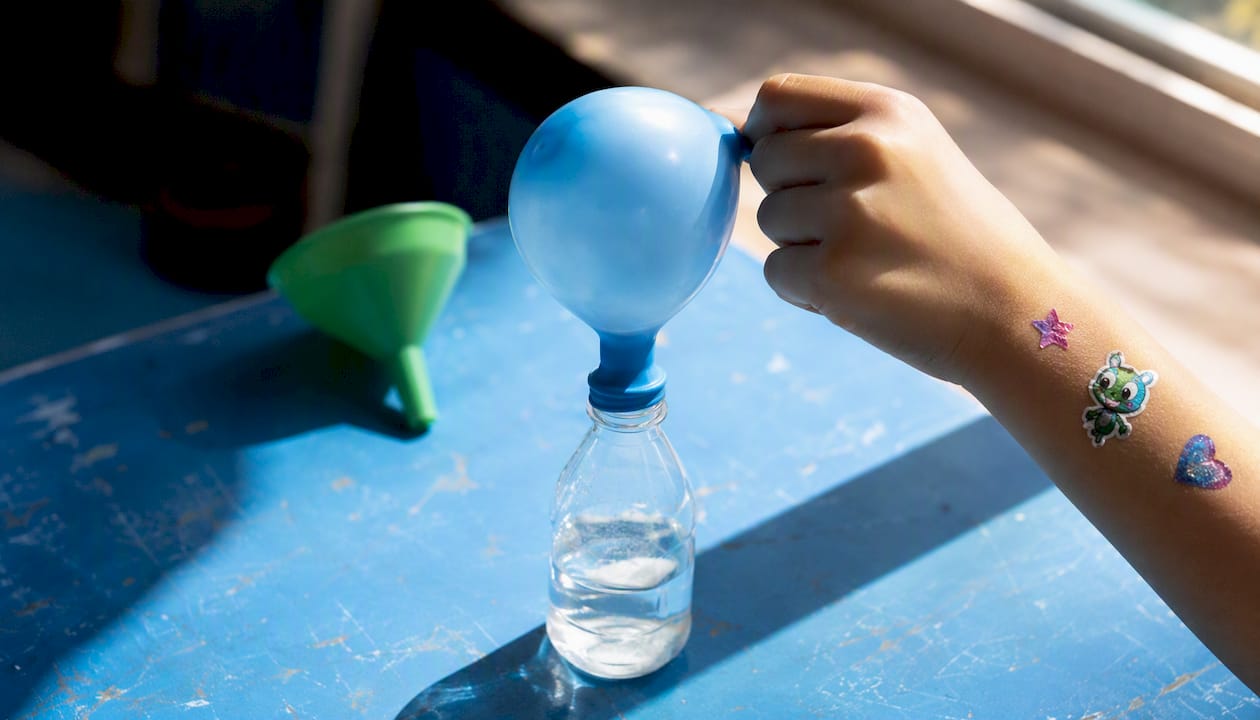
As the balanced equation shows, the CO2 produced is heavier than air and collects in the balloon rather than dispersing. That makes this demo a clean, visual proof that gas takes up space and has mass. Kids can wrap a piece of string around the widest part of the inflated balloon and mark the length, then compare results across different amounts of baking soda.
Measurement prompts: How big does the balloon get with 1 teaspoon vs. 2 teaspoons of baking soda? Does the balloon feel warm or cool after the reaction? (Hint: it should feel slightly cool.)
Safety note: Do not overinflate by using very large quantities in a small bottle. For preschoolers, skip the popping-balloon comparison test; the sudden noise and snap can startle young children.
Pro Tip: Mark the balloon with a permanent marker at the widest point before the experiment. After inflation, measure from that mark to the new widest point. It gives kids a concrete before-and-after number to record.
4. Fizz racer: turn the reaction into an engineering challenge
Materials:
- Ping-pong balls, bottle caps, or small foam pieces (the “racer body”)
- Plastic straws, tape, and small zip-lock bags or film canisters
- Baking soda (½ teaspoon per trial)
- White vinegar (1 tablespoon per trial)
- A smooth, flat surface (table or floor)
- A ruler or measuring tape, stopwatch
The challenge: build a small vessel that holds the reactants, releases the CO2 in a direction that moves the racer forward, and travels the farthest distance in a timed run. Kids design, test, redesign, and test again.
Measurement options:
- Measure distance traveled in inches or centimeters
- Time how long the fizz propels the racer
- Score by finish order in a class race
This activity works best in groups of two or three. Each group gets the same starting materials, which keeps the comparison fair. The design challenge teaches cause-and-effect (more fizz = more force?), iteration (what changed between your first and second design?), and basic measurement. For middle-school groups, add a constraint: the racer must stay on a straight line within a 6-inch-wide lane.
Age/difficulty: Ages 7 and up. Works well in classroom stations with 20–30 minutes per round. Groups of 2–3 students.
5. Mega ratio experiment: which amounts give the biggest fizz?
This is the activity that turns a fun demo into real science. The goal is to find out which vinegar-to-baking-soda ratio produces the most foam, and to understand why adding more of one ingredient past a certain point stops making a difference.
Hypothesis example: “If I double the amount of baking soda while keeping vinegar constant, the foam height will double.”
Steps:
- Choose a single container size and use the same one for every trial (a 16 oz plastic cup works well).
- Add 30 mL (2 tablespoons) of white vinegar to the cup. Keep this amount the same across all trials.
- Measure baking soda in ¼-teaspoon increments: start at ¼ tsp, then ½ tsp, 1 tsp, 1½ tsp, 2 tsp.
- Pour the baking soda into the vinegar in one motion. Start your timer.
- Measure foam height at 10 seconds using a ruler held against the outside of the cup.
- Record results, rinse the cup, and repeat each trial twice for reliability.
The ACS Middle School Chemistry curriculum uses exactly this kind of stoichiometric ratio testing to teach limiting reactants: the reaction is a 1:1 mole relationship, so once one reactant runs out, adding more of the other does nothing. Kids discover this empirically before they ever see the equation.
Data table template:
Variable control tips: Use room-temperature vinegar for every trial. Pour baking soda in one motion rather than slowly. Swirl the container gently after visible fizz subsides, because residual reactants can keep producing CO2 after the main burst. For sustained foam measurement, keep dish soap constant (one drop per trial) and vary only the baking soda, since detergent affects bubble lifetime but not total CO2 produced.
Pro Tip: Use baker’s ratio thinking to help older students understand proportional relationships. Understanding ingredient proportions and ratios is a transferable math skill that shows up in cooking, chemistry, and engineering alike.
6. The chemistry behind the fizz, explained simply
The vinegar and baking soda reaction runs in two steps. First, sodium bicarbonate (NaHCO₃) reacts with acetic acid (HC₂H₃O₂) to form sodium acetate and carbonic acid. The carbonic acid is unstable and immediately breaks down into water and carbon dioxide gas. The balanced equation is:
NaHCO₃ + HC₂H₃O₂ → NaC₂H₃O₂ + H₂O + CO₂
That CO₂ is what you see as bubbles. The liquid left behind is mostly water and sodium acetate, which is why the fizz looks dramatic but doesn’t actually clean much. The cleaning myth is a useful teaching moment: the fizz is a visual effect, not a sign of cleaning power.
One tablespoon of baking soda (about 18 grams) can release a large volume of CO₂ gas when enough acid is present — which is why even small amounts produce a surprisingly large foam overflow. (ScienceNotes)
For older students, there’s one more layer: the reaction is endothermic. The mixture absorbs heat from its surroundings, so the container feels slightly cool to the touch. A simple thermometer placed in the cup before and after the reaction shows a measurable temperature drop, which connects the activity to energy concepts in middle-school chemistry.
Why does adding more baking soda eventually stop working? Because the reaction is stoichiometric: one molecule of baking soda reacts with one molecule of acetic acid. Once the vinegar runs out of acetic acid molecules, there’s nothing left to react with the extra baking soda. That’s a limiting reactant in action.
7. Safety, first aid, and cleanup
Before you start:
- Supervise children at all times during any vinegar and baking soda reaction.
- Use safety glasses for groups ages 7 and up, especially during pouring.
- Keep vinegar at standard grocery-store concentration (5% acetic acid). Do not use cleaning vinegar (6–30%), which can irritate skin and eyes.
- Run large-scale demos in a well-ventilated room or outdoors. CO₂ is heavier than air and can accumulate near the floor in large quantities.
- Avoid ingestion; while both ingredients are food-safe in small amounts, the reaction mixture should not be consumed.
Cleanup:
- Dilute any foam or spills with plenty of water before wiping.
- Pour leftover reaction mixture down the sink with running water.
- Rinse all containers immediately; sodium acetate residue is sticky when dry.
- Wipe surfaces with a damp cloth. No special disposal needed.
First aid: For eye contact, flush with clean running water for 15 minutes. If a child swallows a significant amount, call Poison Control at 1-800-222-1222.
8. Turning demos into real lessons: teaching tips and learning objectives
Suggested learning objectives by age:
- Preschool (3–5): Observe a visible change, describe what they see using new vocabulary (fizz, bubble, foam), and identify that mixing caused the change.
- Elementary (6–8): Measure foam height or balloon size, compare results across trials, and describe the reaction as producing a gas.
- Middle school (9–12): Explain limiting reactants, write a hypothesis, collect and average data, and connect the balanced equation to observed results.
Discussion questions by age:
- Preschool: “What do you see happening? What does it sound like? What do you think made the bubbles?”
- Elementary: “What happened when you added more baking soda? Did the foam keep getting bigger? Why do you think it stopped?”
- Middle school: “Which reactant ran out first? How do you know? What would happen if you doubled both amounts at the same time?”
Extensions and cross-curricular ideas:
- Art: use Fizzy Colours to create tie-dye-style paper art by placing watercolor paper in the tray.
- Writing: have students write a lab report with a hypothesis, method, results, and conclusion.
- Math: graph foam height vs. baking soda amount from the ratio experiment.
- Geology: test small rock samples with vinegar to identify limestone (calcium carbonate reacts the same way).
- Broader chemistry: connect to the pH scale and test other household acids (lemon juice, orange juice) against baking soda.
Classroom management tips:
- Run as stations: four groups rotate through Fizzy Colours, Volcano, Balloon, and Ratio in 10-minute rounds.
- Assign roles: one measurer, one pourer, one recorder, one reporter per group.
- Pre-measure baking soda into small cups before class to reduce spills and save time.
- Set a “freeze” signal so you can give instructions between station rotations without shouting over the fizz.
9. Shopping list and smart substitutes
Everyday items (you likely have these):
- Baking soda: a standard 16 oz box covers 30–40 student trials. Buy two boxes for a full class set.
- White distilled vinegar (5% acidity): one 32 oz bottle covers a class of 20–25 students.
- Food coloring: a 4-color set works for all color-based experiments.
- Dish soap: any liquid dish soap; one small bottle is plenty.
- Measuring spoons and small cups: plastic disposable ones work fine and reduce cleanup.
- Shallow trays or baking sheets: one per student pair for containment.
Extras for specific experiments:
- Balloons (round, 9-inch): one per student for the inflation demo.
- Narrow-neck plastic bottles (16–20 oz): one per student pair.
- Ping-pong balls, straws, tape: for the fizz racer challenge.
- Thermometer: one per group for the temperature-drop extension.
- String or a flexible measuring tape: for balloon circumference measurement.
Substitutes and notes:
- Lemon juice or orange juice can replace white vinegar in a pinch, but the reaction is weaker because citric acid is less concentrated than acetic acid. Results will be less dramatic.
- Apple cider vinegar works but leaves a brown tint that muddies color experiments.
- Gel food coloring is more concentrated than liquid; use half the amount.
- Skip food coloring entirely for children with dye sensitivities. Turmeric powder in the baking soda creates a vivid yellow fizz with no synthetic dye.
- Do not substitute baking powder for baking soda. Baking powder already contains acid, so the reaction behaves differently and produces less CO₂ per gram.
Why fizz experiments are worth every messy minute
The most common mistake teachers and parents make with these activities is treating the eruption as the endpoint. It isn’t. The fizz is the hook. What happens after the fizz is where the learning lives: the question “why did it stop?”, the second trial that produces a different result, the kid who insists on adding more vinegar to see if the baking soda will react again.
Small failures are not problems. A volcano that barely overflows is a data point. A balloon that inflates less than expected is a reason to ask what changed. That iteration loop, trying, observing, adjusting, is exactly how scientists work, and kids as young as five can do it with a tray of baking soda and a dropper.
One thing worth saying plainly: you do not need a chemistry background to run these experiments well. You need good questions. “What do you notice?” and “What would happen if we changed this?” will carry you through every activity on this list. The chemistry explanation can come after the observation, not before it. Kids who discover the pattern first and get the explanation second remember it far longer than kids who hear the explanation first and then watch a demo.
Fizz Force brings the chemistry story home
If the experiments in this article sparked something in your child or class, Fizz Force picks up exactly where the tray of baking soda leaves off. It’s a printed comic book for ages 7–12 that follows a story-driven chemistry adventure, with the same kitchen-safe experiments woven into the narrative as guided activities kids actually want to complete.
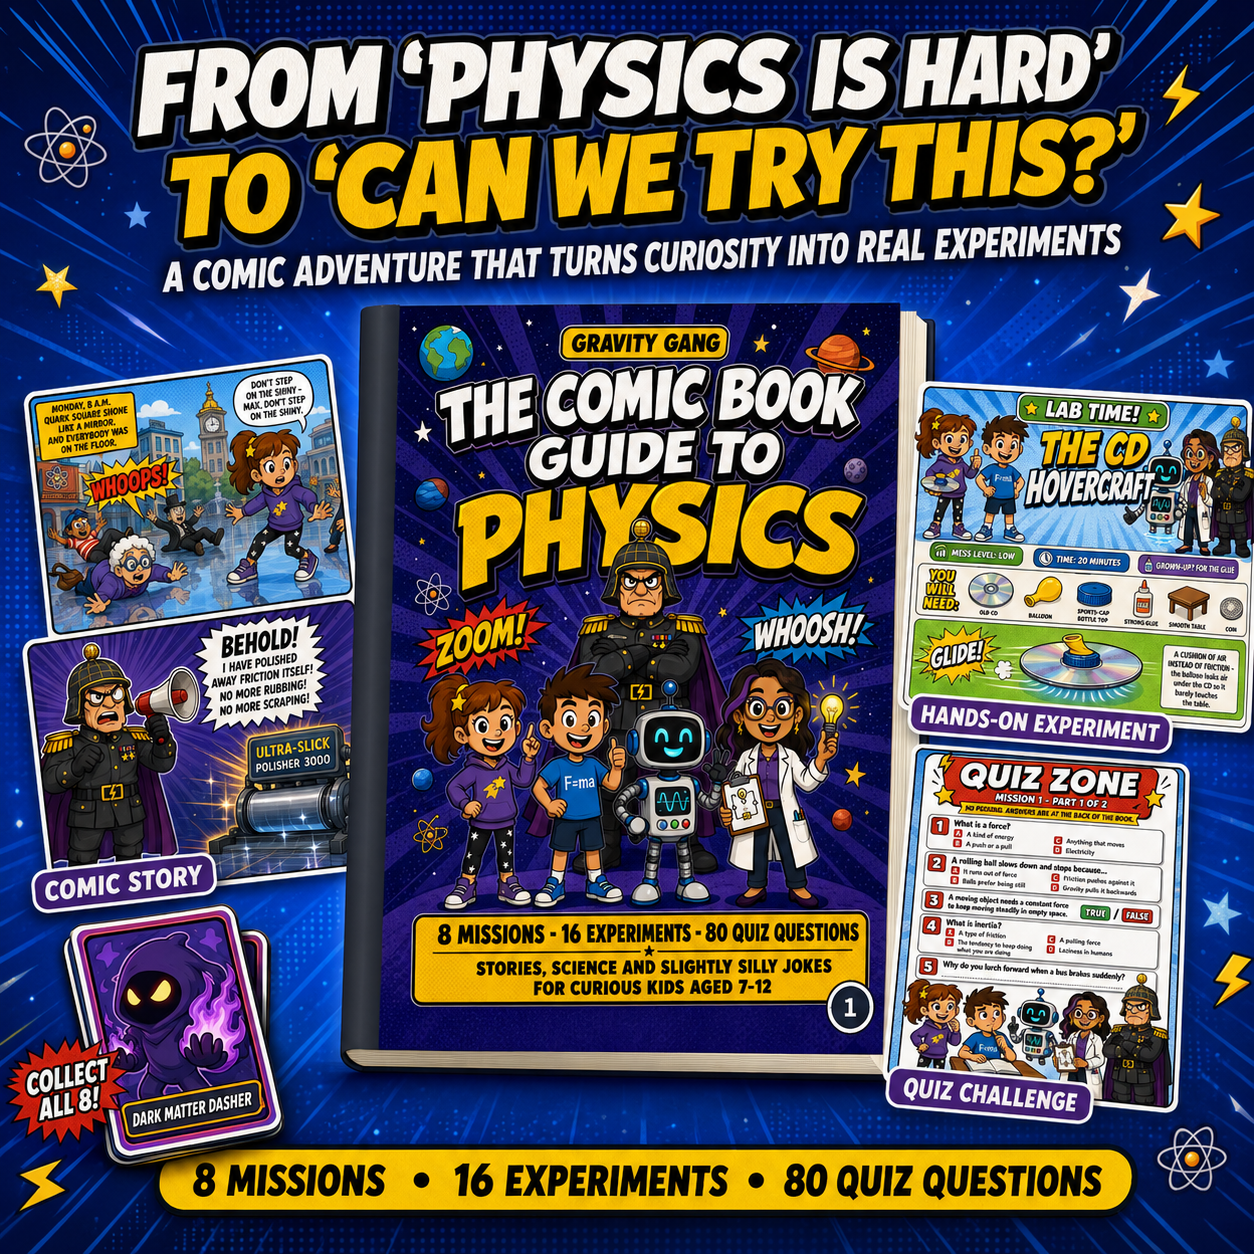
Teachers use it as a warm-up before a lab session or a take-home extension after class. Parents find it works as a read-together book that naturally leads to “can we try that?” moments at the kitchen table. Every experiment inside uses household materials, and the guided format means no lesson-planning required. Brainiecomics also publishes Gravity Gang for physics-curious kids who want the same hands-on approach applied to forces and motion. Pick up a copy at Brainiecomics and have it ready for your next science day.
Sources
- Chemical Equation for Baking Soda and Vinegar Reaction
- Vinegar and baking soda: a cleaning hack or just a bunch of fizz?
- Bubble volcanoes — Royal Society of Chemistry (RSC)
- Reaction Between Baking Soda and Vinegar — ThoughtCo
- Gas Sudsation - American Chemical Society