

8 Kitchen Energy Experiments for Kids: Age Banded, Lesson Ready
Start with a lemon battery, a balloon rocket, and a paper-plate roller coaster. All three teach real energy concepts using items already in most kitchens, and each one runs in 15 to 60 minutes. This guide covers materials, prep time, age bands, safety notes, and classroom extensions for eight energy experiments for kids, so you can pick one tonight and start building.
TL;DR:
- Most projects can be completed with household items like foil, rubber bands, and plastic bottles, and cost less than a few dollars to assemble.
- Proper supervision is essential, especially for experiments involving heat, sharp tools, or small parts, with older kids managing more steps independently.
- Friction and energy loss are normal in experiments like ramps and marbles; adjusting height or smoothing tracks can improve results.
- Troubleshooting tips include sanding metals for the lemon battery and ensuring balloons are aligned to prevent veering in rockets.
- Simplifying instructions and linking experiments to familiar stories can enhance engagement and improve retention for reluctant learners.
Table of Contents
- Energy Experiments for Kids: The Fast Shortlist
- What You Need and How to Set Up Safely
- The Energy Types Behind Every Experiment
- Step-By-Step Instructions for Six Core Experiments
- Turning One Experiment Into a Full Lesson
- Fixing Common Problems Before Kids Give Up
- Why Story and Experiment Belong Together
- An Optional Next Step: Story-Driven Energy Kits
- Where These Lesson Ideas Come From
- Sources
- FAQ
Energy Experiments for Kids: The Fast Shortlist
Pick a concept, check the age band, and go. Every project below uses household materials, and most finish in one sitting.
- Lemon battery (chemical to electrical): Ages 8+, 20 to 30 minutes. Pennies, zinc-coated nails, a lemon, and an LED.
- Balloon rocket (thrust and action-reaction): Ages 5+, 15 minutes. A balloon, straw, string, and tape.
- Paper-plate roller coaster (potential to kinetic): Ages 7+, 45 to 60 minutes. Paper plates, marbles, tape, and foam pipe insulation or cardboard tubing.
- Rubber-band paddle boat (elastic to kinetic): Ages 7+, 30 minutes. A plastic tray, rubber bands, a paddle from cardboard.
- Insulation test (thermal energy and efficiency): Ages 6+, 30 minutes plus a wait period. Ice cubes, small boxes, foil, cotton batting, and a thermometer.
- Solar oven or solar s’mores (solar conversion): Ages 6+, 45 to 90 minutes on a sunny day. A pizza box, foil, plastic wrap, graham crackers, marshmallows, and chocolate.
- Simple electromagnet (magnetic and electric conversion): Ages 9+, 20 minutes. An iron nail, insulated copper wire, and a battery.
- Marble ramp or zipline (mass, height, and speed): Ages 6+, 30 minutes. A ramp or string line, marbles or a small cup, and a stopwatch.
What You Need and How to Set Up Safely
Most of these projects run on items you already own. Pennies, aluminum foil, cardboard tubes, rubber bands, plastic bottles, and popsicle sticks cover a surprising number of energy demos, and several projects can be built for under a few dollars. If you’re missing zinc nails for the lemon battery, galvanized nails from a hardware store work fine and cost less than a dollar for a handful.
Before starting, run through a short prep checklist:
- Clear a workspace with a towel underneath for spills.
- Have an adult present for anything involving heat, sharp tools, or small parts that could be a choking hazard for kids under 5.
- Keep a stopwatch, a spare battery, and an extra LED on hand. LEDs are cheap and it’s common to have one fail.
- Check for food allergies before solar s’mores or any experiment involving shared snacks.
- Dispose of used lemons, batteries, and foil in regular trash; none of these materials need special handling.
Supervision needs shift by age. Kids in kindergarten through second grade should have an adult handling anything sharp or hot. Third through fifth graders can manage most steps solo with a check-in at transitions. Sixth through eighth graders can run full protocols independently, though solar ovens and anything with an open flame still need an adult nearby.
Pro Tip: Keep a “parts drawer” with spare batteries, LEDs, tape, and rubber bands. Half of all experiment frustration comes from a missing $2 part, not a flawed idea.
The Energy Types Behind Every Experiment
Every experiment on this list teaches one core idea: energy converts from one form to another, and some of it always leaks away as heat. Here’s the quick version of each type, paired with the demo that makes it click.
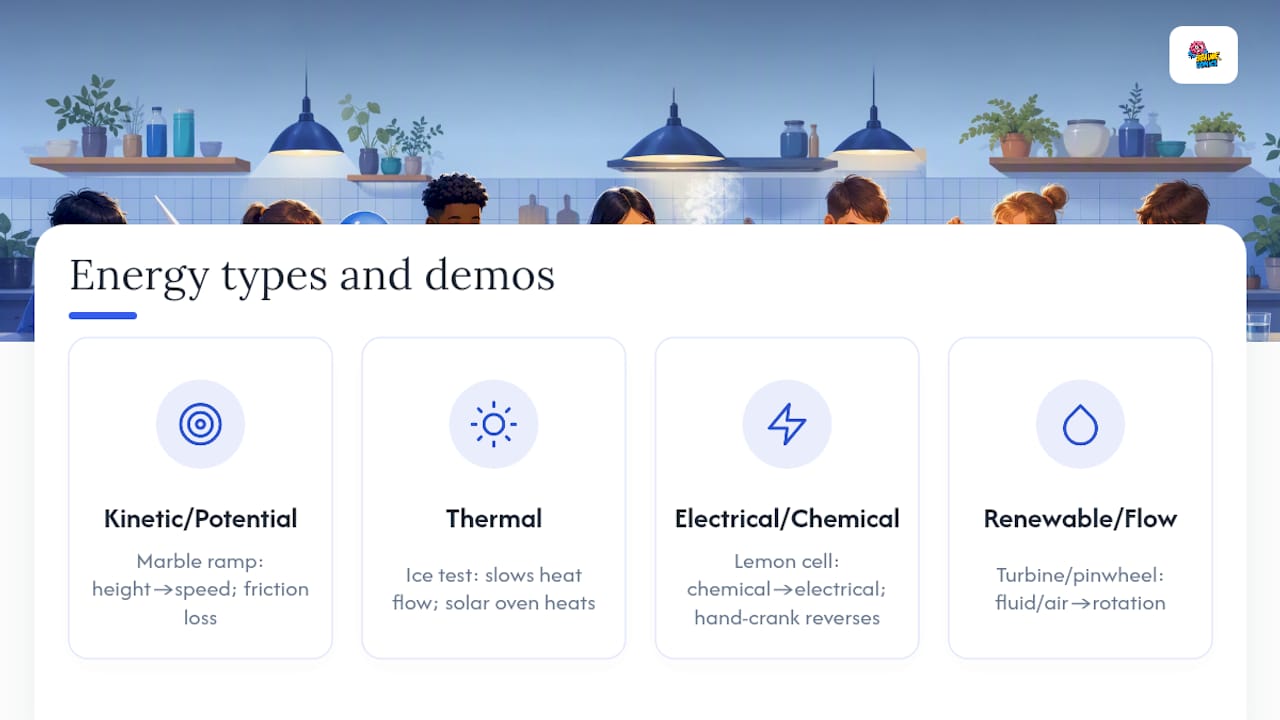
Kinetic and potential energy are two sides of the same coin. Potential energy is stored energy based on position, like a marble sitting at the top of a ramp. Kinetic energy is the energy of motion, like that same marble rolling downhill. A marble ramp or a backyard zipline shows the swap happening in real time: height converts to speed, and a bit gets lost to friction along the way.
Thermal energy is about heat flow, not just temperature. An insulation test using ice cubes in boxes wrapped with different materials shows how some materials slow heat transfer better than others. A solar oven flips the demo around, showing how trapped sunlight raises temperature inside a sealed, reflective box.
Electrical and chemical energy show up together in a lemon battery, where citric acid reacts with two different metals to push electrons through a wire. A small hand-crank generator or motor spun by hand demonstrates the reverse: mechanical motion converting into electrical current.
Renewable and flow energy covers wind and water. A homemade water turbine or a paper pinwheel in front of a fan shows moving fluid or air transferring energy into rotation, the same basic principle behind hydroelectric dams and wind farms.
Each of these demos works best when you name the conversion out loud. “The marble’s height energy is becoming speed energy” sticks better with kids than “energy is converting,” because it points at something they can see.
Step-By-Step Instructions for Six Core Experiments
These six protocols cover the range of energy types and give you everything needed to run them without extra research.
1. Lemon battery
Objective: Show that a chemical reaction can generate measurable electrical current.
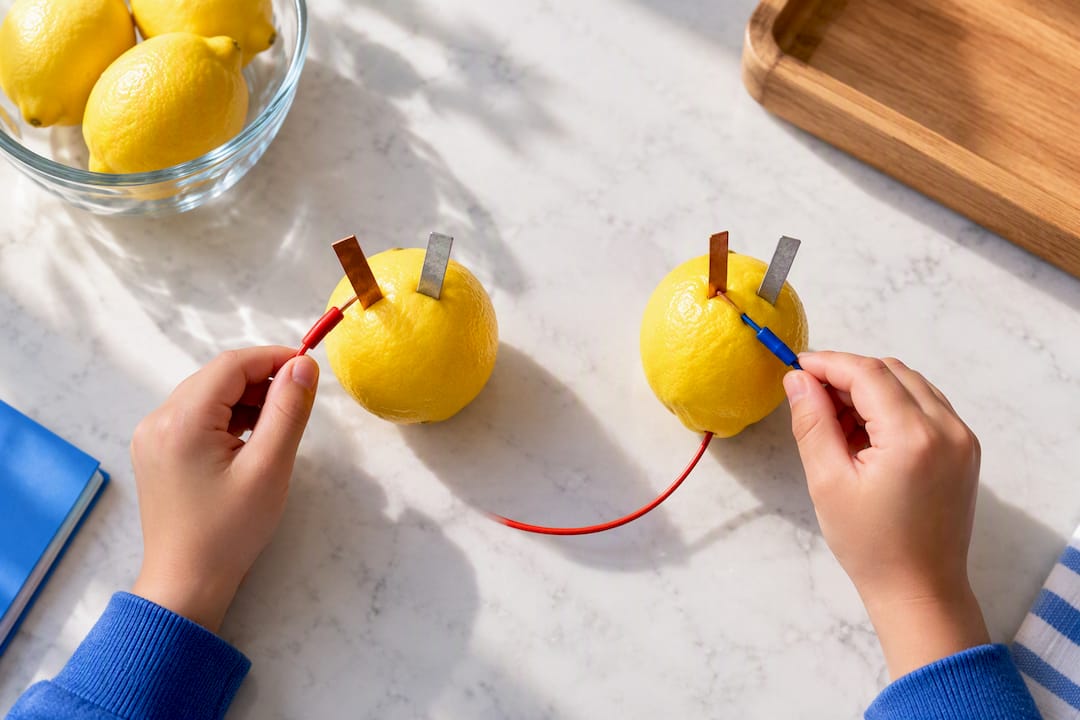
Materials: 4 to 6 lemons, copper pennies (pre-1982 US pennies work best, or copper wire), galvanized zinc nails, insulated wire with stripped ends, and a low-voltage LED or small digital multimeter.
Steps:
- Roll each lemon firmly to release juice inside without breaking the skin.
- Insert one penny and one zinc nail into each lemon, about an inch apart, without letting them touch.
- Connect the zinc nail of one lemon to the penny of the next using wire, chaining all lemons together.
- Attach the final free wires to your LED or multimeter.
What happens: A single lemon produces a small voltage. Chained lemons combine their voltage, so several lemons in series can generate enough voltage for many small LEDs to glow dimly. If nothing lights up, the most common culprit is oxidation on the metal. Sanding the penny and nail with a bit of fine sandpaper before inserting them usually solves it. For a full walk-through with troubleshooting notes, see the lemon battery project or Science Buddies’ lemon battery activity.
2. Balloon rocket
Objective: Demonstrate Newton’s third law using escaping air as thrust.
Materials: A long balloon, a plastic straw, string (10 to 15 feet), tape, and two chairs to anchor the string.
Steps:
- Thread the string through the straw and stretch it between two chairs across a room.
- Inflate the balloon without tying it off, pinching the neck closed.
- Tape the balloon to the straw along its length.
- Release the balloon and let the escaping air push it down the string.
Measuring it: Use a stopwatch to time the run and a tape measure to mark distance. Try different balloon sizes or nozzle widths and graph the results. Shorter, wider nozzles tend to release air faster but for less total time, which changes total distance in ways kids don’t expect until they test it.
3. Paper-plate roller coaster (marble ramp)
Objective: Track potential energy converting into kinetic energy through a full course.
Materials: Foam pipe insulation (cut lengthwise) or paper towel tubes cut in half, cardboard for a base and supports, tape, and marbles.
Steps:
- Build a starting hill using stacked books or a cardboard frame, higher than any later point in the track.
- Tape track segments together, including at least one loop or curve.
- Release the marble from the top and observe where it slows or stops.
- Adjust the height of the starting hill or reduce friction at slow points by smoothing tape seams.
The physics: A marble that stops partway through a loop doesn’t have enough starting height to overcome friction and maintain the speed that loop needs. Raising the starting hill adds potential energy; smoothing the track reduces energy lost to friction. Both fixes work, and comparing them is the lesson.
4. Insulation test (energy efficiency)
Objective: Compare how well different materials slow heat transfer, the same idea behind home insulation ratings.
Materials: Four identical small boxes or cups, ice cubes, and four insulating materials (foil, cotton batting, bubble wrap, newspaper), plus a thermometer.
Steps:
- Place one ice cube in each container.
- Wrap each container in a different material, leaving one unwrapped as a control.
- Check the ice every 10 minutes for an hour, recording how much has melted or the internal temperature.
- Rank materials from best to worst insulator based on how slowly the ice melted.
This is a simple, kid-friendly stand-in for the R-value concept used in real home insulation: a higher R-value means slower heat flow. The material that keeps its ice cube solid longest is doing the same job a well-insulated wall does.
5. Rubber-band paddle boat
Objective: Show elastic potential energy converting into kinetic motion, plus Newton’s third law in water.
Materials: A foam or plastic tray for a hull, two rubber bands, a paddle cut from a plastic lid or cardboard, and a bathtub or shallow tub of water.
Steps:
- Attach the rubber bands to the back of the hull, stretched to hold the paddle.
- Wind the paddle backward to twist the rubber bands, storing energy.
- Release the boat in water and watch the paddle unwind, pushing water backward and the boat forward.
More winds mean more stored elastic energy and a longer run, up to the point where the rubber band can’t take more tension without snapping.
6. Solar oven or solar s’mores
Objective: Demonstrate how reflected and trapped sunlight converts to usable heat.
Materials: A pizza box, aluminum foil, plastic wrap, black construction paper, a wooden skewer, graham crackers, marshmallows, and chocolate.
Steps:
- Line the inside of the box with foil and the bottom with black paper to absorb heat.
- Cut a flap in the lid, line its underside with foil to reflect sunlight in, and seal the box opening with plastic wrap.
- Prop the reflector flap open at an angle facing the sun, and set the assembled s’more inside on the black paper.
- Check temperature every 15 minutes with a thermometer placed inside; most solar ovens reach 120 to 150°F on a sunny day.
Check for allergies before serving, since this experiment produces food. On cloudy days, this project won’t generate enough heat, so save it for full sun and treat it as a two-part lesson if the weather doesn’t cooperate.
Turning One Experiment Into a Full Lesson
A single-period demo becomes a real design challenge with one added constraint. Instead of just building a marble ramp, ask students to optimize it for maximum distance traveled after the last curve, or the fastest total time. That single tweak turns a fifteen-minute demo into a two-day engineering project with testing, redesign, and data collection.
- Add an observation checklist: what changed, what stayed the same, what surprised them.
- Use lab notebook prompts: “Predict what happens if you double the ramp height,” then have them test it.
- Assign short quiz items tied to vocabulary: potential energy, kinetic energy, conversion, friction.
- Differentiate by letting younger students measure with a ruler while older students calculate speed using distance and time.
| Extension type | Example activity | Cross-curricular link |
|---|---|---|
| Speed challenge | Redesign marble ramp for fastest time | Math: speed = distance/time |
| Efficiency challenge | Improve insulation box to save the most ice | Math: percent melted, graphing |
| Distance challenge | Modify balloon rocket for maximum travel | ELA: written lab report |
| Design iteration | Rebuild paddle boat for longest run | Math: measuring and averaging trials |
National lesson repositories organize projects by grade band, which makes it easier to match a challenge’s difficulty to the group running it.
Fixing Common Problems Before Kids Give Up
Most experiment failures trace back to one of a handful of fixable issues, not a flawed idea.
- LED won’t light on the lemon battery: Sand the penny and nail with fine sandpaper. Oxidation on the metal surface is the most frequent cause of failure, not a bad lemon.
- Marble stops on the ramp: Raise the starting height or smooth rough tape seams where friction builds up.
- Balloon rocket veers off the string: Make sure the straw is taped flat against the balloon, not at an angle.
- Timing feels inconsistent: Use the same stopwatch operator for every trial, and run each test three times to average out human reaction delay.
Friction isn’t a flaw to eliminate so much as energy changing form. Every bit of speed a marble loses on a rough track becomes a tiny bit of heat at the contact point, which is exactly why no real machine runs at 100 percent efficiency. Framing friction this way, instead of as some invisible force working against the experiment, helps kids stop thinking of “energy loss” as a mistake and start seeing it as part of how energy behaves.
For reluctant readers, keep instructions to one step per line and let them handle the assembly themselves before you explain the science behind it. Kids retain the concept better when the explanation follows the hands-on part instead of preceding it.
Why Story and Experiment Belong Together
Kids remember a concept longer when it’s attached to a character they care about, not just a worksheet. Pairing a narrative with a real kitchen experiment gives reluctant readers a reason to turn the page: they want to see what happens next, and the science comes along for the ride. Household materials and zero screen time keep the focus on doing, not watching, and clear teacher notes mean an adult never has to guess what the lesson is actually teaching.
— Brainie Comics
An Optional Next Step: Story-Driven Energy Kits
If you’d rather hand your child or class a ready-made bundle instead of assembling one experiment at a time, some companies offer exactly that. Fizz Force and Gravity Gang each pair a comic book adventure with kitchen-safe experiments and teacher notes, so the science lesson is already written into the story instead of bolted on afterward.
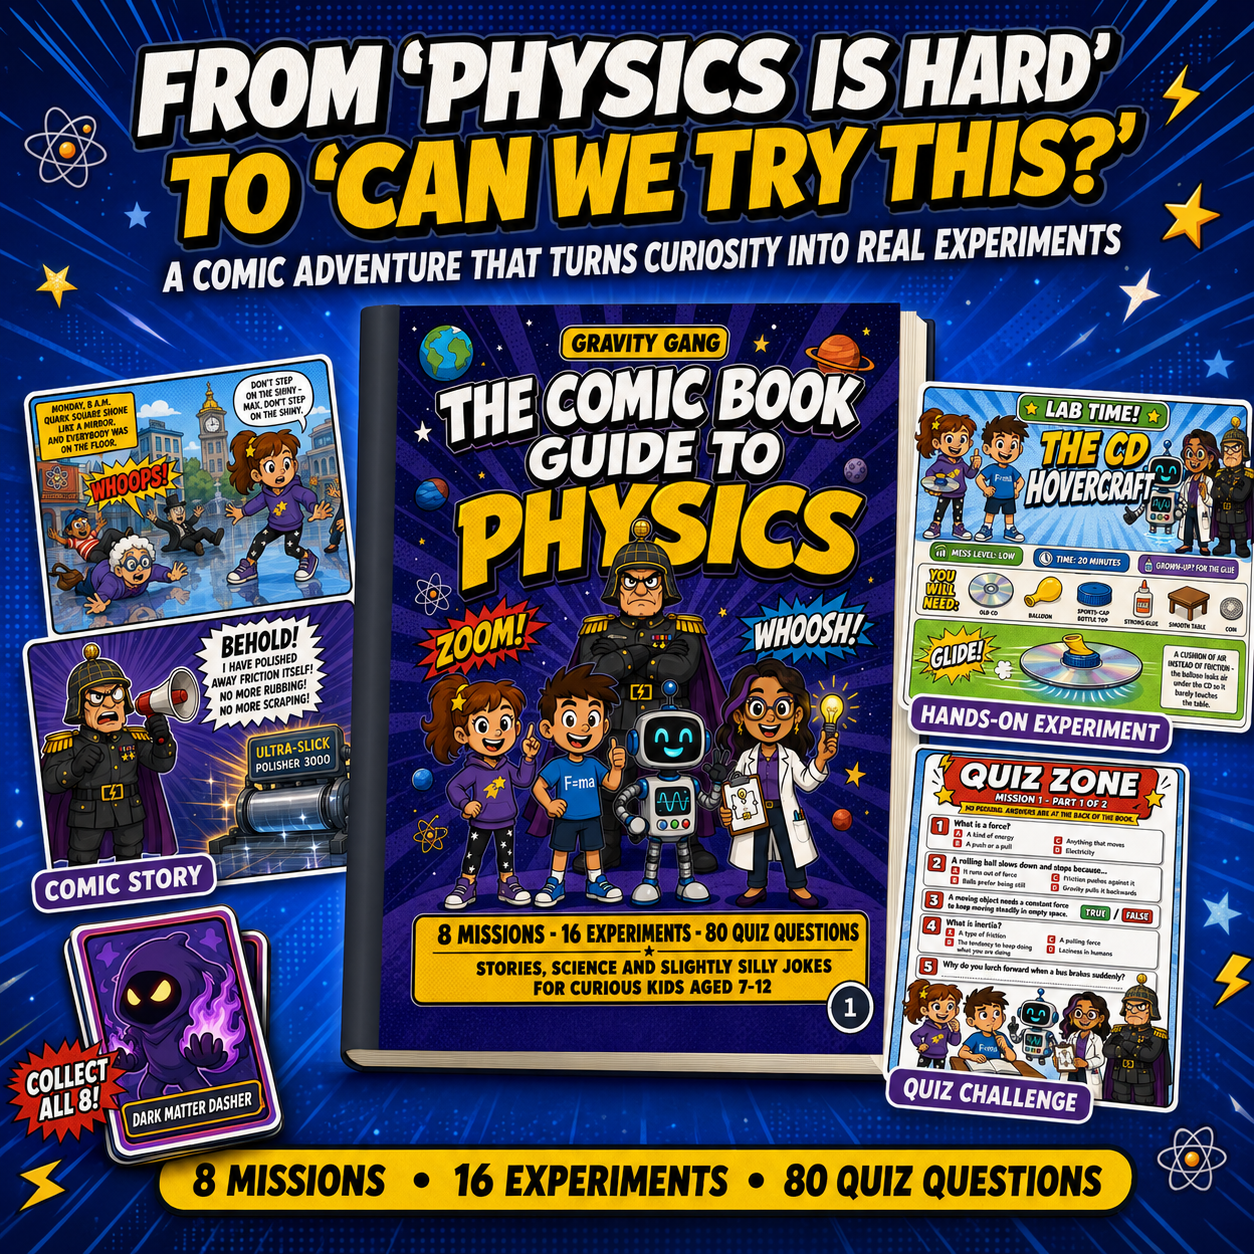
Both books are designed for kids ages 7 to 12, using only household materials with no screens required. Current prices are on the pricing page. Fizz Force leans into chemistry-style reactions similar to the lemon battery above, while Gravity Gang covers physics concepts like the ramp and roller coaster demos. If today’s experiments left your child asking “what’s next,” browse the full comic collection and pick the one that matches what sparked their curiosity.
Where These Lesson Ideas Come From
These protocols draw on established, teacher-facing sources rather than guesswork.
- EIA Energy Kids: grade-banded, science-fair-ready energy projects from the U.S. government’s energy statistics agency.
- Science Buddies: detailed lemon battery and solar project instructions with troubleshooting notes.
- TeachEngineering: pendulum and cart lessons for calculating kinetic and potential energy.
- The Franklin Institute: a clear explanation of kinetic energy and motion for younger learners.
Sources
- How to make a lemon battery (ANU Science Engagement)
- Kinetic energy (Franklin Institute / Spark of Science)
- Science fair experiments - Energy Kids (U.S. EIA)
- Lemon battery project (Science Buddies)
FAQ
What are 10 easy science experiments for kids?
Beyond the eight energy projects above, a baking soda and vinegar volcano and a static electricity balloon demo round out a solid list of ten low-cost, low-mess experiments. Most take under an hour and use materials already in a typical kitchen.
What are some fun experiments I can do with electricity?
A lemon battery, a simple electromagnet made from a nail and copper wire, and a static electricity demo using a balloon and hair are three reliable starting points. Each shows a different way electrical energy is generated or moved, and the lemon battery is the most visual since kids can watch an LED light up from fruit.
Can you give me examples of kinetic energy?
Kinetic energy shows up any time something moves: a rolling marble, a swinging pendulum, a thrown ball, wind turning a turbine blade, and water flowing downhill are all common examples. The Franklin Institute defines it simply as the energy an object has because it’s in motion, as opposed to potential energy, which is stored and waiting to be released.
What are some simple energy projects students can do for class?
A marble ramp for measuring speed, an insulation test comparing materials, and a balloon rocket for measuring distance are all classroom-friendly because they need minimal supplies and finish in one period. For multi-day projects, turning any of these into a design challenge with a measurable goal, like maximum distance or best insulation, adds depth without adding cost.
Does Brainie Comics include experiments in its books?
Yes. Both Fizz Force and Gravity Gang pair a comic book story with hands-on, kitchen-safe experiments and teacher notes, priced at $59.95 each on the Brainie Comics collection page.