

15 Minute Electromagnet for Kids, No Kit Needed for Parents & Educators
An electromagnet is a magnet that runs on electricity instead of natural magnetism, and kids can build a working one quickly with a battery, insulated wire, and an iron nail. Wrap the wire around the nail, connect both ends to the battery, and the nail starts pulling in paper clips. Cut the connection, and the magnetism disappears. That on/off switch is the whole point, and it’s what makes this one of the more satisfying science demos a kid can run in a kitchen.
TL;DR:
- Using a steel nail as the core produces a much stronger magnetic field than non-magnetic materials, and reversing battery connections flips the poles without reversing attraction.
- Testing multiple versions with controlled variables and averaging results is essential to accurately measure the relationship between coil turns and magnetic strength.
- The electromagnet’s magnetic field disappears immediately upon circuit disconnection, and safety precautions include disconnecting between tests to prevent overheating.
- In real-world applications, electromagnets operate at much larger scales and currents than the classroom version, with industrial models utilizing specialized power supplies and cooling systems.
Table of Contents
- What Makes an Electromagnet for Kids Different From a Regular Magnet?
- How to Make an Electromagnet: A Simple Kid-Safe Experiment
- Turning the Build Into a Science Fair Investigation
- Where Electromagnets Show Up in Everyday Life
- Common Misconceptions and How to Troubleshoot a Dead Electromagnet
- Pairing the Experiment With a Story: Brainie Comics in the Lesson Plan
- Why This Experiment Works Better Than Most STEM Kits
- Sources
What Makes an Electromagnet for Kids Different From a Regular Magnet?
A fridge magnet works all the time, whether you want it to or not. An electromagnet only works when electricity flows through it, which is the core difference worth explaining before any wire gets wrapped. An electromagnet generates its magnetic field from electric current moving through a coiled wire, and that field switches off the instant the circuit breaks. A permanent magnet, like the kind stuck to a whiteboard, has its magnetism locked into its molecular structure and can’t be turned off at all.
Here’s the simple mental model to give a child: electricity moving through a wire creates a small magnetic field around that wire. Coil the wire into loops, called a solenoid, and those individual little fields stack on top of each other, building one stronger combined field running through the center of the coil. More loops mean a stronger field, up to a point.
That’s where the iron core comes in. Slide an iron nail into the coil and the field jumps dramatically stronger, because the iron’s internal domains, tiny regions that behave like microscopic magnets, line up with the coil’s field and reinforce it. Without a core, a coil’s magnetic field is usually too weak to pick up more than a paper clip or two. With one, the same coil can lift a small handful.
A few other things worth pointing out to kids as they build:
- Flip the direction the battery connects, and the magnetic poles flip too. North becomes south and south becomes north.
- The coil has to be wound consistently in one direction. Wrapping some loops one way and some the other cancels out the field instead of building it.
- Iron works far better as a core than materials like wood, plastic, or aluminum, because those don’t have the magnetic domain structure iron has.
- Steel nails can hold onto a little bit of magnetism after the experiment ends, which is a useful segue into the misconceptions section later on.
Once a kid sees the nail go from inert to magnetic and back again just by flipping a switch, the abstract idea of “electricity makes magnetism” stops being abstract.
How to Make an Electromagnet: A Simple Kid-Safe Experiment
This is the one experiment worth running before any of the fancier variations. It takes cheap materials, works reliably, and gives a visible result in under fifteen minutes.
Materials you’ll need:
- One large iron nail, at least 3 inches long (steel works; avoid galvanized or coated nails if you want the strongest result)
- About 3 feet of thin insulated copper wire, the kind sold for basic electronics or found in hardware stores
- One D or C battery (a 9-volt battery also works and gives a slightly stronger pull)
- A handful of small metal paper clips or steel pins for testing
- Electrical tape or masking tape
- Wire strippers or scissors, for an adult to prep the wire ends
For a classroom setting, a good rule of thumb is one kit per pair of students, which keeps costs down and encourages kids to compare results with a partner.
Steps to build it:
- Have an adult strip about half an inch of insulation off each end of the wire so bare copper is exposed.
- Starting about 4 inches from one end of the wire, wrap the wire tightly around the nail in a single direction, leaving both ends free. Aim for a moderate number of tight coils for a first attempt.
- Use tape to hold the coils in place so they don’t loosen or slide while testing.
- Touch one bare wire end to one battery terminal and the other bare wire end to the other terminal.
- Bring the nail’s tip near a small pile of paper clips and watch it pick them up.
- Disconnect the wire from the battery immediately after each test.
The BBC’s Science Focus guide recommends this same basic build and notes that taping coils firmly is one of the most common places first attempts go wrong, since loose wraps shift and weaken the field.
Safety notes that matter more than they sound:
The wire and battery terminals will get warm during use, and can get genuinely hot if left connected for a short period. Museum science programs advise disconnecting the circuit between every test rather than leaving it running continuously, both to protect small fingers and to keep the battery from draining fast. Never let the two bare wire ends touch each other directly without the nail and coil in between. That creates a short circuit, which drains the battery quickly and can heat the wire enough to burn skin. Younger kids should have an adult handle the wire stripping and the actual battery connection, then take over for the fun part: testing.
If the nail doesn’t pick anything up, check these in order: Is the wire making solid contact with both battery terminals? Are all coils wound in the same direction? Is the battery fresh? Is the nail actually iron or steel, and not aluminum? Nine times out of ten, it’s a loose connection.
Three extensions once the basic version works:
- Add another 20 loops of wire without changing anything else, then retest the pull strength.
- Swap the single battery for two batteries in series (connected end to end) and compare.
- Try a different core, like a wooden dowel or a piece of plastic pipe of the same size, and see how much weaker the result gets.
Pro Tip: Number each test clearly on a scrap of paper before you start, and always return the coil to its original 20 or 30 turns before changing the next variable. Kids get excited and change three things at once, which ruins the comparison entirely.
Turning the Build Into a Science Fair Investigation
A single working electromagnet is fun for about five minutes. A comparison between five different versions is where the real learning happens, and it’s also what turns a kitchen craft into something worth entering into a school science fair.
The key rule is controlling variables: change one thing at a time, and keep everything else identical between tests. If you’re testing whether more coils make a stronger magnet, keep the battery, the nail, and the wire type exactly the same across every trial. Change only the number of wraps. Science Buddies’ classroom-tested approach frames this explicitly as a variables experiment, testing coil turns and battery voltage as the two most demonstrable factors, and recommends graphing the averaged results rather than trusting a single run.
Here’s a simple way to measure and record strength without any special equipment:
- Count how many paper clips the nail picks up and holds for at least three seconds.
- Run each configuration three times and average the results, since a single trial can be thrown off by clip placement or a shaky hand.
- Keep a simple table: number of coils, battery type, paper clips lifted (trial 1, 2, 3), and the average.
- Graph coils on one axis and average clips lifted on the other. A rising line is an easy, visual way to show the relationship to a class or judge.
Increasing coil turns and increasing current are the two most reliable, demonstrable ways to strengthen a simple classroom electromagnet, and counting lifted paper clips remains the standard, low-tech way educators measure that strength. It’s not precise in a laboratory sense, but for a ten-year-old’s science fair board, it’s exactly the right level of rigor.
A few pitfalls wreck fair comparisons more than anything else. Testing with a battery that’s partially drained from a previous trial skews results low. Letting the nail stay slightly magnetized from a prior test (more on that below) can make a “control” reading misleadingly high. And holding the nail at inconsistent distances from the paper clip pile changes the outcome without anyone realizing why. Fix the distance, use a fresh or fully charged battery for each condition, and reset the nail between major test blocks.
Where Electromagnets Show Up in Everyday Life
The nail-and-battery version is a toy compared to what electromagnets actually do in the world, but the underlying idea is identical: coiled wire, current, and usually an iron core.
- Doorbells use a small electromagnet to pull a metal striker against a bell or chime when you press the button.
- Electric motors, the kind spinning inside toy cars and kitchen blenders, use rotating electromagnets to convert electrical energy into motion.
- Loudspeakers use an electromagnet attached to a cone; rapidly changing current makes it vibrate and push air, which is what creates sound.
- Junkyard cranes use giant electromagnets to lift entire car bodies and stacks of scrap steel, then drop the load by simply cutting the current.
- MRI machines in hospitals rely on extremely powerful electromagnets, cooled to near absolute zero, to generate the magnetic fields used for medical imaging.
The scale difference between a classroom nail and an MRI magnet is enormous, and it’s worth being explicit with kids about that gap rather than letting their imagination run toward “let’s build a bigger one.” Junkyard and MRI electromagnets use industrial power supplies, specialized cooling, and safety systems that have nothing to do with a battery and a nail. Those are not a home or classroom project at any scale, and no version of this experiment should be scaled up toward anything close to that kind of current or voltage.
Common Misconceptions and How to Troubleshoot a Dead Electromagnet
The single biggest misconception kids pick up from this experiment is that the nail is now a permanent magnet. It isn’t, not in any lasting sense. A steel nail can hold a weak, temporary magnetization for a while after the coil is disconnected, because some of its domains stay partly aligned. A simple, visible fix demonstrates this clearly: remove the nail from the coil and tap it firmly on a hard surface, which jostles the domains back into random orientation and kills the leftover magnetism. It’s a great “aha” moment to show live.
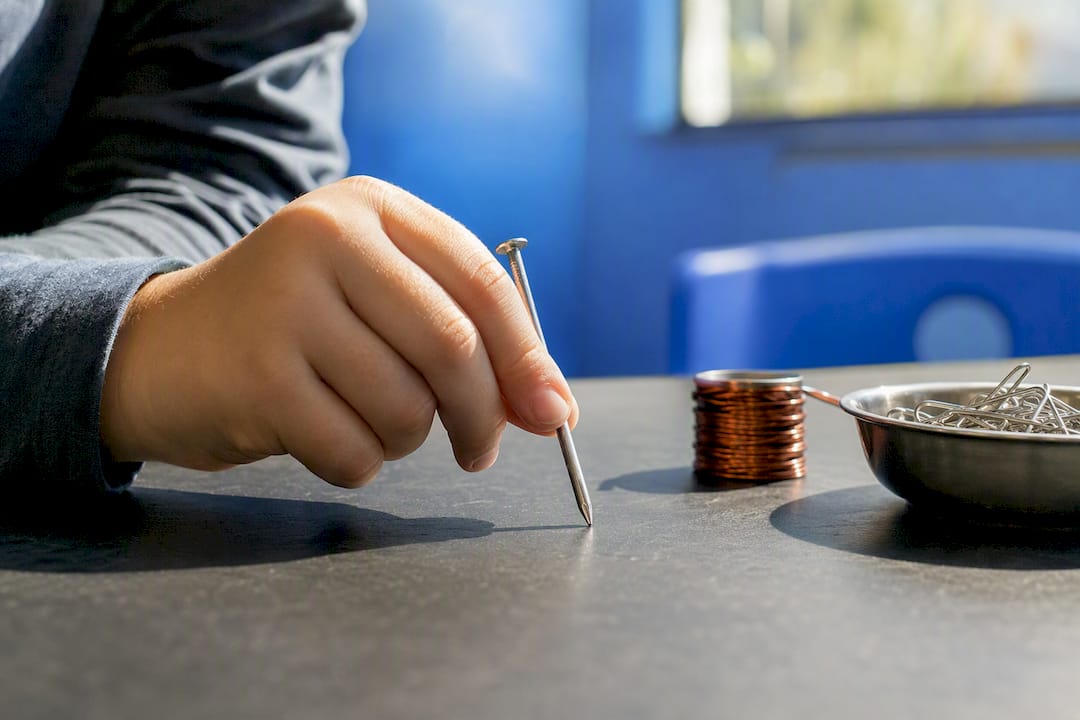
Another common mix-up: kids sometimes assume reversing the battery direction will make the core repel the paper clips instead of attracting them. It won’t. Reversing current flips which end of the nail is north and which is south, but both poles of any magnet attract plain steel and iron. Polarity only matters when you’re testing magnet against magnet.
A quick troubleshooting checklist when the build doesn’t work:
- Confirm both bare wire ends are making firm contact with the battery terminals.
- Recount the coils. Fewer than 15 to 20 tight wraps often isn’t enough for a weak battery.
- Swap in a fresh battery. Even a lightly used one can be too weak for a visible result.
- Double check the core is iron or steel, not a non-magnetic metal.
- Watch for a small spark when disconnecting the wires. That’s a normal inductive kick from the coil, harmless at this voltage, but it’s a good cue to teach kids to disconnect by the insulated part of the wire, not the bare metal ends.
For a classroom safety checklist, keep continuous connection time under thirty seconds per test, never let two bare wires touch directly, and supervise battery handling closely with kids under eight.
Pro Tip: Keep one “known good” electromagnet built and tested at the start of class. If a student’s version fails, swap in the working one to isolate whether the problem is their build or their battery.
Pairing the Experiment With a Story: Brainie Comics in the Lesson Plan
Kids retain a science concept longer when it’s wrapped in a story they actually want to finish, which is the whole premise behind Brainie Comics. A chapter from Gravity Gang can set up the electromagnet build as a challenge the characters face, embedding the same safety notes and steps covered above inside a comic panel instead of a worksheet. Kids read the setup, predict what will happen, then go build it themselves.
A ready-to-use classroom sequence: have students read the relevant comic scene, write down a one-sentence prediction about what the electromagnet will do, run the actual experiment from this guide, then draw their own comic panel showing the real result. That last step doubles as a quick literacy check and a science recording method at the same time.
For a broader unit, pair this build with related activities like nine physics experiments to run at home or the Newton’s Laws lesson, which use the same read-then-build structure. Chemistry-curious classrooms can round things out with Fizz Force for a kitchen-safe complement to the physics side.

Why This Experiment Works Better Than Most STEM Kits
Most electromagnet lessons stop at “look, it picks up paper clips,” and that’s the part conventional advice gets wrong. The build is the easy fifteen percent. The part that actually teaches something, comparing coil counts, tracking averages, graphing results, is where a kid moves from doing a craft to thinking like a scientist, and most home guides skip it entirely.
The second gap is engagement, not content. A worksheet explaining electromagnetic fields bores a ten-year-old in about ninety seconds. A story that puts the same concept inside a character’s problem to solve doesn’t. That’s the reasoning behind pairing an experiment this hands-on with a comic narrative instead of a textbook page.
If you take one thing from this guide, prioritize the measurement step over buying fancier materials. A nail, a battery, and a table for recording results will teach more than an expensive kit used passively. Read first, predict, build, measure, and then let the story carry the follow-through.
— Brainie Comics
Sources
- Electromagnet — Wikipedia
- Build an electromagnet — Wonders of Physics (UW–Madison)
- Teach electromagnetism lessons — Science Buddies
- Magnetic suction — Exploratorium