

Sink or Float: The Complete Kids' Science Guide
Whether an object sinks or floats depends on one thing: its density compared to water. Denser objects sink; less-dense ones float. That single rule, grounded in buoyancy principles that align with NGSS physical science standards, is all you need to run a genuinely useful experiment with kids. Setup takes only a few minutes, the test itself runs a short time, and every item you need is probably already in your kitchen.
Key Takeaways
Whether an object sinks or floats is determined by its density relative to water: objects denser than 1.0 g/cm³ sink, and less-dense objects float, regardless of their total weight.
| Point | Details |
|---|---|
| Density decides the outcome | Objects denser than water (1.0 g/cm³) sink; less-dense objects float — weight alone does not predict the result. |
| Low prep, high impact | The activity needs only a clear container, water, and household items; setup takes under 5 minutes. |
| Predict before you test | Asking kids to guess first, then seeing what happens, drives the deepest learning — wrong predictions are the most useful. |
| Shape and air matter | The same material can sink or float depending on shape; a foil ball sinks while a foil boat floats because of trapped air. |
| Brainiecomics extends the learning | Gravity Gang and Fizz Force pair comic stories with household experiments that reinforce buoyancy and density for ages 7–12. |
Table of Contents
- What you’ll need to get started
- Which objects should you test?
- How to run the experiment, step by step
- How to ask questions that build real scientific thinking
- Why do objects sink or float? The science explained
- How this activity aligns with learning goals and NGSS
- Safety and cleanup
- Ways to extend the experiment
- Teaching tips and common misconceptions
- Brainie Comics makes the science stick beyond the experiment
- Sources
What you’ll need to get started
The beauty of a sink float experiment is that it costs almost nothing. A clear plastic bin or large bowl is ideal so kids can watch objects from the side. Beyond that, you’re pulling from the junk drawer and the pantry.
Basic supplies:
- Clear container (large bowl, plastic bin, or deep baking dish)
- Water (room temperature)
- Towel or tray to catch drips
- A mix of 8–12 household test objects (see the next section)
- Pencil and a simple prediction worksheet (a printable chart from PBS Parents works well, or draw two columns labeled “Sink” and “Float”)
Setup notes: Fill the container enough so objects have room to move. A shallow container works fine for preschoolers; a deeper one lets older kids observe objects that hover mid-water before settling. Lay a towel flat underneath to catch splashes and keep the surface safe.
Cost and time: Most households spend $0 on this activity. If you need to grab a cork or a small sponge, you’re looking at under $2. Total time: roughly 5 minutes to set up, 10–20 minutes to test, and 5 minutes to clean up. A downloadable sink-or-float chart from PBS KIDS can replace the hand-drawn worksheet entirely.
Which objects should you test?
Not every household item is equally useful. The list below is grouped by typical result, with age guidance so you can pick the right mix for your child.
Age guidance: For toddlers, stick to three or four large, soft items (cork, sponge, empty bottle). Preschoolers can handle six to eight items with adult support. Elementary students can run the full list independently and record their own predictions.
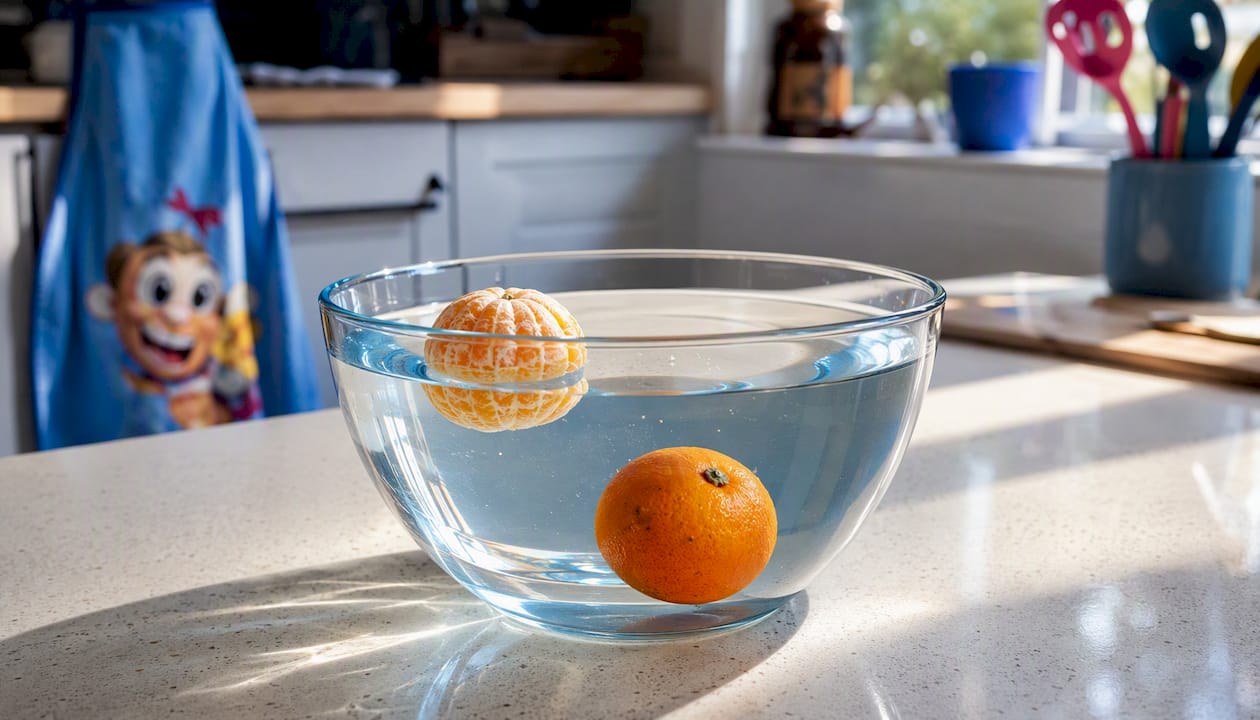
Pro Tip: Include one “tricky pair” per session. The peeled versus unpeeled orange is the best one: the unpeeled orange floats because its porous rind traps air, lowering its average density. Peel it, and it sinks. That single swap does more to teach density than ten minutes of explanation. Flat versus crumpled aluminum foil is a close second, as shown in Oxford’s float-and-sink demonstrations.
How to run the experiment, step by step
The core sequence is the same for every age: predict, test, observe, record, repeat. What changes is the language and the level of independence.
Preschool version (ages 3–5)
- Gather 3–6 objects and lay them on the table where the child can see them.
- Hold up one object and ask, “Do you think this will sink or float?” Let the child point to a picture chart showing water with an object on top (float) or at the bottom (sink).
- Place the object gently in the water together. Watch what happens.
- Name the result out loud: “It floated! It stayed on top.” Move the object to the correct column on the chart.
- Repeat for each item, one at a time.
- At the end, count how many sank and how many floated. Let the child sort the dry objects into two piles.
Elementary version (ages 6–10)
- List all test objects on a worksheet with three columns: Object, My Prediction, and What Happened.
- Write a hypothesis for each item before touching the water. Encourage specific reasoning: “I think the coin will sink because it’s made of metal and feels heavy.”
- Test one item at a time, placing it gently in the center of the container.
- Record the result immediately. Circle “correct” or “incorrect” next to each prediction.
- Group results by material (metal vs. plastic, solid vs. hollow) and discuss patterns.
- Revisit wrong predictions. Ask: “Why do you think it did that instead?” This is where the real science happens.
- Run the tricky pair (peeled vs. unpeeled orange or foil ball vs. foil boat) last, after students have formed their initial theories.
A simple step-by-step worksheet from Little Bins for Little Hands can be printed and adapted for both versions.
How to ask questions that build real scientific thinking
The experiment itself is easy. Getting kids to think like scientists takes a few specific moves.
Start every object with a direct prediction prompt before the test. Don’t skip this step, even when kids are eager to just drop things in the water. The American Chemical Society’s Inquiry in Action curriculum makes the point clearly: wrong predictions are not failures. They’re the most productive moment in the whole activity.
Here’s a short example of how a productive exchange can sound:
Adult: “What do you think will happen when we put the orange in?” Child: “It’ll sink because it’s heavy.” Adult: “Let’s find out.” [Orange floats.] Child: “Wait, why did it float?” Adult: “Great question. What do you notice about the orange’s skin? Is it smooth or bumpy? Does it feel solid all the way through?”
That last question redirects attention from weight to structure, which is exactly the conceptual shift you want. When the child peels the orange and it sinks, the reasoning clicks without you having to explain density at all.
Pro Tip: For classroom stations, set up three containers side by side with different item sets. Assign small groups of two or three kids to each station, then rotate after five minutes. Groups will naturally compare results when they move, which generates peer discussion without any extra prompting from you.
Why do objects sink or float? The science explained
For kids: Every object is made of stuff packed together. Some stuff is packed tightly (like a coin), and some is packed loosely (like a sponge or a cork). Water has its own “packed-ness.” When an object is packed more tightly than water, it sinks. When it’s packed less tightly, it floats. Scientists call that packed-ness density.
For educators: Density is mass divided by volume (density = mass ÷ volume). When an object is placed in water, the water pushes back with an upward force called the buoyant force. According to Archimedes’ principle, that upward force equals the weight of the fluid the object displaces. If the buoyant force matches or exceeds the object’s weight, it floats. If the object is denser than water, it displaces less fluid than its own weight and sinks.
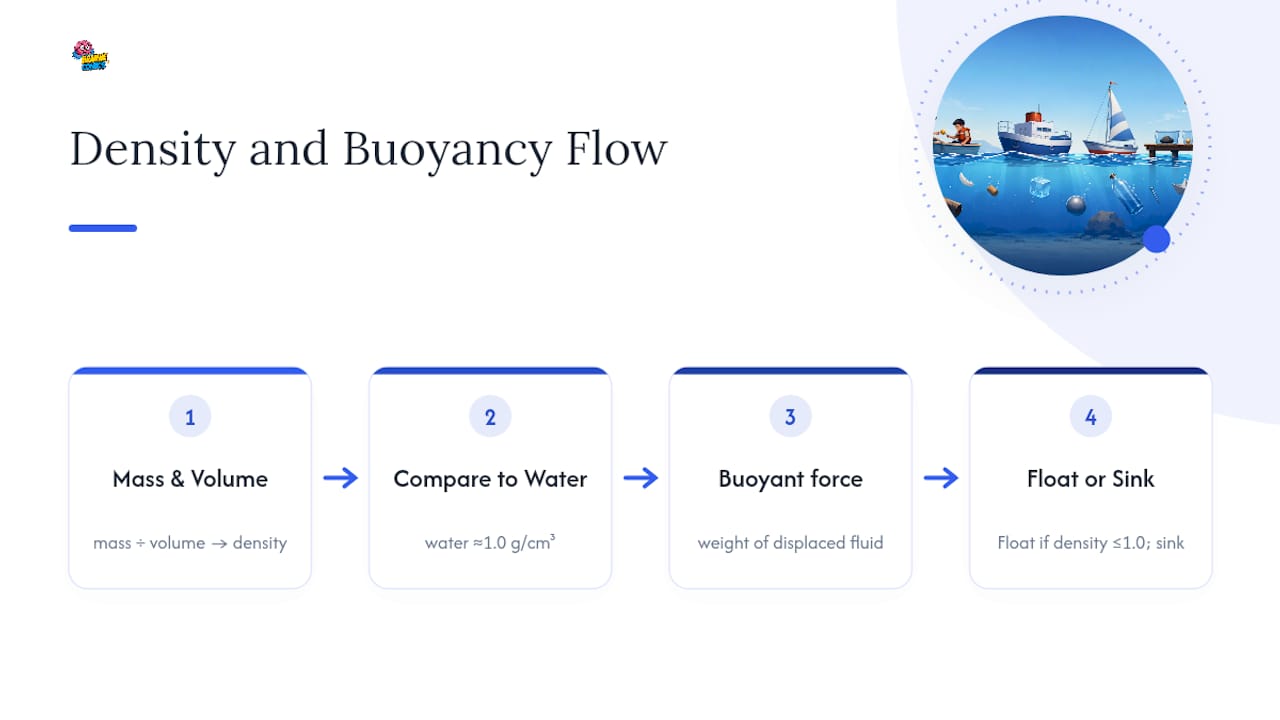
Why a steel ship floats: A solid steel ball sinks immediately because steel’s density (~7.8 g/cm³) is far above water’s (~1.0 g/cm³). But a steel ship is hollow. Its total volume includes a large air space, which brings its average density below 1.0 g/cm³. The ship displaces enough water to generate a buoyant force equal to its weight.
Reference densities:
These figures from LivePhysics’s sink-or-float lab give educators a quick reference for explaining why the numbers matter. Cork is much less dense than water. Steel is much denser than water. That gap explains everything kids observe in the tub.
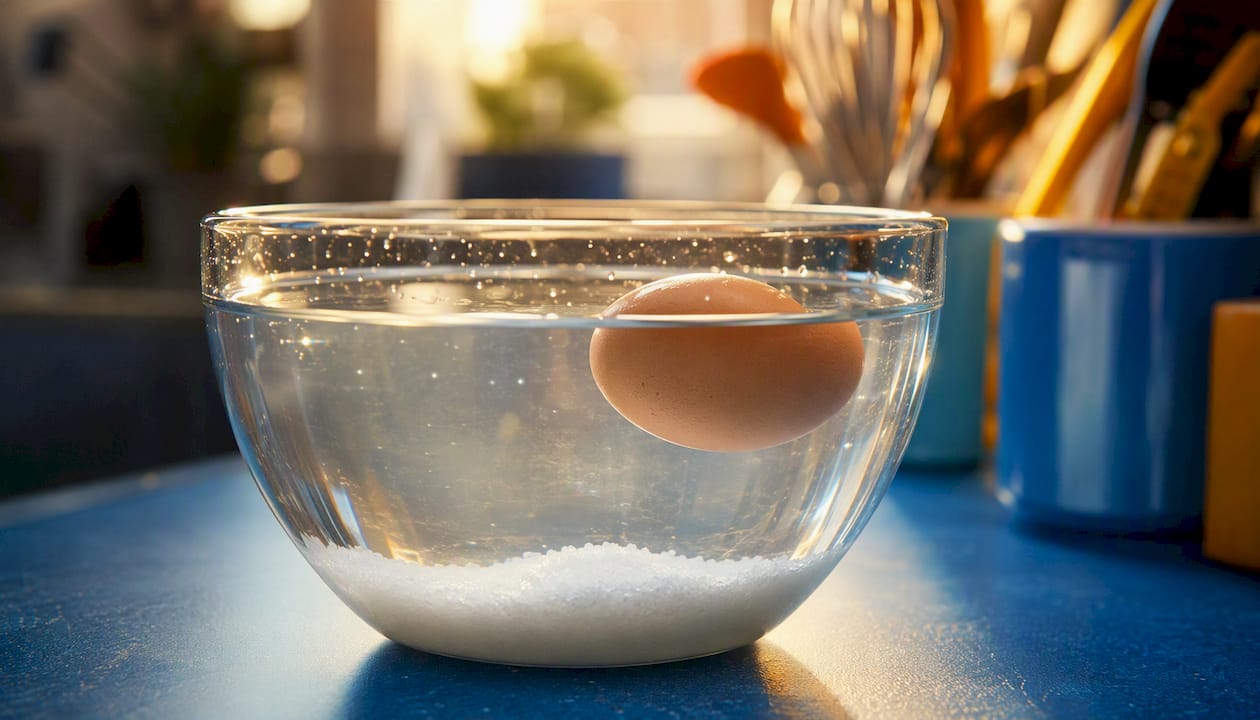
The saltwater twist: Adding salt to water raises the water’s density. An egg that sinks in fresh water will float in salted water as the denser liquid generates a stronger buoyant force. This is a reliable extension demo, backed by ACS Middle School Chemistry’s density layering lesson.
How this activity aligns with learning goals and NGSS
This experiment fits naturally into early physical science standards and gives teachers a quick, observable assessment opportunity.
Learning objectives:
- Make and record predictions before testing (scientific method)
- Observe and describe what happens when objects are placed in water
- Sort objects by whether they sink or float
- Begin to use the word density to explain results (elementary)
- Recognize that shape and material both affect floating behavior
NGSS connections: The activity maps most directly to kindergarten performance expectation K-PS2-1 (plan and conduct an investigation) and first-grade physical science concepts around properties of materials. For second grade and up, it supports 2-PS1-1 (plan and conduct an investigation to describe and classify different kinds of materials by their observable properties).
Quick assessment ideas:
- Preschool: Did the child point to the correct column before testing? Can they say “sink” or “float” after observing?
- Elementary: Review the prediction worksheet. Count correct predictions and ask students to explain one surprising result in a sentence.
- Exit ticket prompt: “Name one object that floated and tell me one reason why.”
- Observation rubric: Score on three points: made a prediction, used observation language (“it went to the bottom”), used density or material language in explanation.
Safety and cleanup
Water play is low-risk, but a few precautions keep the activity smooth and repeatable.
Safety checklist:
- Supervise toddlers at all times near any open container of water
- Avoid small items (coins, small rocks, marbles) with children under 3
- Wash hands before and after handling food items like eggs or oranges
- Lay a towel under the container before you start to prevent slippery floors
- If using raw eggs, handle them carefully and wash the container afterward
Age-specific notes: Toddlers should only handle large, soft objects (cork, sponge, sealed bottle). Keep the water level low (3–4 inches) for the youngest children. Elementary students can handle the full item set with standard supervision.
Cleanup tip: Before you drain the water, ask kids to sort all the objects back into “sink” and “float” piles. This doubles as a quick review and keeps the cleanup from feeling like a chore. Dry small items on a towel, toss any food scraps, and the whole reset takes under three minutes.
Pro Tip: Keep a dedicated “science bin” with your test objects stored in two labeled bags (Sink / Float). That way, the next session starts in 60 seconds instead of 5 minutes of hunting.
Ways to extend the experiment
Once kids have the basic idea, these variations deepen the concept across multiple sessions.
- Density column (medium difficulty): Layer water, vegetable oil, and corn syrup in a tall clear jar. Drop small objects in and watch them settle at different levels. Each liquid has a different density, so objects rest at the layer that matches their own. Extra supplies: corn syrup, vegetable oil, tall jar. Time: 15–20 minutes.
- Saltwater egg (easy): Fill two identical glasses with water. Add 6–8 tablespoons of salt to one. Drop an egg in each. The egg sinks in fresh water and floats in salt water. Kids can document results with a quick drawing. Time: 5 minutes.
- Aluminum foil boat challenge (medium): Give each child a 6-inch square of foil. Challenge them to shape it into a boat that holds the most pennies before sinking. Count pennies as a class. This directly demonstrates how shape changes average density. Time: 20–30 minutes.
- Empty vs. filled container (easy): Test a sealed empty plastic bottle, then fill it with water and seal it again. The filled bottle sinks. This isolates the role of trapped air without any new materials.
- Mass and volume measurement (harder, grades 3–5): Weigh each object on a kitchen scale and measure its volume by water displacement. Calculate density = mass ÷ volume and compare to the 1.0 g/cm³ water benchmark. Record in a simple table. This bridges hands-on observation and quantitative reasoning, as practitioners describe in LivePhysics’s classroom lab framework.
For the density column and saltwater extensions, photo documentation works well: kids photograph each stage and arrange the images in order for a simple lab report.
Teaching tips and common misconceptions
The biggest misconception kids bring to this activity is “heavy things sink.” It sounds logical, and it’s wrong in a useful way.
A large piece of styrofoam is heavier than a penny, yet the styrofoam floats and the penny sinks. That single example is usually enough to crack the assumption. The Physics Classroom’s buoyancy notes frame it well: what matters is not total weight but average density relative to the fluid.
Demo script for the foil misconception: Hold up a ball of crumpled aluminum foil. Ask: “Will this sink or float?” Most kids say sink. Drop it in — it sinks. Now take a fresh piece of the same foil and shape it into a shallow boat. Ask the same question. Drop it in — it floats. Same material, same mass, completely different result. Ask: “What changed?” Kids will notice the shape. Follow up: “What’s inside the boat that wasn’t inside the ball?” Air. That’s the concept.
Research-backed teaching moves:
- Always ask for a prediction before testing. The ACS Inquiry in Action framework shows that incorrect predictions drive the best discussions and push kids to revise their thinking.
- Treat a wrong guess as the most interesting result, not a mistake. Say: “Oh, that’s surprising! Why do you think it did that?”
- Use the peeled orange as your closing demo. It’s the clearest proof that material alone doesn’t determine floating behavior — structure and air pockets matter just as much, as Oxford’s chemistry department demonstrates in their float-and-sink classroom resource.
Pro Tip: After the activity, give kids a blank two-column chart and ask them to draw three objects they think would float and three they think would sink at home. This extends the thinking beyond the session and gives you a quick formative snapshot of their reasoning.
A note from Brainie Comics
Running this experiment with a group of seven-year-olds, the moment that always lands hardest is the peeled orange. Every single time, at least one child gasps. That gasp is worth more than any worksheet. The practical tip: do the orange last, after kids have already formed their “heavy = sink” theory. Let them be wrong first. The surprise is what makes the concept stick. Pairing the experiment with a comic story that uses the same ideas — buoyancy, forces, why things move the way they do — keeps that curiosity alive for days afterward, not just the afternoon.
Brainie Comics makes the science stick beyond the experiment
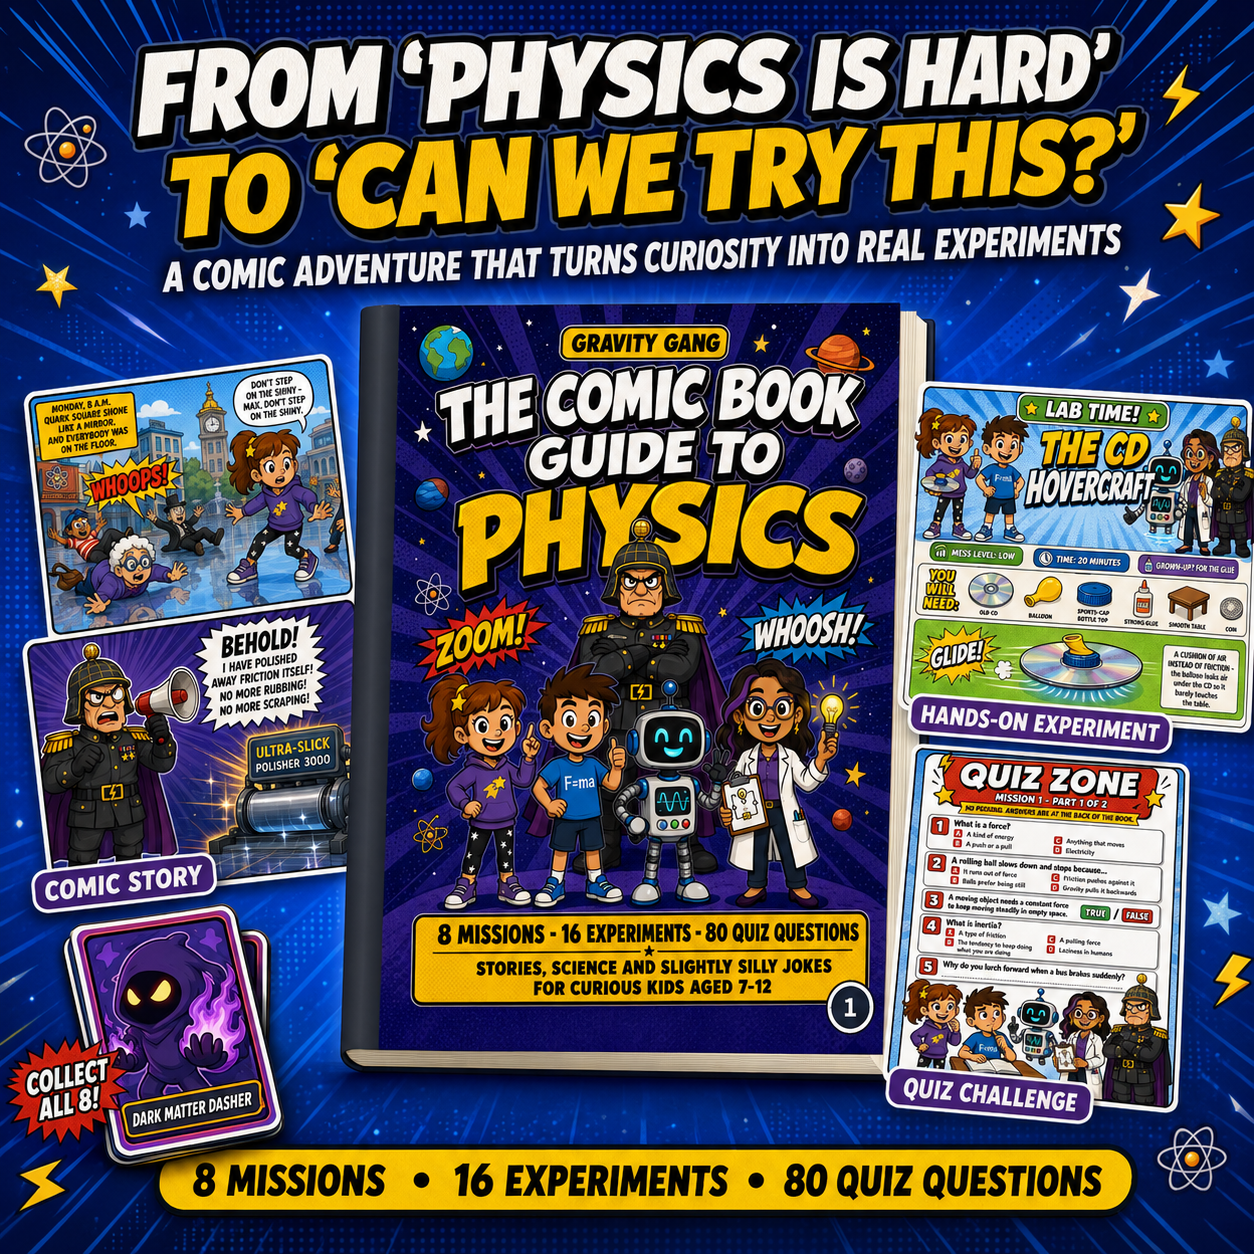
The sink-or-float activity gives kids a great first encounter with density and buoyant force. Keeping that curiosity going is where Gravity Gang comes in. It’s a physics comic built for ages 7–12 that pairs a fast-moving story with hands-on experiments using household items — the same low-prep approach you just used. Each chapter includes experiment pages, observation prompts, and a completion certificate kids actually want to earn.
For the chemistry side (saltwater density, liquid layers, the density column extension), Fizz Force covers those concepts through kitchen-safe experiments woven into the story. Both books work as independent reads or as a follow-up to a hands-on session like this one. No screens, no subscription, just a book a reluctant reader will pick up on their own. You can find both titles at Brainiecomics.
Sources
- Sinking and floating | The Physics Classroom
- Float and sink (Inquiry in Action) | American Chemical Society
- Sink or Float experiment | PBS Parents
- Buoyancy | Britannica
- Does it float or does it sink? — Department of Chemistry, University of Oxford