

Red Cabbage Indicator: The Complete Classroom Guide
Red cabbage juice is a natural pH indicator that shifts color from bright pink in acids to green or yellow in strong bases. To make it: chop a quarter of a red cabbage, cover with hot water, steep for 10 minutes, then strain the deep purple liquid into a clean jar. That’s your red cabbage indicator.
Quick color expectations before you start:
- Acids typically appear pink to red
- Neutral solutions are purple to blue-purple
- Bases shift from blue to green to yellow as alkalinity increases
Key Takeaways
Red cabbage juice is a reliable, classroom-safe natural pH indicator that shows a full color range from pink (acids) to yellow-green (strong bases) using only water and a common vegetable.
| Point | Details |
|---|---|
| Quickest extraction method | Hot steep for 10–15 minutes, then cool and strain for a deep purple indicator ready to use. |
| Core color rule | Pink to red signals acid (pH 1–5); purple is neutral (pH 6–7); green to yellow means base (pH 8–13). |
| Safety priority | Goggles for all students; adults handle heat; never test undiluted bleach or unlabeled chemicals. |
| Storage tip | Refrigerate in a sealed jar for a few days, or freeze in ice cube trays for up to 2–3 weeks. |
| Brainiecomics Fizz Force | Pairs story-driven chemistry with kitchen-safe experiments for ages 7–12, extending the lab into a full lesson. |
Table of Contents
- What do you need to run the red cabbage indicator lab?
- How do you extract the indicator? Three safe methods
- How to test household solutions with your indicator
- What does each color mean? A pH color guide
- Why does red cabbage change color with pH?
- Safety rules and classroom logistics
- How long does homemade indicator last?
- Why do results sometimes look wrong, and how do you fix them?
- Can you get more precise results using your smartphone?
- Are there other plant-based indicators, and why is red cabbage usually the best choice?
- What do students actually learn from this experiment?
- Fizz Force pairs perfectly with this chemistry lab
- Sources
What do you need to run the red cabbage indicator lab?
Materials list:
- ½ head of red cabbage (yields roughly 1–2 cups of indicator)
- 2–3 cups of distilled or tap water
- Medium saucepan or microwave-safe bowl
- Fine-mesh strainer or cheesecloth
- 8–12 small clear plastic cups (3 oz works well)
- Plastic droppers or pipettes (one per test solution)
- Safety goggles for every student
- Disposable gloves for handling strong bases or bleach
- Permanent marker and labels
- Optional: commercial pH strips for comparison
Classroom setup tips:
- Pre-pour indicator into small labeled dropper bottles the night before — it saves 10 minutes of class time and keeps spills down.
- Set up workstations with a white sheet of paper underneath each cup so color changes read clearly.
- Prepare a cleaning station (paper towels, a small tub of water) at each table.
- Keep a printed color chart at each station so students can match results in real time.
Pro Tip: For younger students or rooms without a stove, cold extraction works fine. Seal chopped cabbage and water in a zip-lock bag, squeeze and knead for 3–5 minutes, then strain. The color is slightly paler but the pH response is identical.
How do you extract the indicator? Three safe methods
Method A: Hot steep (recommended for most classrooms)
- Chop ½ head of red cabbage into rough 1-inch pieces.
- Place in a heatproof bowl or saucepan and cover with 2 cups of near-boiling water.
- Steep for several minutes, pressing the cabbage down occasionally.
- Let cool for 5 minutes, then strain through cheesecloth or a fine-mesh strainer into a clean jar.
- Discard the solids. The liquid should be a deep blue-purple.
Total active time: about 20 minutes. This method gives a consistent, deeply colored extract that reads colors clearly across the full pH range.
Method B: Short boil (higher yield, faster extraction)
- Combine chopped cabbage and 2 cups of water in a saucepan.
- Bring to a boil, then reduce heat and simmer for 5 minutes.
- Cool, then strain as above.
Safety callout: An adult or teacher should handle the boiling step. Keep students away from the stove during this phase. The RSC Education classroom protocol recommends allowing full cooling before students handle the liquid, typically 5–15 minutes after removing from heat.
Method C: Cold mash in a sealed bag (no heat needed)
- Place ½ cup of finely chopped cabbage into a heavy-duty zip-lock bag.
- Add 1 cup of room-temperature water.
- Seal the bag and knead vigorously for 3–5 minutes.
- Strain through cheesecloth into a cup.
Yield is lighter in color than the hot methods, so use slightly more indicator per test (about 2 teaspoons per cup instead of 1). This is the safest option for elementary classrooms and works well for small-group stations.
How to test household solutions with your indicator
A clean, repeatable protocol matters here. Sloppy technique produces muddy colors that are hard to interpret.
Prepare your controls first:
- Label three cups: “Distilled Water,” “Vinegar,” and “Baking Soda Solution.”
- Add 2 tablespoons of each liquid to its labeled cup.
- Add 1 teaspoon of red cabbage indicator to each control cup and stir gently.
- Record the colors. These become your reference points for neutral, acid, and base.
Testing protocol for unknowns:
- Pour 2 tablespoons of the test liquid into a clean, labeled cup.
- Add a small amount of indicator using a fresh dropper for each sample.
- Stir with a clean stir stick. Wait a short moment before reading the color.
- Hold the cup over a white sheet of paper to aid color observation and record it.
- Rinse the dropper between samples or use a new one to avoid cross-contamination.
Data table template:
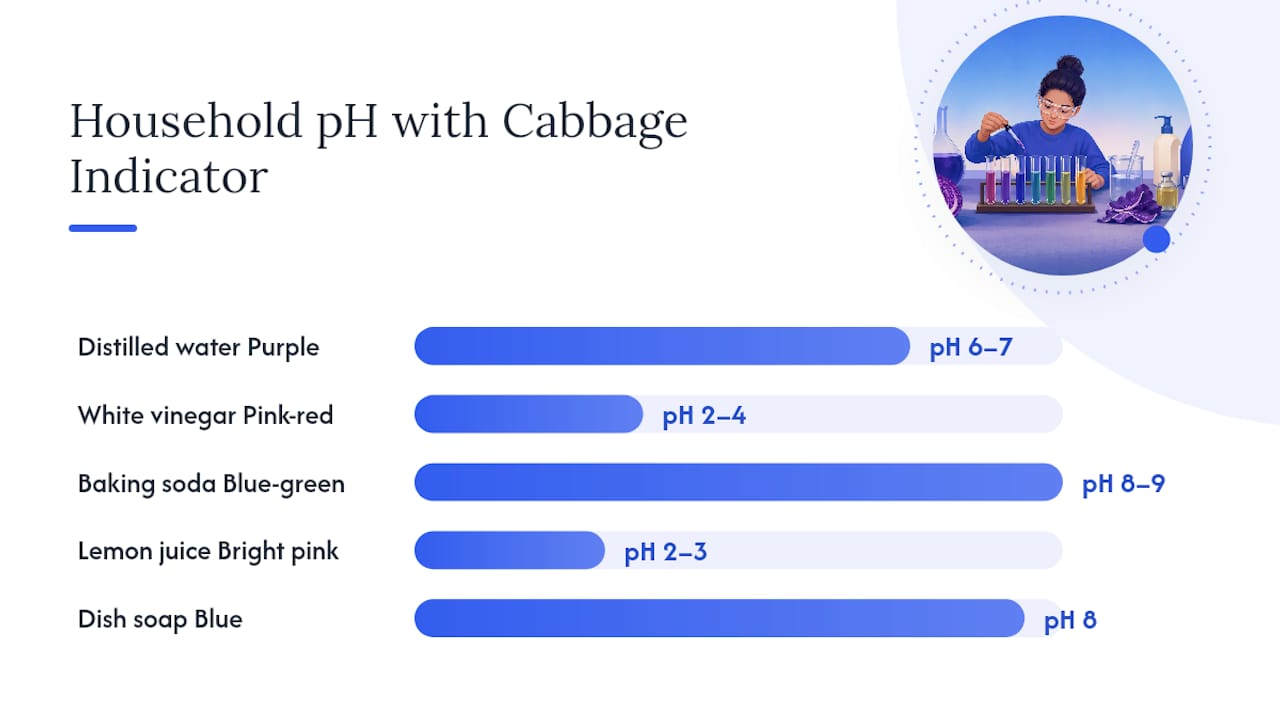
| Sample | Color Observed | Estimated pH Range | Acid / Neutral / Base |
|---|---|---|---|
| Distilled water | Purple | 6–7 | Neutral |
| White vinegar | Pink-red | 2–4 | Acid |
| Baking soda solution | Blue-green | 8–9 | Base |
| Lemon juice | Bright pink | 2–3 | Acid |
| Dish soap | Blue | 8 | Weak base |
Dilution guidance: Never test undiluted bleach or concentrated drain cleaner directly. Dilute bleach to at least 1 part bleach in 10 parts water before testing, and only with adult supervision. Skip any unlabeled or unknown chemical entirely. Scientific American’s cabbage chemistry guide recommends sticking to common household items like vinegar, lemon juice, baking soda, and mild soap for safe classroom demonstrations.
What does each color mean? A pH color guide
The table below maps observed colors to approximate pH ranges. Treat these as estimates, not precise readings.
| Color | Approximate pH | Example Substance |
|---|---|---|
| Bright red / hot pink | 1–3 | Lemon juice, stomach acid |
| Pink | 3–5 | Vinegar, cola |
| Purple | 6–7 | Distilled water, milk |
| Blue-purple | 7–8 | Tap water, baking soda (weak) |
| Blue-green | 8–10 | Baking soda solution, soap |
| Green | 10–11 | Ammonia-based cleaner |
| Yellow-green | 12–13 | Bleach (diluted), lye solution |
A few interpretation notes worth sharing with students:
- Hue matters more than intensity. A pale pink and a deep pink both signal an acid; the shade of pink tells you roughly how strong.
- Concentration of the indicator itself affects the reading. Too little indicator in a cup produces a faint color that’s hard to classify; too much can mask subtle differences. Stick to the 1-teaspoon-per-2-tablespoons ratio.
- Bleach and strong bases can decolorize the indicator entirely, producing a clear or very pale yellow. That’s still a result — it means strongly basic, pH 12+.
Carolina Knowledge’s color-to-pH chart provides a reliable classroom reference that educators commonly use alongside homemade extracts.
Why does red cabbage change color with pH?
The pigments responsible are anthocyanins, a family of water-soluble plant compounds found in red cabbage, blueberries, and purple grapes. Red cabbage is particularly rich in them, which is why it produces such a vivid range of colors.
Here’s the chemistry in plain terms:
- Anthocyanin molecules carry a central ring structure that absorbs light. The exact wavelength absorbed depends on how many hydrogen ions (H⁺) are attached to the molecule.
- In acidic solutions, extra H⁺ ions attach to the molecule (protonation), shifting absorption toward the blue end of the spectrum and making the solution appear red or pink.
- In neutral solutions, the molecule sits in a middle form and absorbs in the middle of the visible spectrum, producing the characteristic purple-blue color.
- In basic solutions, H⁺ ions are pulled away (deprotonation), shifting absorption further and producing blue, then green, then yellow as the solution becomes increasingly alkaline.
These transitions are reversible. Add acid to a green solution and it turns pink again. That reversibility is what makes the experiment so satisfying to watch. As Compound Interest explains, anthocyanins undergo multiple distinct structural transitions across the pH scale, which is why you see a full rainbow rather than a single color flip.
Compare that to phenolphthalein, a common lab indicator that flips from colorless to pink at one specific pH point. Cabbage juice shows you the whole scale. That’s exactly why it’s more useful for teaching the concept of pH as a continuous range.
Safety rules and classroom logistics
PPE and supervision:
- Safety goggles are mandatory for all students during extraction and testing.
- Gloves are required when handling diluted bleach, ammonia cleaners, or any strong base.
- An adult must handle boiling water and hot liquids. Students should only work with cooled indicator.
- Younger students (grades 3–5) should use the cold-mash method exclusively.
Substances to avoid:
- Do not test concentrated acids (muriatic acid, battery acid) or undiluted drain cleaners.
- Never mix bleach with vinegar or ammonia-based cleaners, even for testing purposes.
- Skip any substance that is unlabeled, expired, or stored in an unmarked container.
Spill response:
- Cabbage juice stains fabric and some plastics. Cover surfaces with newspaper or plastic sheeting.
- For acid spills, neutralize with a small sprinkle of baking soda before wiping.
- For base spills, blot with a damp cloth and rinse with water.
Disposal:
- Diluted test solutions (vinegar, baking soda, soap) can go down the drain with plenty of water.
- Bleach solutions, even diluted, should be further diluted and disposed of per your school’s chemical disposal policy.
- Used cabbage indicator is organic and safe to pour down the drain.
Time management: A 50-minute class period works well if the indicator is pre-made. Allow 5 minutes for setup, 20 minutes for testing, 15 minutes for data recording and discussion, and 10 minutes for cleanup.
How long does homemade indicator last?
Not long. Homemade anthocyanin extract is an organic liquid, and it degrades quickly. Per RSC Education’s guidance, refrigeration in a sealed, sanitized container keeps it effective for a few days at most.
Signs it’s gone bad:
- Cloudiness or visible particles (microbial growth)
- Off or fermented smell
- Color has shifted from purple to brownish or grayish
- Weak or no color change when tested against vinegar
Storage options:
- Refrigerator (2–3 days): Store in a clean, airtight glass jar. Label with the date. Works for a lab planned within the same week.
- Freezer (up to 2–3 weeks): Pour into ice cube trays, freeze, then transfer to a sealed bag. Thaw one cube per lab session. Color response remains good.
- Paper strips (longest shelf life): Dip coffee filter strips into fresh indicator, let dry completely, and store in a sealed bag away from light. These last several weeks and are easy to distribute to students.
Paper strips are worth the extra prep time for teachers who run this lab multiple times per semester.
Why do results sometimes look wrong, and how do you fix them?
Faded or washed-out colors usually mean too little indicator was added or the extract was too dilute. Fix: use a higher ratio of cabbage to water during extraction, or add a second teaspoon of indicator to the test cup.
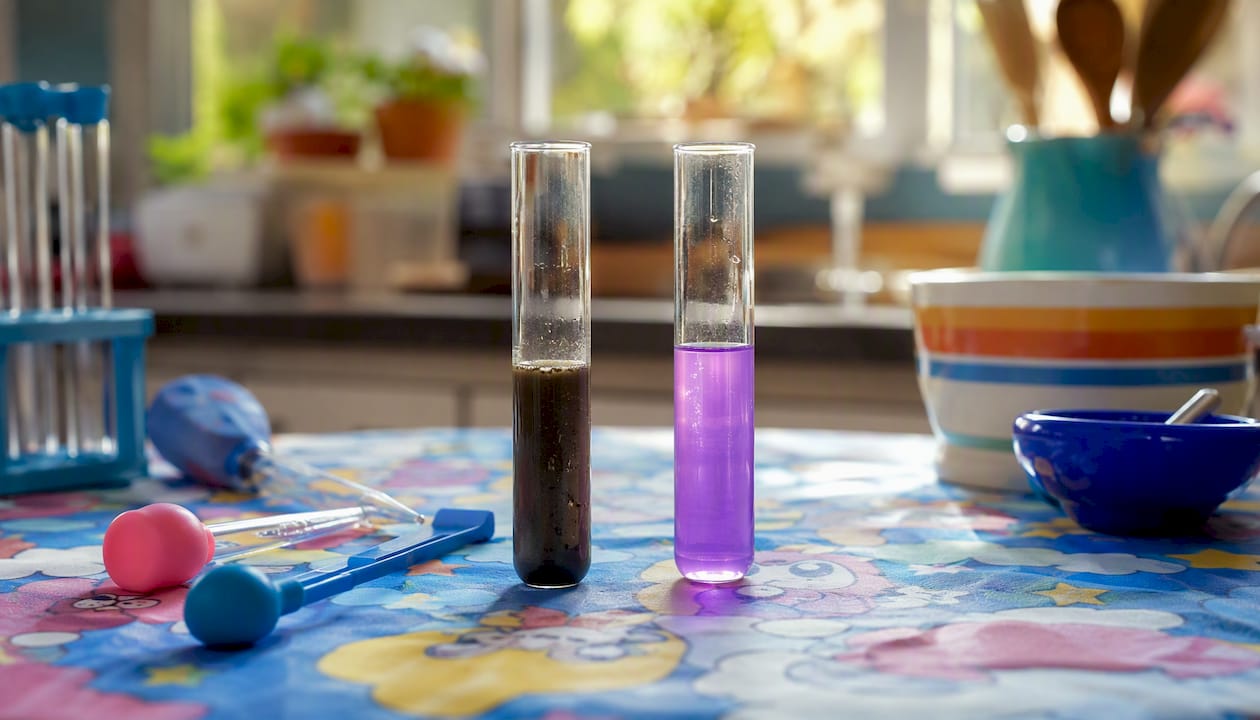
Muddy gray or brown results often signal contamination. A dirty cup, a shared dropper, or a test solution that already contains dye can all muddy the color. Fix: use fresh cups and dedicated droppers for each sample.
Unexpected hues (orange where you expected pink, for example) can result from temperature. Warm indicator reads slightly differently than cold. Fix: let all solutions reach room temperature before testing and use the same indicator batch throughout.
Calibration tip: Before running unknowns, test your three controls (distilled water, vinegar, baking soda solution) and compare them to the color chart. If your “neutral” control reads blue instead of purple, your indicator may be slightly basic from tap water minerals. Switch to distilled water for extraction if precision matters.
The ACS classroom protocol notes that anthocyanin-based indicators are semi-quantitative by nature. Concentration, temperature, and dissolved salts all shift hue and intensity. For precise pH measurement in environmental testing or clinical contexts, use a calibrated pH meter or certified pH strips instead.
Pro Tip: Place a white sheet of paper under every test cup. It eliminates the table color from your reading and makes subtle differences between pH 7 and pH 8 much easier to see.
Can you get more precise results using your smartphone?
Yes, and it turns a simple demo into a genuine data-collection exercise. Research published in PMC demonstrates that anthocyanin-rich extracts can produce semi-quantitative pH readouts when combined with image analysis and a calibration curve.
Here’s a classroom-ready workflow:
- Prepare 4–6 standards using household buffers: lemon juice (~pH 2), vinegar (~pH 3), distilled water (~pH 7), baking soda solution (~pH 9), and diluted ammonia (~pH 11). Add equal amounts of indicator to each.
- Photograph all standards together on a white background under consistent lighting (natural daylight or a single overhead light, no flash).
- Extract RGB or hue values using a free app like Color Grab (Android) or a similar color-picker tool. Record the hue value for each standard.
- Plot hue vs. pH on graph paper or a spreadsheet to build a simple calibration curve.
- Test unknowns using the same lighting, same indicator volume, and same camera settings. Read the hue value and estimate pH from the curve.
Sources of error to discuss with students:
- Camera auto-white-balance adjusts between shots, shifting apparent color.
- Indicator concentration must be identical across all cups.
- Ambient light color (warm bulb vs. daylight) changes hue readings significantly.
- Dissolved solids in tap water can shift baseline color.
This extension pairs well with a discussion of experimental uncertainty and why scientists use multiple measurements. For older students, calculating percent error against a commercial pH strip reading adds a quantitative layer that maps directly to data-analysis skills.
Are there other plant-based indicators, and why is red cabbage usually the best choice?
Several plants produce pH-sensitive pigments, but they’re not all equally useful in the classroom:
- Hibiscus flowers: Anthocyanin-based, similar to red cabbage. Produces a vivid red-to-green range. Works well but is less consistent in color intensity than cabbage, and dried hibiscus can vary by source.
- Turmeric: Contains curcumin, not anthocyanin. Changes from yellow to red-brown in strong bases only. Useful for demonstrating a single endpoint but gives no information across the acid range.
- Beetroot: Contains betalains, not anthocyanins. The color barely changes with pH, which makes it a poor indicator. Students sometimes assume any red plant juice will work, so beetroot is a useful negative control. BBC Hands On’s acid cabbage activity notes that not all red or purple plant juices are interchangeable, and betalain-based pigments like beetroot often lack the reversible pH-dependent transitions that anthocyanins provide.
- Grape skins / blueberries: Anthocyanin-based and functional, but yield is lower per gram of plant material, and the color range is slightly narrower than red cabbage.
Red cabbage wins on three counts: it’s cheap and available year-round at any grocery store, its anthocyanins extract easily in water with no special equipment, and it shows the widest visible color range across the full pH scale. That last point is the real pedagogical advantage — students see a genuine rainbow, not just two colors.
Pro Tip: To make reusable paper test strips from any anthocyanin source, dip coffee filter strips in fresh extract and dry flat. Store in a sealed bag away from light. Strips made from red cabbage last longer and show clearer color gradations than those made from blueberries or grape skins.
What do students actually learn from this experiment?
The red cabbage lab is one of the few classroom activities that teaches chemistry, data recording, and scientific reasoning in a single 50-minute period. Done well, it maps directly to Next Generation Science Standards (NGSS) performance expectations around evidence-based explanations and cause-and-effect relationships.
Core concepts covered: acids and bases, pH as a continuous scale, pigment chemistry, and the idea that color can encode chemical information. Students also practice controlling variables, recording observations, and drawing conclusions from data rather than from a textbook.
Two lesson formats that work:
(A) Structured inquiry: Students receive a hypothesis (“Vinegar will turn the indicator pink because it is an acid”) and test it. They record results, compare to the color chart, and write a claim-evidence-reasoning statement. This works well for grades 5–7 and keeps the lab manageable.
(B) Open inquiry: Students choose 5–8 household items from a class-supplied list, predict the color change for each, test, and then present their results. The twist: they must explain one result that surprised them. This version works for grades 7–10 and produces genuinely different data sets across groups, which makes the class discussion richer.
Assessment options: a lab worksheet with a color-matching task, a short written claim-evidence-reasoning paragraph, or a 2-minute group presentation where students defend one unexpected result. The color-matching task, where students match their observed colors to the pH chart and assign a classification, is particularly effective because it requires interpretation, not just observation.
Fizz Force pairs perfectly with this chemistry lab
If the red cabbage experiment sparked real curiosity in your students, Fizz Force from Brainiecomics takes that energy further. It’s a chemistry comic book written for kids aged 7–12 that teaches acids, bases, reactions, and more through a fast-moving story and kitchen-safe experiments using everyday household items.

The book’s layout is teacher-friendly: each experiment connects directly to a story chapter, so kids read the concept in context before they test it. The experiments use the same kinds of materials as the red cabbage lab, which means no extra supply ordering. Parents consistently report that kids who read Fizz Force ask to run more experiments at home, which is exactly the kind of carry-over a good classroom activity should produce.
Pick up Fizz Force for your classroom or as a gift for a curious kid who just turned their kitchen counter purple.
Sources
These are the primary references used for the procedures, chemistry explanation, and classroom guidance in this article:
- Red Cabbage Indicator - American Chemical Society
- Cabbage chemistry — Scientific American
- Making a pH indicator using red cabbage | Class experiment | RSC Education
- Paper-Based Colorimetric pH Test Strip Using Bio-Derived Dyes - PMC
- Red cabbage indicator — Compound Interest
- Make your own indicators — Carolina Knowledge