

Measuring in the Kitchen: Tools and Techniques That Work
For repeatable results, weigh dry ingredients in grams and use liquid measuring cups or spoons for small or pourable amounts. That single rule solves most kitchen measuring problems before they start.
Bake a cake and scoop flour with the measuring cup itself, and you can pack in enough extra flour to turn a tender crumb into a dry brick. Weigh that same flour on a scale, and the result matches what the recipe developer actually tested. Measuring 1 teaspoon of vanilla extract, on the other hand, doesn’t need a scale at all. A spoon does the job faster and just as accurately.
- Weigh anything over about a quarter cup, especially flour, sugar, and liquids in bread or brine recipes.
- Use spoons or small cups for vanilla, spices, baking powder, and other small-volume ingredients.
- Trust the meniscus method for anything poured into a liquid cup.
Pro Tip: NIST recommends measuring by mass whenever precision matters, because grams don’t shift with how firmly you pack a cup. Brainiecomics builds that same weigh-first habit into its kitchen experiments, so kids learn accurate technique before they ever touch a Bunsen burner substitute.
Key Takeaways
Accurate measuring in the kitchen depends on matching the tool to the ingredient: a scale for precision, cups and spoons for small or liquid amounts.
| Point | Details |
|---|---|
| Weigh dry ingredients over a quarter cup | Grams remove the variability that comes from scooping or packing a measuring cup. |
| Read liquids at the meniscus | Set the cup down, bend to eye level, and read the bottom of the curve, not the top. |
| Spoon and level, don’t scoop | Scooping flour or sugar directly from the bag compacts it and adds extra weight. |
| Match spoons to small amounts | Most home scales lose accuracy under 3 to 5 grams, so spoons beat scales for tiny quantities. |
| Practice with real experiments | Brainie Comics’ Fizz Force ties precise kitchen measuring to hands-on chemistry activities for kids ages 7 to 12. |
Table of Contents
- Measuring in the Kitchen: Which Tools You Actually Need
- How to Measure Liquids Without Guessing
- Measuring Dry and Packable Ingredients Correctly
- Handling Sticky and Tiny Measurements
- Cup, Spoon, and Gram Conversions Worth Memorizing
- Fixing the Measuring Mistakes That Wreck Recipes
- Why Accurate Measuring Makes Kitchen Science Click for Kids
- Practice Real Measuring With Kitchen Science Kids Love
- Sources
Measuring in the Kitchen: Which Tools You Actually Need
You don’t need a drawer full of gadgets to measure well. You need the right five tools, used the right way, every time.
A digital kitchen scale is the one upgrade that changes everything. It has a tare function that zeroes out the weight of your bowl, so you can add ingredients one after another without doing subtraction in your head. Grams beat cups for consistency because a cup of flour can vary by 20 or more grams depending on how it’s scooped, while a scale reads the same regardless of technique. The catch: most scales lose accuracy below 3 to 5 grams, so don’t rely on one for a pinch of baking soda.
Liquid measuring cups should be clear, marked, and have a pour spout. Buy the smallest one that comfortably holds what you’re measuring. A 1-cup liquid measure for 2 tablespoons of oil forces you to squint at a nearly empty vessel, and that’s how errors creep in.
Dry measuring cups are a completely different shape by design. They’re filled to the brim and leveled off flat, which only works because there’s no liquid to slosh over the edge. Using a liquid cup for flour, or a dry cup for milk, is one of the most common measuring mistakes home cooks make.
Measuring spoons cover the small end of both categories, dry and liquid alike.
Adjustable plunger cups exist for one job: sticky, semisolid ingredients like peanut butter or shortening that refuse to release cleanly from a standard cup.
- Scale: best for flour, sugar, and anything over a quarter cup.
- Liquid cup: best for water, milk, oil, and other pourable ingredients.
- Dry cup: best for flour, rice, and granulated ingredients, filled and leveled.
- Spoons: best for small quantities of either type.
- Plunger cup: best for nut butters, shortening, and mashed bananas.
How to Measure Liquids Without Guessing
Set the liquid measuring cup on a flat counter, not in your hand. Holding a cup while pouring almost guarantees it tilts, which throws off the reading before you even check it.
- Pour the liquid until it looks close to your target line.
- Bend down, or lift the cup, until your eye is level with the marking on the side.
- Read the bottom of the curve the liquid forms, called the meniscus, not the top edge where it climbs the glass.
That third step trips up more cooks than any other. Water and most kitchen liquids curve slightly where they meet glass or plastic, and reading from above makes the amount look higher than it really is. Health Canada’s guidance on this is blunt: skip the eye-level check and your measurement runs short, every time.
Pick the smallest cup that fits the job. A 2-cup measure for a quarter cup of buttermilk gives you almost no margin to read accurately. Switch to measuring spoons for anything under a quarter cup. They’re built for it, and the smaller opening makes the meniscus far easier to judge.
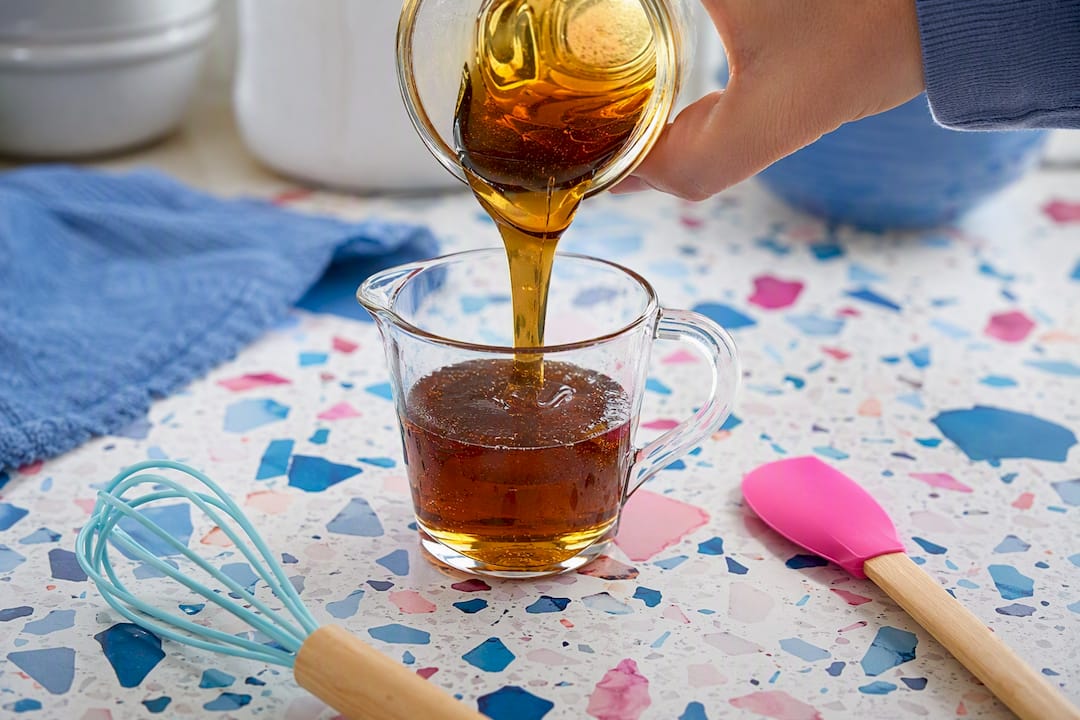
Thick, viscous liquids like honey, molasses, and maple syrup behave differently. They cling to the sides of a cup and pour slowly, which can leave you guessing whether you’ve hit the line. Rinse the cup with warm water first so the liquid releases cleanly, then pour slowly and pause to check the level rather than eyeballing it mid-stream. An adjustable plunger cup sidesteps the problem entirely by pushing the exact amount out in one motion.
Measuring Dry and Packable Ingredients Correctly
Flour is where most home bakers lose control of a recipe without realizing it. The fix is the spoon-and-level method: fluff the flour first, spoon it loosely into the measuring cup, then drag a flat edge like a butter knife across the top to remove the excess. Scooping the cup directly into the bag compacts the flour and can add a meaningful amount of extra weight, which is exactly why Health Canada and extension programs like Kansas State’s both teach spooning over scooping as standard technique.
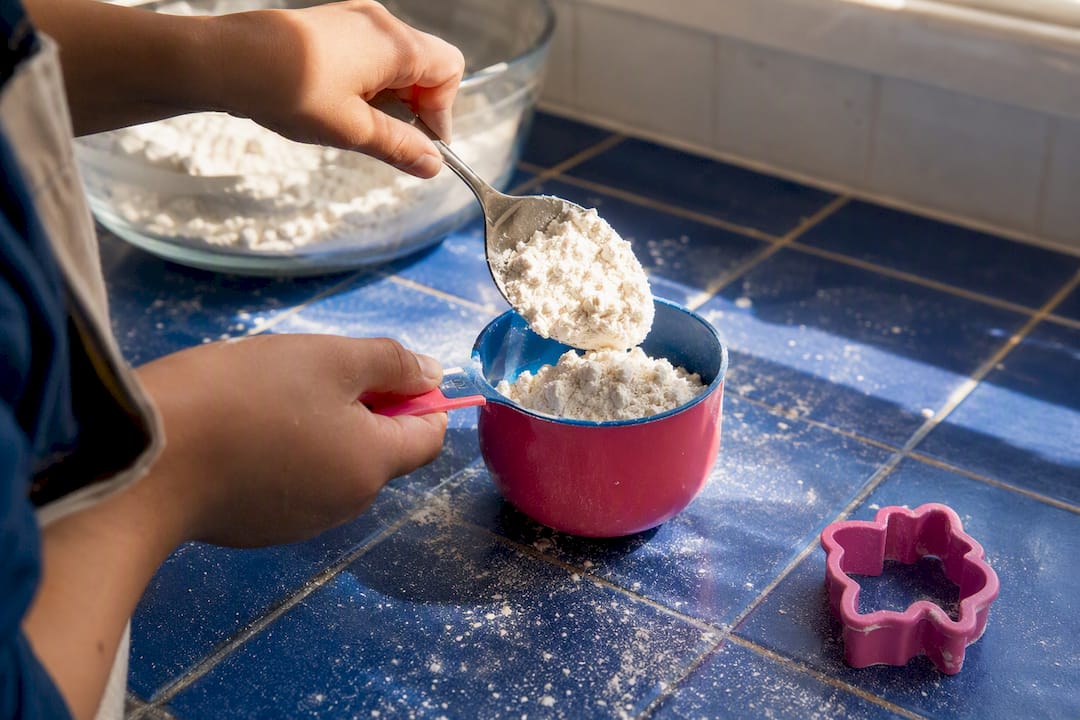
Weighing matters even more once a recipe crosses roughly a quarter cup of a dry ingredient, and it’s close to essential for bread dough, brines, and any baking recipe where hydration ratios drive the final texture. NIST’s culinary measurement guidance makes the case plainly: mass removes the guesswork that volume measures introduce.
Brown sugar behaves like nothing else in the pantry. It should be packed firmly into the cup until it holds the cup’s shape when turned out, the opposite instruction from flour. Solid fats like shortening or coconut oil in solid form follow the same packing logic, pressed in to eliminate air pockets.
Salt deserves its own warning. Kosher salt brands vary enough in crystal size and weight that a teaspoon of one brand can weigh noticeably different from a teaspoon of another. In brines, curing, and precision baking, weighing salt in grams is the only way to avoid getting the whole recipe wrong.
- Cookies: volume measuring is usually forgiving enough.
- Cakes, bread, and pastry: weigh flour and sugar for consistent results.
- Brines and cured foods: weigh salt, never eyeball it.
Handling Sticky and Tiny Measurements
Honey, molasses, nut butter, and shortening share one annoying trait: they stick to whatever you measure them with, and what clings to the spoon is volume you’re not actually using in the recipe.
The fix is almost embarrassingly simple. A light coat of nonstick cooking spray on the measuring spoon or cup before adding a sticky ingredient lets it slide out cleanly, which cuts waste and cuts the cleanup that follows. Adjustable plunger cups solve the same problem from the design side, pushing the measured amount out rather than asking you to scrape it free.
Temperature changes the equation too. Cold peanut butter or refrigerated coconut oil grips a spoon far more stubbornly than the same ingredient at room temperature, so let sticky fats warm up before measuring whenever a recipe allows it.
For genuinely tiny amounts, don’t reach for the scale at all. Most consumer kitchen scales lose reliable accuracy under about 3 to 5 grams, which is roughly the weight of a teaspoon of baking powder or a pinch of salt. A measuring spoon or a set of pinch spoons will outperform a scale at that scale, no pun intended.
Pro Tip: Keep a dedicated “sticky” spoon and cup sprayed and ready near your honey and nut butter jars. It sounds minor, but it saves several minutes of scraping every time you bake.
Cup, Spoon, and Gram Conversions Worth Memorizing
A handful of conversions cover almost every recipe you’ll encounter:
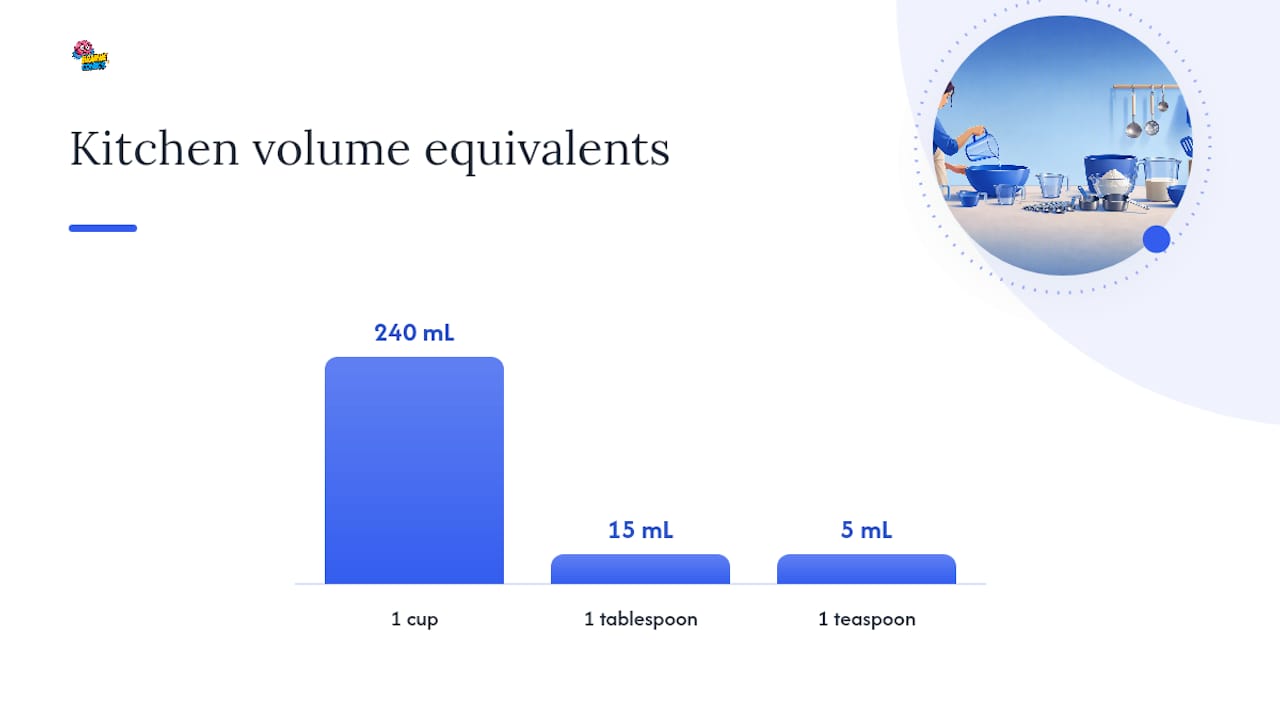
- 3 teaspoons = 1 tablespoon
- 16 tablespoons = 1 cup
- 1 cup = 236 milliliters (rounded to 240 mL for most recipes)
- 1 tablespoon = about 15 milliliters
- 1 teaspoon = about 5 milliliters
Gram equivalents get trickier because density varies by ingredient, not just volume. A cup of flour and a cup of sugar don’t weigh the same, and neither weighs the same as a cup of butter.
Treat these as reliable starting points, not absolutes. Flour especially can shift with humidity and how it’s scooped, which is the whole argument for weighing it in the first place. When a recipe gives both cups and grams, default to grams for baking and stick with the cup measurement for liquids, where volume is the more natural unit anyway.
Fixing the Measuring Mistakes That Wreck Recipes
Order of operations quietly ruins more recipes than bad technique does. Measure a cup of walnuts whole, then chop them, and you get a different amount of walnut than if you chop first and then measure a cup of the pieces. Chopped nuts pack more densely into a measuring cup, and that gap can run around 20% by weight depending on how finely they’re cut. If a recipe says “1 cup chopped walnuts,” measure after chopping, since that’s almost always what the recipe developer meant.
- Read the recipe’s exact wording (before/after chopping, packed/loose) rather than assuming.
- Check your cup type matches your ingredient type: liquid cups for liquids, dry cups for dry goods.
- Reread the meniscus from eye level, not from above, every single time.
- Weigh salt and flour in recipes where the ratio actually matters.
When something still goes wrong mid-recipe, don’t panic and start over. Dough too dry? Add liquid a tablespoon at a time. Dish too salty? Add unsalted stock, a squeeze of acid, or a starchy component to dilute rather than dumping in more of everything else. Write down what you changed so the next attempt starts from a known point instead of another guess.
Getting comfortable with a scale changes how a kitchen runs day to day. Fewer measuring cups means fewer dishes, and weighing directly into the mixing bowl with the tare button zeroed out saves real time on every single recipe.
Pro Tip: Tare your scale after every ingredient, not just at the start. Add flour, hit tare, add sugar, hit tare again. It keeps a running total of zero and makes multi-ingredient recipes almost foolproof.
Why Accurate Measuring Makes Kitchen Science Click for Kids
A vinegar-and-baking-soda eruption either fizzes dramatically or fizzles quietly, and the difference usually comes down to whether the amounts were actually measured or just eyeballed. Predictable measuring is what turns a kitchen experiment into a real lesson about ratios and reactions, rather than a one-off surprise a kid can’t repeat… Get the measuring right, and the science becomes something a child can explain, not just watch.
Practice Real Measuring With Kitchen Science Kids Love
Reading about measuring technique only goes so far. Kids retain it when they’re the ones holding the spoon.

That’s the idea behind Fizz Force, Brainie Comics’ chemistry comic for readers ages 7 to 12. Every chapter pairs a comic-book adventure with a kitchen-safe experiment that runs on exact measurements: a teaspoon of this, a tablespoon of that, read correctly and leveled correctly, or the reaction just doesn’t work the way the story promises. Gravity Gang does the same for physics concepts, using everyday materials instead of chemical reactions. Neither book asks for special equipment. A set of measuring spoons and a kitchen scale, the same tools covered in this guide, are enough.
Parents looking for a screen-free way to reinforce the exact skills covered above can start with the Fizz Force comic book, or browse the full catalog at Brainiecomics to see which title fits their reader.
Sources
- Canada
- Metric Kitchen: Culinary Measurement Tips | NIST
- How To Measure Ingredients Correctly - Preppy Kitchen