

Light and Shadows: A Beginner's Guide to Seeing in 3D
Light is energy that travels in straight lines until something stops it. A shadow is the area where an object blocks that light from reaching a surface. That’s the whole definition. The practical part, the piece that actually changes your drawings and photos, is this: the size of your light source and its distance from the subject control how sharp or soft a shadow’s edge looks, and how large that shadow grows.
A small, distant light (direct sun on a clear day) throws hard, crisp shadows. A large, close light (a lamp with a paper shade right next to your subject) throws soft, spread-out shadows with fuzzy edges. Learn to read that relationship and you can predict, before you even pick up a pencil or a camera, exactly how a scene will look.
Here’s the roadmap for getting there:
- The basic physics of how light travels and gets blocked
- The vocabulary of shadow regions (umbra, penumbra, antumbra)
- How light wraps around three-dimensional forms
- Color and value shifts inside shadows
- Hands-on drawing and photography exercises
- Simple experiments you can run with kids using stuff from a kitchen drawer
Key Takeaways
Understanding light and shadows comes down to one core mechanism: a shadow forms wherever an opaque object blocks straight-traveling light, and the size and sharpness of that shadow depend entirely on how large and how close the light source is.
| Point | Details |
|---|---|
| Source size controls edge softness | Small, distant lights create hard shadow edges; large, close lights create soft, gradual ones. |
| Learn the three shadow zones | Umbra is fully dark, penumbra is a gradient, antumbra appears when the source outshines the blocker. |
| Separate form shadow from cast shadow | Core shadow describes the object’s own surface; cast shadow shows where it touches the ground. |
| Preserve value relationships first | Correct relative darkness matters more than perfect color when rendering a convincing form. |
| Practice with one light source | A single, angled light source makes the terminator and core shadow easiest to read and learn from. |
Table of Contents
- The Science of Light and Shadows: How They Actually Form
- Umbra, Penumbra, and Antumbra: The Language of Shadow Edges
- Rendering Volume: How Light Wraps Around 3D Forms
- Why Shadows Aren’t Just Gray: Color and Value Shifts
- How to Practice Light and Shadow: A Step-by-Step Drawing Routine
- Using Exposure and Contrast to Control Shadows in Photography
- Fun Light and Shadow Experiments You Can Try at Home
- How Brainie Comics Turns Light and Shadow into Story-Driven Science
- What Beginners Get Wrong About Light and Shadow
- Sources
The Science of Light and Shadows: How They Actually Form
Light moves in straight lines unless something bends or blocks it. That single fact explains almost everything you need to know about how light and shadows form. When those straight-line rays hit an object they can’t pass through, the rays stop, and the space behind the object where light can’t reach becomes a shadow. No blocked light, no shadow. It sounds obvious, but most beginners skip past this and jump straight to “shading,” which is really just guessing without understanding the mechanism.
Objects fall into three categories that determine what happens next:
- Opaque objects (a brick, a hand, a coffee mug) block light completely and cast a well-defined shadow.
- Translucent objects (frosted glass, a lampshade, tracing paper) let some light through but scatter it, producing a soft, hazy, low-contrast shadow.
- Transparent objects (clear glass, clean water) let most light pass through with minimal scattering, so the shadow is faint or nearly invisible, though you’ll often see refraction effects like light bending through a glass of water.
Distance changes everything, too. Move a lamp close to an object and its shadow stretches long and gets blurrier at the edges. Pull that same lamp far away and the shadow shrinks and sharpens. This isn’t a design choice, it’s geometry: rays from a nearby source spread out at a wider angle as they pass the object, smearing the shadow’s edge across a bigger area on the ground or wall. Rays from a distant source arrive almost parallel, so the edge stays crisp.
The size of the source matters just as much as the distance. A pinpoint bulb and a wide window act completely differently even at the same distance, because a wide source sends light at the object from many angles simultaneously, softening every edge it touches. This is the exact principle photographers exploit when they bounce a flash off a white ceiling instead of firing it directly at a face: bouncing effectively turns a small, harsh point source into a large, soft one.
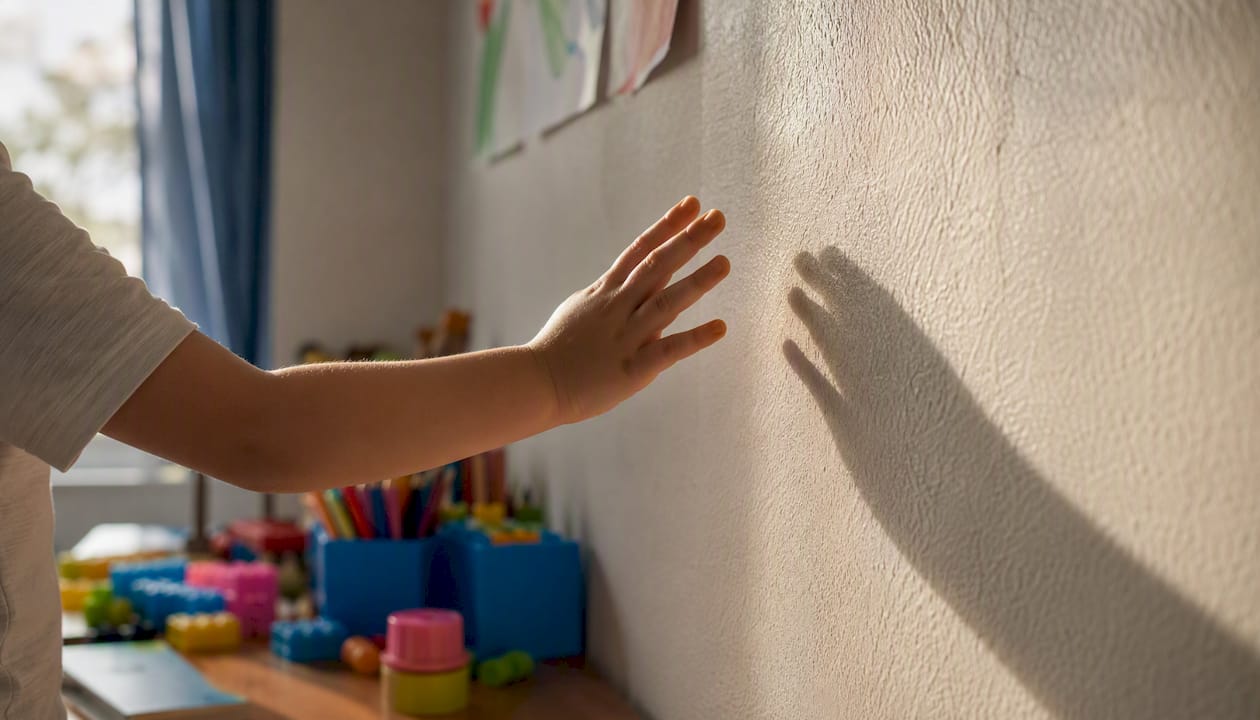
Try this the next time you’re near a window: hold your hand a few inches from a wall on a sunny afternoon, then slowly pull it away. Watch the shadow’s edge go from sharp to soft as the distance increases. That’s the entire lesson of this section, demonstrated in about four seconds.
Umbra, Penumbra, and Antumbra: The Language of Shadow Edges
Every shadow cast by a real-world light source (not a mathematical point) actually contains multiple regions, and knowing their names changes how precisely you can talk about, draw, and photograph shadows. Shadow terminology from optics breaks a cast shadow into three zones:
- Umbra: the fully blocked region where none of the light source is visible. This is the darkest part of any shadow.
- Penumbra: the partially blocked region where only part of the light source is visible. Brightness here fades gradually, which is why penumbras look soft and gray rather than solid black.
- Antumbra: the region beyond the umbra’s tip where the light source appears larger than the blocking object, so light wraps around it on all sides. You’ve seen this during an annular solar eclipse, when the moon looks like a dark disc surrounded by a bright ring instead of blacking out the sun entirely.
Extended light sources are what create penumbras in the first place. A single point of light produces only a hard-edged umbra with no soft transition zone. But almost no real light source is a true point. The sun has an actual disk-shaped diameter, a window has physical width, a lightbulb’s filament takes up space, and each of those creates rays from slightly different angles, blurring the shadow’s boundary into a gradient instead of a line.
Point sources give you sharp umbras with almost no penumbra; large or close sources spread that transition zone wider, which is exactly why studio photographers use big diffusers when they want gentle, flattering shadows on a face.
Things get more interesting once you introduce a second light source. Overlap two shadows from different lights and you get a darker region where both shadows fall, plus lighter partial-shadow zones where only one light is blocked. Photographers and cinematographers sometimes call the resulting patchwork a “shadow blister,” a cluster of overlapping dark and half-dark shapes that can look messy if it’s accidental but genuinely striking if it’s controlled, like the layered shadows cast by blinds combined with a desk lamp. If you’re ever confused by a photo with weird double shadows, that’s almost always two light sources fighting for the same space.
Rendering Volume: How Light Wraps Around 3D Forms
This is where light and shadow knowledge turns into actual drawing skill. Every believable rendering of a three-dimensional object, whether it’s a sphere in a still life or a face in a portrait, relies on the same six components showing up in the same relationship to each other.
- Light side: the surface facing the light source, receiving the most direct illumination.
- Highlight: the brightest point on the object, usually where the surface angle reflects the light source most directly back at the viewer’s eye.
- Terminator: the line or gradient where light meets shadow on the object’s own surface. This is not a hard black line in most cases; it’s a transition zone, and how you handle its softness or hardness determines whether a form reads as smooth (a sphere) or angular (a cube).
- Core shadow: the darkest band on the object itself, typically sitting just past the terminator, before reflected light starts brightening things up again.
- Reflected light: light bouncing off nearby surfaces back into the shadow side of the object, which is why the darkest part of a sphere is almost never its bottom edge, it’s usually a band in the middle of the shadow, with a slightly lighter strip below it from ground bounce.
- Cast shadow: the shadow the object throws onto another surface, distinct from the form shadow that lives on the object’s own body.
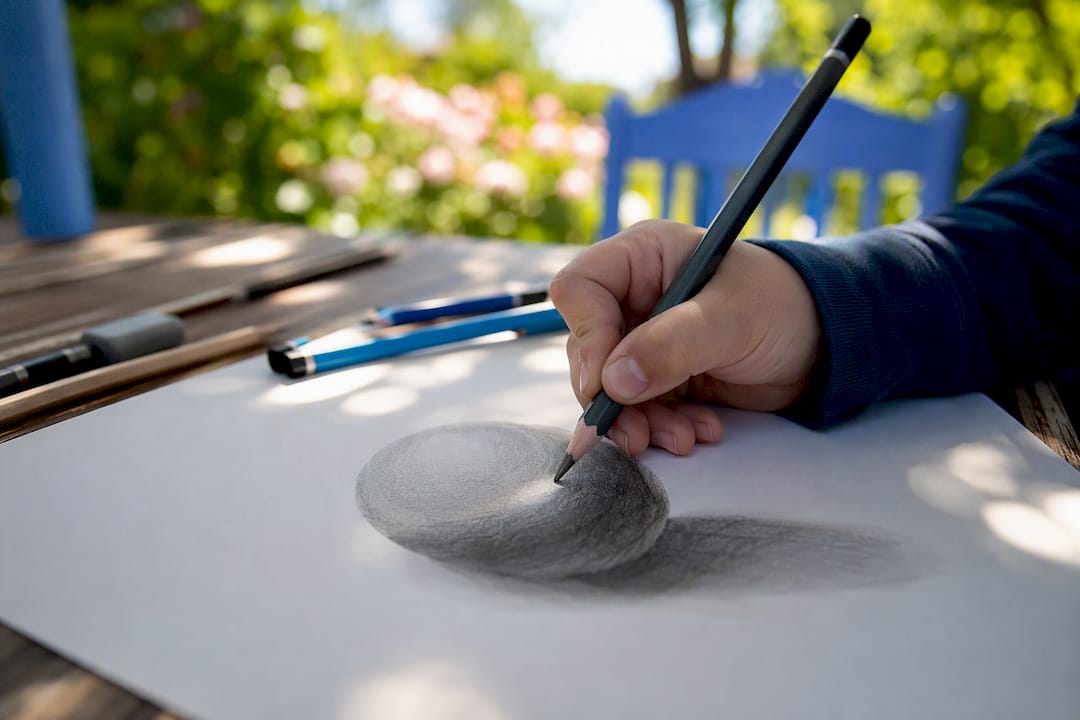
Beginners frequently confuse core shadow and cast shadow, and that mix-up is probably the single biggest reason early drawings look flat. The core shadow lives ON the object and describes its shape. The cast shadow is thrown BY the object onto something else, like a table or the ground, and describes the object’s relationship to that surface and to the light’s direction. You need both, rendered distinctly, for a drawing to convince the eye that it’s looking at a solid form sitting in real space rather than a flat sticker.
The terminator deserves special attention because it’s the single most diagnostic edge in any drawing. On a smooth, curved surface like a sphere or a cheek, the terminator should be soft, a gradual gray transition with no visible line. On a sharp-edged surface like a cube or a jawline, the terminator can be a hard, almost graphic edge. Mixing these up, putting a hard line on a sphere or a soft gradient on a cube, is why some renderings look subtly “off” even when a beginner can’t articulate why.
Pro Tip: Squint at your reference photo or subject until the details blur away. Squinting simplifies everything into just a few value shapes, light side, core shadow, and cast shadow, which makes the terminator’s exact path and the shadow’s true darkness much easier to see and copy accurately.
Reflected light is the detail that separates convincing shading from muddy shading. Because it comes from bounced ambient light rather than the main source, it’s always dimmer than the light side of the object, never as bright, or the form reads as if it has two light sources instead of one. Keep reflected light subtle and slightly warmer or cooler than the core shadow depending on what surface it’s bouncing off, and your shadows will suddenly have depth instead of just looking like flat gray patches.
Why Shadows Aren’t Just Gray: Color and Value Shifts
Flat, muddy-gray shadows are probably the most common beginner mistake in both painting and photo editing, and the fix starts with understanding why shadows shift color in the first place. Shadows often read as cooler and less saturated than lit areas because they’re illuminated by ambient and reflected light rather than the direct, usually warmer, main source. Outdoors, this shows up constantly: sunlight is warm (yellowish), but the open sky illuminating everything in shadow is cool (bluish), so shadows on snow, skin, and pavement often pick up a distinct blue or violet cast that beginners instinctively want to paint as plain gray.
Getting the values right matters more than getting the colors perfect. If you preserve correct relative darkness (the core shadow reads darker than the midtone, which reads darker than the highlight) a drawing will hold together even with imperfect color choices. Get the values wrong, even with beautiful color, and the form collapses into a flat, confusing mess. This is why so many drawing instructors have students work in grayscale before ever touching color: value is the actual load-bearing structure, and color is decoration on top of it.
- Shadows under direct sun often shift cooler because ambient sky light fills them in.
- Shadows lit only by reflected surfaces often pick up that surface’s color (a shadow on a red tablecloth tints slightly red).
- Digital cameras can misread shadow color entirely if white balance is set for the wrong light source, turning neutral shadows sickly green or orange.
A quick fix that works across mediums: painters can glaze a thin, cool, semi-transparent layer over a shadow that’s reading too warm or too flat, photographers can correct with a custom white balance reading taken from a gray card in the shadow itself, and anyone shooting digitally can bounce a small reflector or fill flash into deep shadows to lift detail without flattening the contrast entirely.
How to Practice Light and Shadow: A Step-by-Step Drawing Routine
Understanding the theory doesn’t automatically translate into skill. Skill comes from repetition with feedback, and the exercise below is one of the fastest ways to build an intuitive feel for light and shadow.
Materials: a single light source (a desk lamp works fine), a simple object (a ball, an egg, or a coffee mug), plain paper, and a pencil with a soft eraser.
- Set up one light source only. Turn off all other lights in the room, or move away from windows. Multiple light sources at this stage will confuse the exercise, since you’ll get competing shadows and no clean terminator to study.
- Position the light at an angle, roughly 45 degrees to the side and slightly above your object. Straight-on lighting kills all shadow information, and light from directly behind or below creates unnatural, hard-to-read results.
- Squint and identify the five value zones: highlight, light side, terminator, core shadow, reflected light. Say them out loud if it helps; naming the zone makes it easier to spot where its edges actually fall.
- Block in the darkest shapes first (the core shadow and cast shadow) before touching any midtones. This is called “shape blocking,” and it prevents the common mistake of rendering everything as gradual, mushy gray with no real dark anchor.
- Add the cast shadow last, and pay attention to how it changes shape and length depending on the surface it falls across and the object’s contact point with the ground. A cast shadow that doesn’t touch the object at its base makes the object look like it’s floating.
- Step back and compare your drawing to the actual setup from a few feet away. Distance reveals value mistakes that are invisible up close.
Once you can do this reliably with a single light source, the cast shadow itself becomes a powerful compositional tool, not just an accuracy detail. A long shadow stretching across a page can lead the viewer’s eye toward or away from the subject, and a hard, correctly anchored ground shadow is often the single detail that convinces a viewer an object is actually resting on a surface rather than pasted onto it.
Pro Tip: If a drawing looks “off” and you can’t figure out why, check the cast shadow’s contact point first. Nine times out of ten, a floating or disconnected object traces back to a cast shadow that doesn’t touch the form at the correct spot.
For a quick plausibility test once you finish: does the terminator direction stay consistent across every surface in the piece? All terminators should point roughly the same way, because in a single-light scene, every shadow obeys the same light direction. Inconsistent terminator angles are the fastest way to spot an amateur rendering, and the fastest fix once you know to look for it.
Using Exposure and Contrast to Control Shadows in Photography
Photography gives you technical tools that drawing doesn’t, mainly a histogram and a set of physical light modifiers, and learning to read both turns shadow control from guesswork into a repeatable skill.
The histogram is a graph on your camera or phone showing how many pixels sit at each brightness level, from pure black on the left to pure white on the right. If you want to preserve shadow detail (visible texture in the dark areas rather than pure black voids) you’re watching to make sure the left edge of that histogram doesn’t slam all the way against the wall, which signals clipped, unrecoverable black. If you’re deliberately going for a silhouette or a dramatic, moody shot, you actually want some of that data pushed toward black, exposing for the bright background and letting your subject fall into shadow entirely.
- Hard light (direct sun, a bare bulb, an on-camera flash) produces short, crisp shadow edges and high contrast, good for dramatic or graphic images.
- Soft light (overcast sky, a softbox, light bounced off a wall) produces long, gradual shadow transitions and lower contrast, better for flattering portraits.
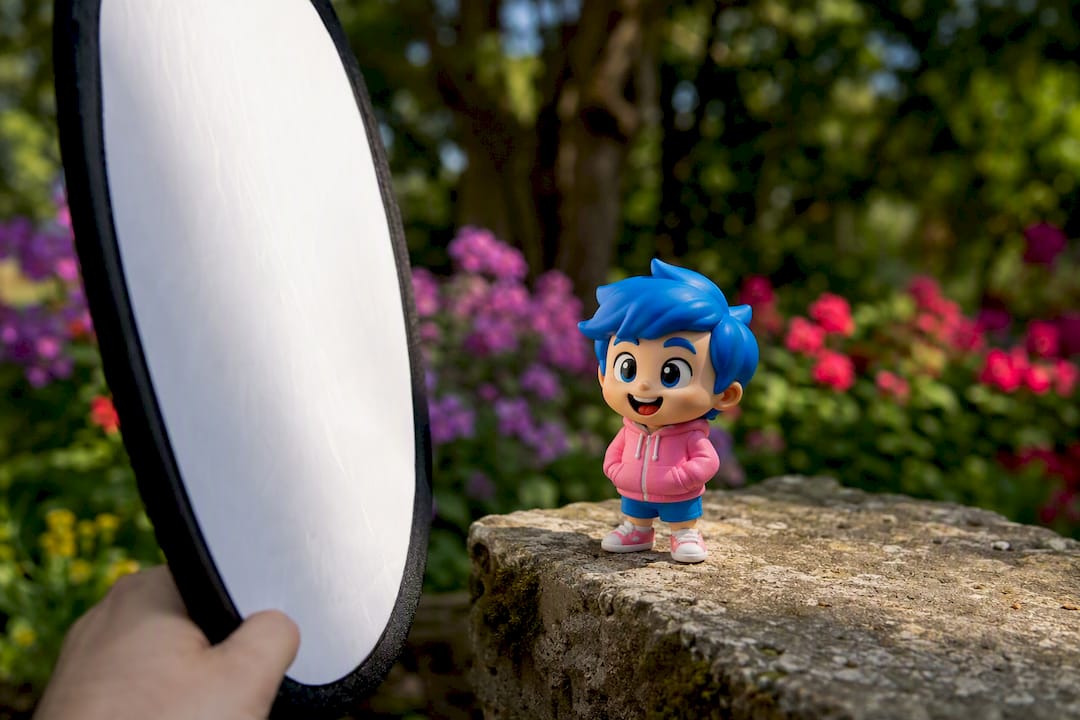
- A reflector bounces existing light back into shadow areas to lift detail without adding a whole new light source.
- A flag (any solid, opaque panel) blocks light selectively, letting you deepen a shadow exactly where you want it darker.
- Simply moving your subject relative to a window or repositioning your own shooting angle often changes shadow behavior more than any gear purchase would.
Pro Tip: Before adjusting a single camera setting, just walk your subject a few feet in either direction relative to the light source. Repositioning is free, instant, and usually solves a bad shadow faster than fiddling with exposure compensation.
Fun Light and Shadow Experiments You Can Try at Home
These three activities take minutes to set up and teach the exact same principles covered above through direct observation instead of reading, which is genuinely how most kids (and plenty of adults) learn this material best.
- Shadow puppet play. Grab a flashlight, a blank wall, and your hands or a few cutout cardboard shapes. Dim the room, hold objects between the flashlight and the wall, and experiment with distance and angle. Watch what happens to the shadow’s size and edge sharpness as you move the object closer to the light versus closer to the wall. This kind of open-ended hands-on light experimentation builds an intuitive “light vocabulary” that sticks far better than a diagram ever could.
- The shrinking and stretching shadow. Set an object on a table under one lamp. Measure its shadow’s length with a ruler or string. Now move the lamp progressively closer, then farther, remeasuring each time. You’ll see directly, not just read about, the distance law from earlier in this guide.
- Backyard sundial. Push a straight stick into the ground on a sunny morning and trace the tip of its shadow with a small rock or chalk mark every hour. By afternoon you’ll have a rough sundial and a firsthand record of how the sun’s changing angle reshapes shadow length and direction throughout the day.
How Brainie Comics Turns Light and Shadow into Story-Driven Science
Reading about occlusion and reflected light only gets a kid so far. Brainie Comics builds its books around the idea that a gripping story is what makes a child actually want to run the experiment, not just look at a diagram of one.
- Gravity Gang weaves core physics concepts, including how light behaves and interacts with objects, into an adventure narrative paired with kitchen-safe experiments using household items.
- Parents and educators can pair the book’s built-in activities directly with the shadow puppet and sundial exercises above for a deeper, layered lesson.
- Each book includes quizzes and a completion certificate, giving kids a clear sense of progress alongside the fun.
- Expect the biggest payoff in observation skills and reading engagement, exactly the areas parents most often report improvement in.
What Beginners Get Wrong About Light and Shadow
The conventional advice on this subject tends to treat shadow as an afterthought, something you add at the end to “finish” a drawing or darken in post-processing. That’s backward. Shadow placement and edge quality are the information; everything else is decoration on top of a correctly built value structure.
The most overlooked idea in this whole subject is that shadow edges are diagnostic. A hard edge tells you the source is small or far away. A soft edge tells you it’s large or close. Most beginners treat edge softness as a stylistic choice instead of a physical consequence, and that’s exactly why so many drawings and photos feel inconsistent, one shadow reads as if it’s under harsh noon sun while another in the same piece reads as an overcast afternoon.
If you take one thing from this guide, prioritize the single light source exercise before anything else. Complexity comes fast enough on its own. Master how one light behaves first, and every other lighting scenario becomes a variation you can reason through instead of guess at.
Sources
For deeper science background, the BBC Bitesize explainer on light and shadows covers the fundamentals clearly for younger learners, while Wikipedia’s shadow entry breaks down umbra, penumbra, and antumbra in more technical detail. For hands-on projects, the Exploratorium’s Light Play page and PBS Parents’ shadow activities are excellent starting points. Readers curious about cutting-edge applications should look at Cornell’s shadow art research, which shows how computational tools now generate art directly from an object’s cast shadow.
- Light and shadows – KS2 Science curriculum
- Light Play | Exploratorium
- Shadow — Wikipedia
- Light and shadows | PBS Parents